Engine Wiring

Tiny
JOEF1985
  • MEMBER
  • 28 POSTS
Good Evening,

I tried your link yesterday and did not work. I actually got bored earlier and decided what the hell. If I have a fire the boat fire extinguisher was near. I did some deductive reason and figured the jumper should be hooked to the field 2 post and brown to the other.

After hooking it up I tested and with engine off I had 12.5 to 12.7 after multiple attempts so that is good.

While running it was only putting out like 13.3 to 13.7.

After driving around for sometime (approx 30 mins around the neighborhood) I stopped and turned off the engine to check the battery to see if I was draining and it still was maintaining at 12.5.

Should I be concerned about the low output with the alternator but what is weird is that I took the alternator off like a week ago to have it checked at O'reillys and they showed it within spec.

I appreciate your input on the plug. I looked today at all the stores for a Ford style knowing it was a ford alternator. All I came up with was the G, style.

Have you had any luck finding barb fuel fittings for the fuel pump. I had to buy a metal brake line cut a 2 1/2 inch section then got 1 ft 1/2 of rubber fuel line hose to fix where the old metal lines ferrell was leaking at the top of the fuel pump. It is not the prettiest work but it works and no leaks!

Also you said you know some great places to get some part. Where might those be? I know as of right know I need.

-fuel gauge not working (could be something in the tank or gauge)
-Volt meter gauge not working.
-Need the boots for shifters, steering column through firewall, Cluch pedal boot through firewall.
-I feel like the clutch linkage is a little sloppy where it connects to the mount on the transmission.
-may need new seats (will depend if I can get the slides and tilts to break free.) I did get the passenger side to lift but not slide forward so there is still hope with lots of lubricant!
-Also been trying to find a good top that has the removable windows (not a tiger top). If you know a good place to find a hardtop, I would love to hear that. I have been reading on converting a CJ7 to fit the CJ5 but have not decided to pull the trigger. Also found a really cool one where a guy used heavy foam and shaped it then fiberglass mat and resined it to make a hard top.

I also did find a small crack on the bottom of the bell housing maybe 1 1/2 inch long. It is on the flat where the engine bolt to the transmission. I am not to concerned seeing that area does not have fluid storage only covers shields the clutch and such.

Well I am sure the parts list will grow.

Thank you
Joe
Was this
answer
helpful?
Yes
No
Sunday, August 9th, 2015 AT 6:57 PM
Tiny
CJ MEDEVAC
  • MECHANIC
  • 11,004 POSTS
I WILL START LOOKING FOR YOUR TOMORROW

IN THE MEAN TIME

INSPECT YOUR CLUTCH LINKAGES FOR WALLERED OUT HOLES AND THE RODS BEING "SAWED INTO" BY THE HOLES

EVENTUALLY, ONE OR THE OTHER WILL FAIL

USUALLY WHEN YOU ARE SITTING AT A STOP LIGHT 5 FEET BETWEEN YOU AND THE FELLER UP FRONT. YOU WILL HAVE THE PEDAL PUSHED IN AND EITHER A HOLE OR ROD WILL FAIL OR ONE OF THE ENDS OF THE BELL CRANK WILL GIVE WAY!

IMMEDIATELY, THE PEDAL WILL HIT THE FLOOR AND THE CLUTCH WILL ENGAGE

EITHER YOU WILL STALL FROM THE CLUTCH DUMPING OR YOU WILL SMACK THE GUY IN FRONT OF YOU!

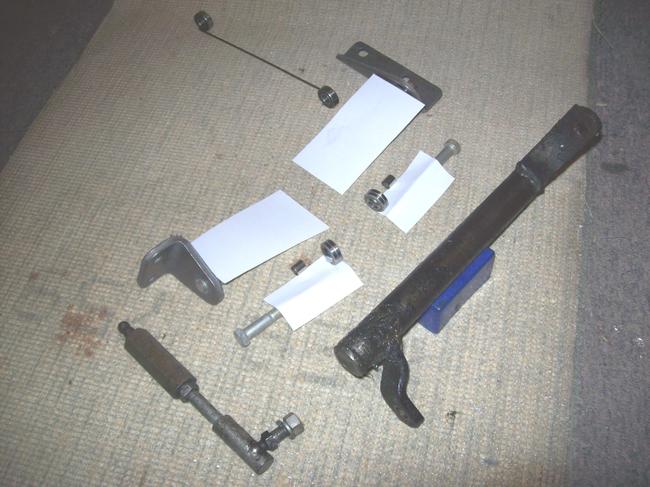
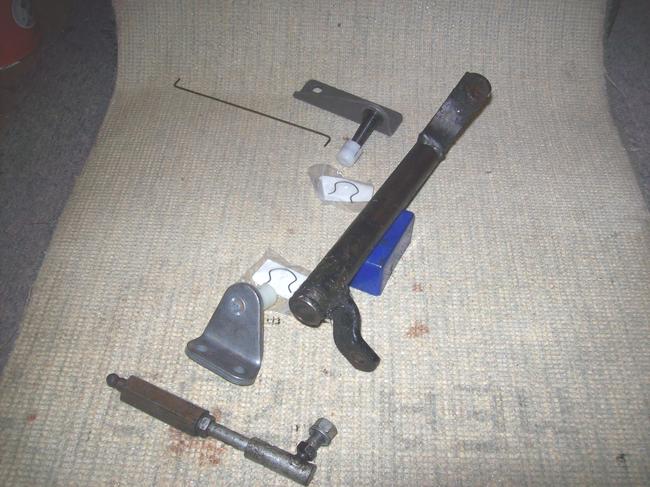
PIC 1) HERE'S PICS OF MOST OF THE OEM PARTS, THE ROD BETWEEN THE PEDAL AND BELL CRANK IS NOT SHOWN (SORTA SIMULATED ON A SMALL SCALE WITH A PIECE OF CLOTHES HANGER WIRE)

I DID A TIME CONSUMING MODIFICATION TO MINE BY CUTTING OFF AND DRILLING STUFF, MAKING "DOUGHNUTS" W/ HOLE SAWS, WELDING THEM IN PLACE AND INSTALLED BEARING ASSEMBLIES. (A BIT MORE INVOLVED THAN I WROTE)

5 YEARS TO THE DAY, I TOOK THE WHOLE THING APART, THERE WAS NO WEAR, EXCEPT THE ZINC WAS RUBBED OFF OF THE BOLT SHOULDERS THAT MY "SPHERICAL PLANE BEARINGS" PIVOTED ON (NOW TAKING THE PLACE OF THE BELL CRANK SIDE PIVOTS.

PIC 2) DEPICTS WHAT I CHOPPED OFF (PAPER COVERING THE UN-NEEDED STUFF)

LAST PIC) I REMOVED THE PEDAL AND GAVE IT A DOUGHNUT TOO!

I KNOW YOU WON'T DO THAT MOD ANY TIME SOON, INSURE YOUR PARTS ARE "GOOD" OR REPLACE THE BAD STUFF

NEXT POST I WILL SHOW YOU PROPER ADJUSTMENT OF WHAT YOU HAVE

DON'T RESPOND JUST YET!

THE MEDIC
Was this
answer
helpful?
Yes
No
Sunday, August 9th, 2015 AT 8:42 PM
Tiny
CJ MEDEVAC
  • MECHANIC
  • 11,004 POSTS
WE WANT MR. CLUTCH PEDAL TIGHT AT THE TOP END

HOWEVER WE WANT 1 INCH OF FREE PLAY AT THE TOP BEFORE IT STARTS DOWNWARD BEGINNING TO LIFT THE PRESSURE PLATE (OR CLUTCH COVER)

WHY AT THE TOP? ("I LIKE IT CLOSE TO THE FLOOR"- WAHH WAHH!)

A) YOU NEED A "FULL" PUSH LIFTING THE PRESSURE PLATE HIGH SO IT WILL SHIFT EZily

B) AS YOU HOLD THE CLUTCH PEDAL IN, YOUR FOOT/ LEG FATIGUE, IF YOU ARE ADJUSTED CLOSE TO THE FLOOR, YOUR LEG "GIVES WAY", YOU ARE NOW ENGAGED!

AT THE TOP, YOU HAVE LOTS OF TRAVEL BEFORE THE CLUTCH BEGINS TO ENGAGE

C) THE FACTORY MANUAL SAYS TO TO IT THE WAY I'M TELLING YOU!

TO ADJUST THIS TO THE CORRECT HEIGHT

INSURE YOUR PARTS ARE NOT WORN OUT, THEY WILL CHEAT YOU OUT OF YOUR ALREADY LIMITED AMOUNT OF ADJUSTMENT SCREW (THE ADJUSTER WILL FALL APART WHEN IT RUNS OUT OF THREADS) (YOU ALSO DON'T WANNA BE AT THE "VERGE" OF IT FALLING INTO

THIS IS REAL EZ

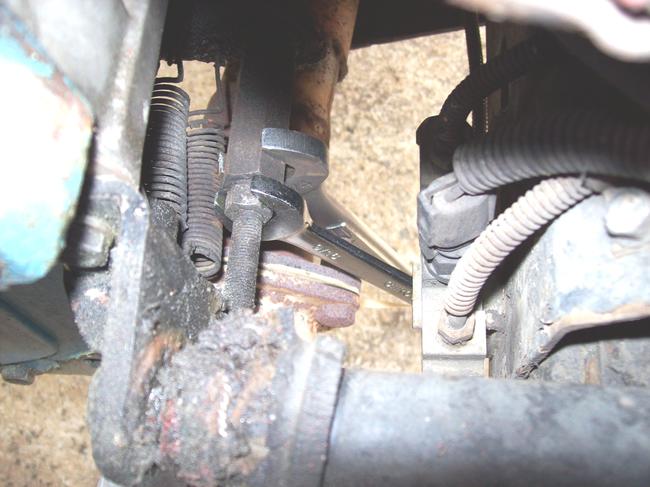
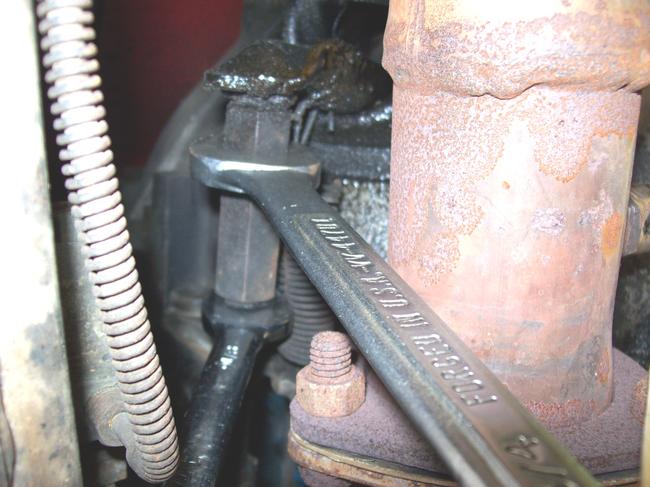
YOU WILL NEED A 3/4 AND A 9/16 WRENCH (BACK HOLD WITH THE WRENCHES WHEN YOU BREAK THE NUT LOOSE - DO NOT FORCE THE "ROD WITH A BALL END" TO BURDEN THE FORCE/ IT WILL BREAK!

SIMPLY BREAK THE 3/8 JAM NUT LOOSE, SPIN IT OUT OF THE WAY

TURN THE 3/4 ADJUSTER (BY HAND OR WRENCH) TO MAKE THE ROD LONGER (OR SHORTER)

YOU MIGHT FLICK THE CLUTCH ARM TO SEE HOW MUCH SLOP IS LEFT

WHEN IT GETS TO WHERE SORTA NOT MUCH SLACK LEFT

CHECK THE PEDAL FOR THE INCH OF FREE PLAY

ADJUST AS NEEDED

RUN THE JAM NUT BACK AGAINST THE ADJUSTER TIGHT (BOTH WRENCHES) SO IT CANNOT BACK IN OR OUT

YOU ARE DONE/ STICK YOU WITH A FORK!

NOW, YOU KNOW WHAT "ONE INCH" OF FREE PLAY FEELS LIKE WITH YOUR FOOT, OVER TIME IT WILL GROW AND GROW. (YOU MAY NOT NOTICE IT) BUT IF YOU MEASURE IT, YOU WILL FIND THAT MOST LIKELY YOUR PARTS ARE SLOWLY SAWING THRU EACH OTHER. TIME TO REPLACE THE WORN OUT STUFF!

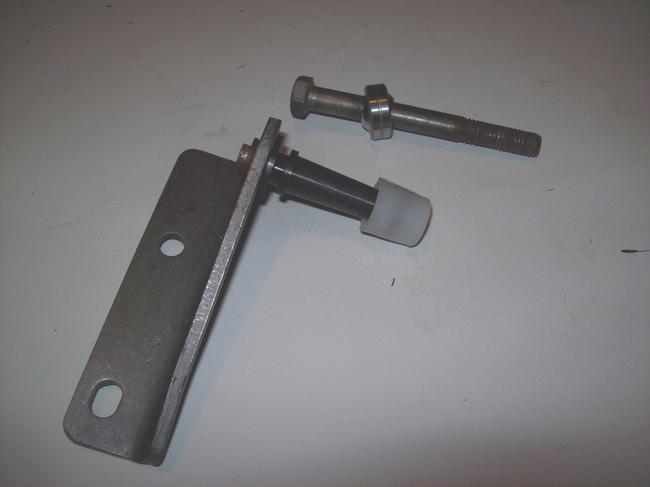
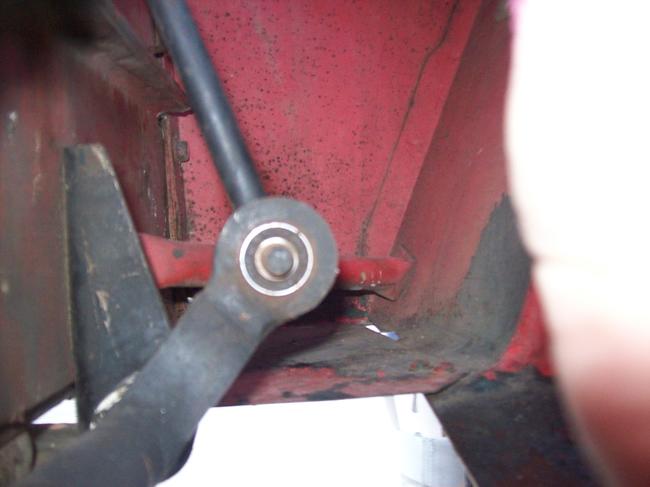
PICS 1-3) PEDAL HEIGHT ADJUSTMENT

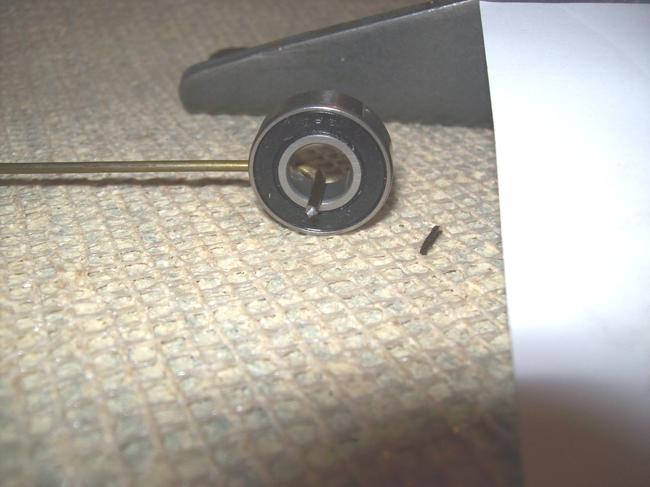
LAST PIC PIC IS THE CONTINUATION OF MY LAST "BEARING-ED OUT LINKAGE ASSEMBLY"
THIS SHOWS ONE OF THE ROLLER BEARINGS IN PLACE, THE BIG WASHER AND PIN (IN THE OTHER PICS ABOVE) KEEP IT FROM WORKING IT'S WAY OUT

OK

MIDNIGHT 30

BED TIME

SEE YA TOMORROW!

THE MEDIC
Was this
answer
helpful?
Yes
No
Sunday, August 9th, 2015 AT 9:23 PM
Tiny
CJ MEDEVAC
  • MECHANIC
  • 11,004 POSTS
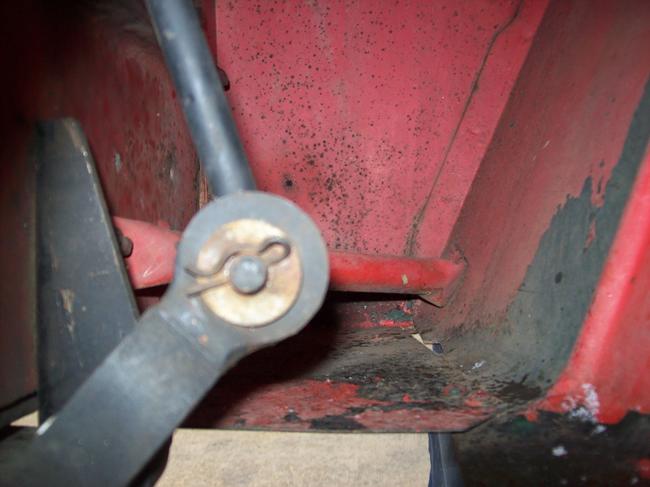
ONE PIC GOT LOST

THIS IS DONE FROM UNDER THE JEEP

THE MEDIC
Was this
answer
helpful?
Yes
No
Sunday, August 9th, 2015 AT 9:28 PM
Tiny
CJ MEDEVAC
  • MECHANIC
  • 11,004 POSTS
UNABLE TO DO ANY SEARCHING FOR YOU THIS EVENING

WIFE HAD TO DELIVER STUFF FROM WORK TO ANOTHER STORE 70 MILES AWAY

I GOT ELECTED TO GO TOO!

I HAD TO COACH HER ON HOW TO MANEUVER HER VEHICLE THE WHOLE TIME

SHE ASKED WHY I ALWAYS HAD TO $% &# ABOUT HER DRIVING CONSTANTLY?

I TOLD HER THAT WHEN SHE ACTUALLY STARTED DRIVING, I WOULD SAY NOTHING!

I TRY AGAIN TOMORROW!

THE MEDIC
Was this
answer
helpful?
Yes
No
Monday, August 10th, 2015 AT 7:41 PM
Tiny
CJ MEDEVAC
  • MECHANIC
  • 11,004 POSTS
THE ALTERNATOR LOOKS TO BE ALRIGHT, I WOULD NOT WORRY ABOUT IT, REPLACE THE GAUGE IF YOU LIKE

I'M OFF TO LOOK FOR SOME OF YOUR PARTS!

THE MEDIC
Was this
answer
helpful?
Yes
No
Tuesday, August 11th, 2015 AT 3:45 PM
Tiny
JOEF1985
  • MEMBER
  • 28 POSTS
Hey that is funny. It sounds like we had similar days. I was teaching the misses to drive a straight drive.

Apparently that ending with her saying the same thing about me! Go figure when you tell someone they are doing it wrong because they are riding the clutch and you have to be fluid like water because you are an extension of a vehicle. I find that to be solid advice!

Needless to say despite hard feelings and maybe not having a house to sleep in tonight. My drill like techniques had her starting off with minimal stalling considering! All in all I would say a win.

I guess another chapter in the jeep project!

We was actually just outside sanding the front and just sprayed rust converter on the front of the frame.

Thank you
Joe Franz
Was this
answer
helpful?
Yes
No
Tuesday, August 11th, 2015 AT 3:57 PM
Tiny
JOEF1985
  • MEMBER
  • 28 POSTS
We were just outside working on sanding the front and spraying rust converter.

Also on another high note we got some brand new rubber shoes on the old jeep.

A brand new set of 31 10.50 r 15 Hankook Dyanpro ATM.

I believe as of right now the misses family has got.

-Oil Pressure gauge.
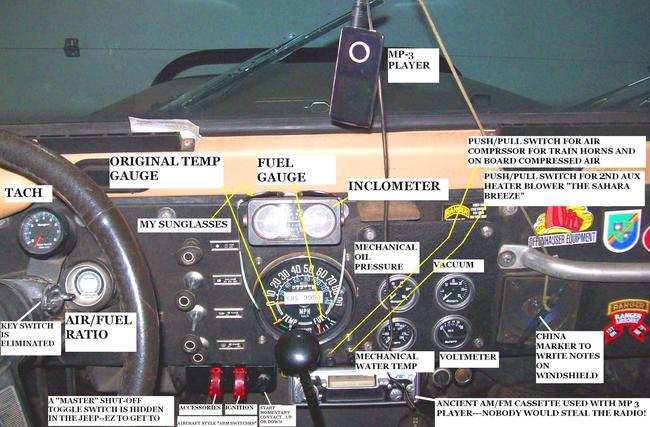
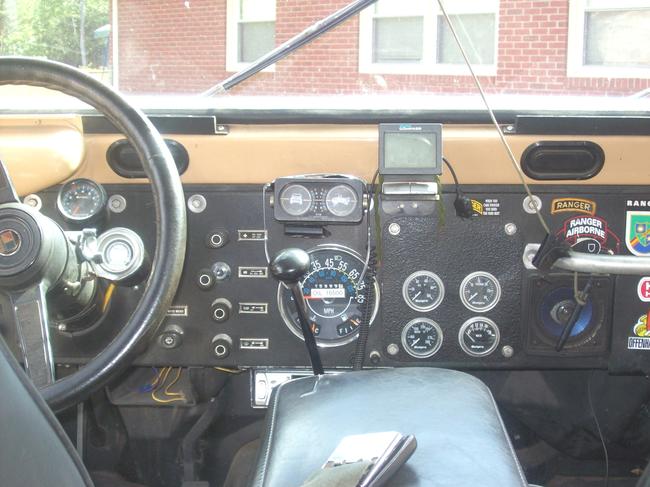
-Temperature gauge with a light. ( Not sure how this is going to work because the current temperature gauge is clustered with the speedometer/fuel (which I believe speedometer is incorrect as well and know the fuel gauge does not work).

Dont know cross the issue when we they get here on Thursday morning,

If you need any pictures of the parts I am talking about let me know. I will take pictures tomorrow of what I was talking about with the clutch.

Thank you for all your time in helping me see this through.
Joe
Was this
answer
helpful?
Yes
No
Tuesday, August 11th, 2015 AT 4:12 PM
Tiny
CJ MEDEVAC
  • MECHANIC
  • 11,004 POSTS
4 LOW, IT'S A TOUGH REALLY GEARED DOWN SPEED, IT IS HARD TO BOG IT DOWN

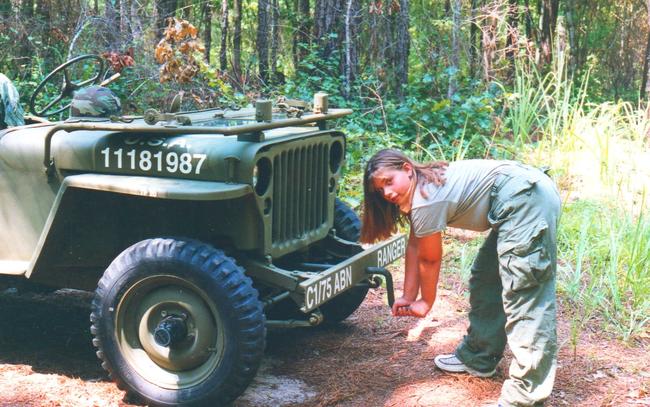
I TAUGHT MY DAUGHTER HOW TO DRIVE "WILLY", STARTING WHEN SHE WAS 7 YEARS OLD, SHE WAS 100% PROFICIENT AT AGE 10, THIS INCLUDED BASIC TROUBLESHOOTING, HAND CRANKING, CHANGING THE OIL (DOING OTHER MAINTENANCE PROCEDURES)

SHE LEARNED IN 4 LOW, THIS SAVED MY STARTER FROM MEGA CRANKINGS FROM DUMPING THE CLUTCH AND KILLING HIM

GETTING PAST "DUMPING THE CLUTCH" AND THE ENGINE DYING IS ALMOST NON-EXISTENT IN 4 LOW, THIS MADE IT EZier AND LESS STRESSFUL ON HER TILL SHE MASTERED EASING THE CLUTCH OUT

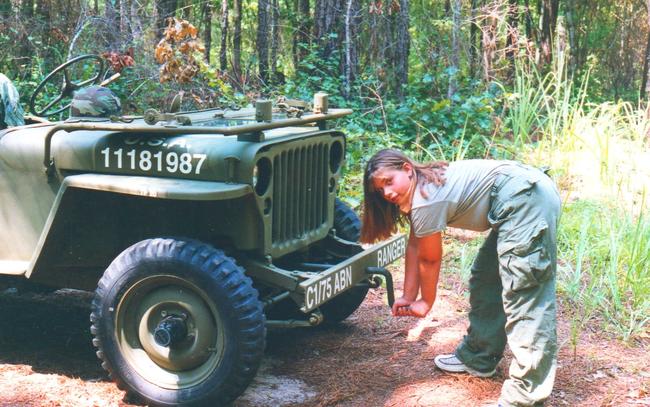
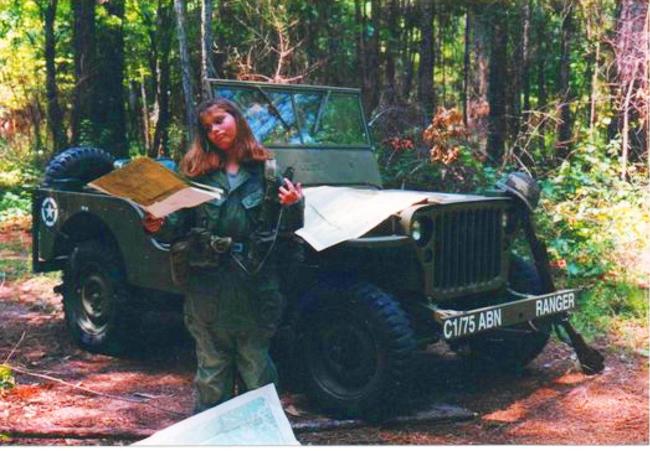
PICS OF HER AT 10 (SHE LIKED THE HAND CRANKING BETTER'N USING THE STARTER SO SHE COULD SHOW OUT)

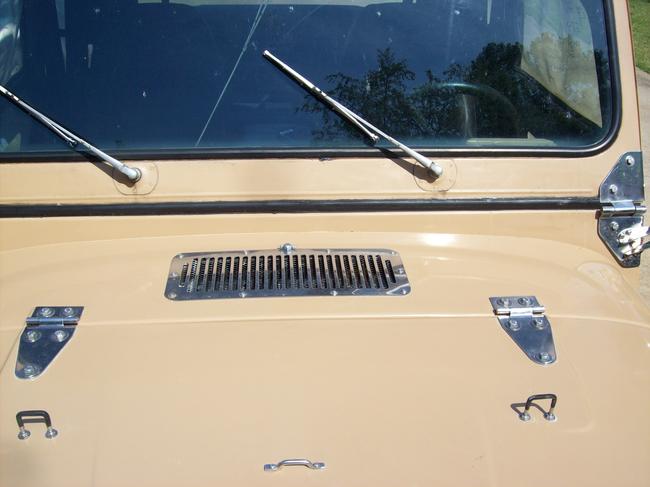
HER BIRTH DATE IS THE HOOD NUMBERS- SHE SAYS WHICH MEANS SHE'S GONNA INHERIT HIM! 'SPECIALLY SINCE SHE "HELPED" RESTORE HIM AT AGES 3 AND 4. SHE IS NOW 27, STILL DRIVES "WILLY" HERE AND THERE

GAUGES, JUST LOOKING FOR YOU A SET

OMIX ADA AND CROWN AUTOMOTIVE ARE THE SAME "REPLACEMENT GAUGES"

THEY ARE CRAP!

YES, I KNOW HOW TO INSTALL 'EM, DONE ORIGINALS 10 OR MORE TIMES!

I ORDERED [2 SETS] AND INSTALLED ONE SET(SUPPOSED TO DO "SETS") FUEL AND TEMP GAUGE FROM A JEEP CATALOG [OMIX]. THIS WAS A FLOP, SO INSTALLED THE OTHER SET, BOTH FUEL NEEDLES CONSTANTLY FLUCTUATED MAYBE A 25% SWEEP AND DID THIS FROM DIFFERENT SPOTS, DEPENDING ON THE AMOUNT OF FUEL I HAD. I SENT THEM BACK. I WAS GIVEN 2 MORE SETS. SAME DEAL, SWEEPING NEEDLE.

I WAS PIZZED, SO I GOT A SET FROM CROWN, SAME SCREWED UP DEAL. APPEAR TO BE THE SAME EXACT ANIMAL.

FOUND ANOTHER BUSTED UP CLUSTER IN MY STUFF, REMOVED THE "STEWART WARNER" GAUGES, PAINTED THE FADED NEEDLES, INSTALLED, ALL WAS PERFECT!

ANOTHER FELLER ORDERED THE WHOLE CLUSTER (OMIX ADA) IT WORKS FINE IN HIS JEEP.

SO I WAS PRESENTLY LOOKING FOR THE BEST DEAL FOR THE WHOLE CLUSTER OR "REAL GAUGES" FOR YOURS, WHEN I SAW YOUR RESPONSE

WHAT IS THE TOP SPEED ON YOUR ORIGINAL CLUSTER?

THE MEDIC
Was this
answer
helpful?
Yes
No
Tuesday, August 11th, 2015 AT 4:55 PM
Tiny
JOEF1985
  • MEMBER
  • 28 POSTS
Top speed is 90 on the gauges we have.

Hey thanks for the idea about the 4 low. I didnt think about that. You may have saved our relationship lol. She is doing better but still a few hard starts and stalls. I think some maybe from the carb needing to be adjusted which presented itself today. I noticed after driving six miles to get the tires and getting it nice and warm it started to backfire and stall when fuel wasnt applied if I slowed down out of gear. So tomorrow I am going to tune the carb if I get time.

Thank you
Joe
Was this
answer
helpful?
Yes
No
Tuesday, August 11th, 2015 AT 5:05 PM
Tiny
CJ MEDEVAC
  • MECHANIC
  • 11,004 POSTS
REMEMBER THIS

VERY IMPORTANT!

DO NOT DRIVE ON PAVEMENT/ CONCRETE/ REALLY HARD SURFACES IN FOUR WHEEL DRIVE!

IT WILL WRECK YOUR TRANNY AND/ OR TRANSFER CASE!

HOWEVER!

IF YOU HAVE THE HUBS "UNLOCKED", YOU CAN DRIVE IT IN 4WD (ACCORDING TO THE TRANSFER CASE STICK - HIGH OR LOW! ON THE PAVEMENT!

THE DIFFERENCE BEING YOUR FRONT WHEELS ARE NOT POWERED, THE FRONT AXLES WILL FREE WHEEL (NO RATIO BINDING CAN OCCUR)

USING 4WD NORMALLY (HUBS LOCKED IN) ON A DIRT ROAD, THE TIRES CAN "SLIP" ON THE DIRT, IF FRONT DIFF AND REAR DIFF ARE BINDING AGAINST EACH OTHER.

THE MEDIC
Was this
answer
helpful?
Yes
No
Tuesday, August 11th, 2015 AT 5:51 PM
Tiny
CJ MEDEVAC
  • MECHANIC
  • 11,004 POSTS
I TWITCHED WHILE ADDING THE PICS ABOVE, I ACCIDENTALLY SUBMITTED BEFORE I FINISHED.

IS YOUR FUEL FILTER SET UP LIKE IN MY PICS? (NOT THE OPTIONAL STUFF)

VACUUM LEAKS YOU MAY OVERLOOK.

RUN AROUND THE CARB, INSURE ALL THE SCREWS ARE GOOD AND SNUG.

IS IT SNUGGED DOWN GOOD TO THE INTAKE?

IS THE PLASTIC SPACER BETWEEN THEM SOLID AND NOT CRACKED?

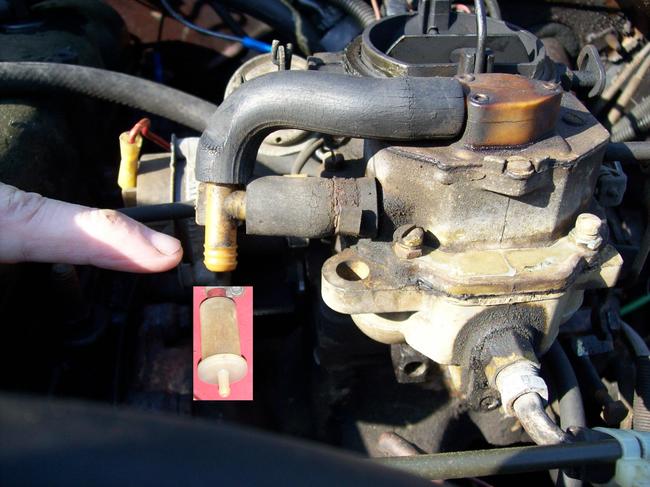
PIC BELOW IS THE VENTS FOR THE CARB, DO NOT CAP EITHER OF THESE PORTS, THEY MUST BREATHE! IF THEY CAN'T, YOUR FUEL IN THE CARB BOWL WILL BOIL WHEN YOU SHUT HIM DOWN. FUEL WILL TRICKLE OUT OF THE PIVOT HOLES, ETC.

WHEN I STILL HAD MY BBD, I LEFT THEM TIED TOGETHER (AS IN THE PIC) AND ADDED A CHEAP FUEL FILTER (3/8 PORTS) TO THE END OF THE LINE, JUST TO KEEP TRASH OUT, ALLOWING IT TO BREATHE.

I DID THE SAME THING TO THE FUEL TANK VENT, WHICH IS "GARDEN HOSE GREEN" AND ORIGINALLY WENT INTO THE CANISTER. SEE THE PIC IN THE ABOVE POST. THE FUEL TANK MUST ALSO BREATHE, I EXTENDED THE GREEN HOSE AND MOUNTED IT UP AS HIGH I COULD, TO KEEP WATER OUT, AND IF FUEL EVER MADE IT PAST THE ROLL OVER CHECK VALVE AND LIQUID CHECK VALVE IT WOULD BE HARD FOR IT TO GET OUT.

YOUR DISTRIBUTOR ADVANCE RUNS ON VACUUM

ORIGINALLY FROM "PORTED VACUUM" (VACUUM GENERATED HIGHER THAN THE THROTTLE PLATES) AS YOURS IS NOW.

MINE

RUNS BETTER USING "MANIFOLD VACUUM", (VACUUM BELOW THE THROTTLE PLATES) THE CARB HAS A FEW PORTS LIKE THIS. OVER WHERE THE EGR IS HOOKED UP (WHICH IS UNNECESSARY), THAT IS ALSO A MANIFOLD VACUUM PORT (ON THE SIDE OF THE INTAKE MANIFOLD).

YOU CAN EXPERIMENT WITH THESE, IDLE SPEED WILL GO UP ON THE MANIFOLD VACUUM (ADJUST IT BACK TO THE CORRECT SPEED - WHICHEVER PORT YOU USE

I RECKON YOU STILL KNOW THAT "MY TUNE UP" STUFF IS IN THE "STALLS WHEN HOT" POST ON THE 1st PAGE? I THINK!

CHECK THE TIMING WELL. INSURE YOU TAKE OFF THE ADVANCE HOSE AND PLUG IT WHILE YOU TIME (BE SURE TO HOOK IT BACK UP)

I WILL ALSO EXPLAIN HOW TO INSURE "BOTH" OF THE DISTRIBUTOR ADVANCES ARE WORKING RIGHT (REMIND ME!)

I'LL NOW LOOK FOR SOME OF YOUR PARTS!

THE MEDIC
Was this
answer
helpful?
Yes
No
Wednesday, August 12th, 2015 AT 4:32 PM
Tiny
CJ MEDEVAC
  • MECHANIC
  • 11,004 POSTS
DEAR MRS. Joef1985

IF YOU HAVE PUT SOME KINDA HURTIN' ON Joef1985

LIKE BROKE HIS FINGERS, ETC

PLEASE KEEP ME INFORMED ON WHAT'S-A-GOIN' ON ON Y'ALLS END!

THE MEDIC

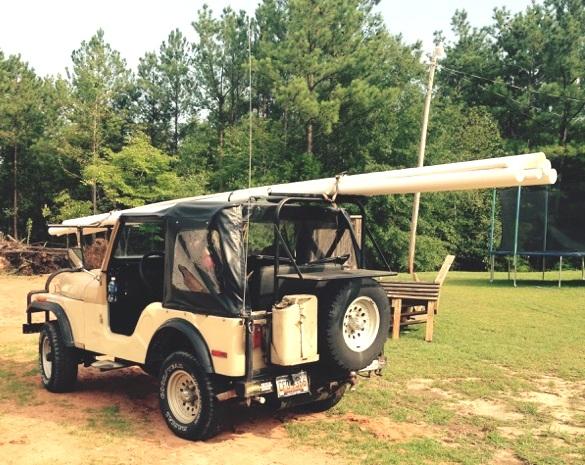
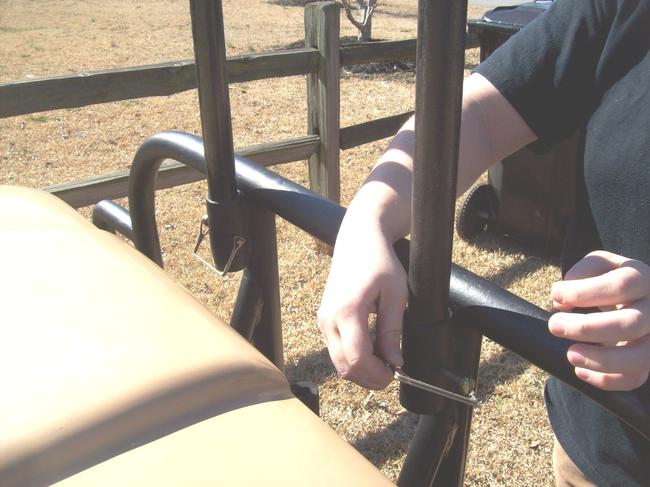
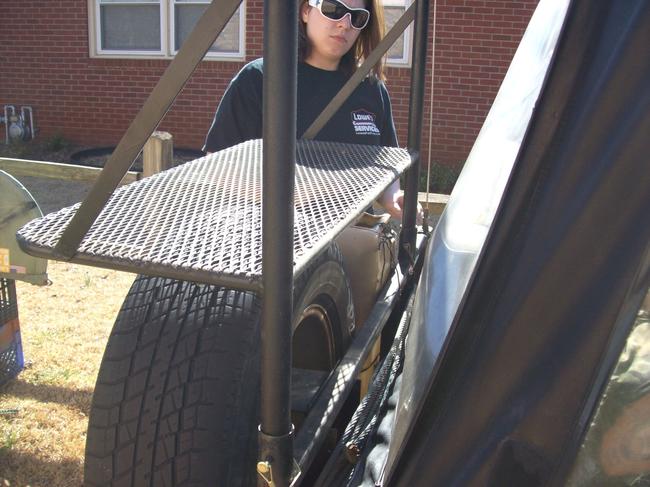
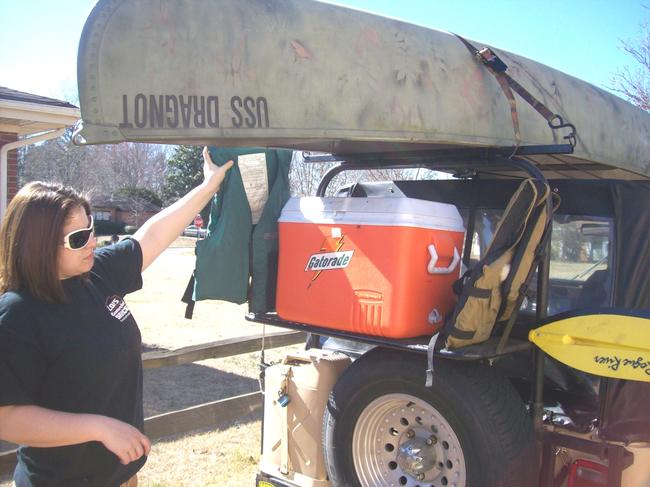
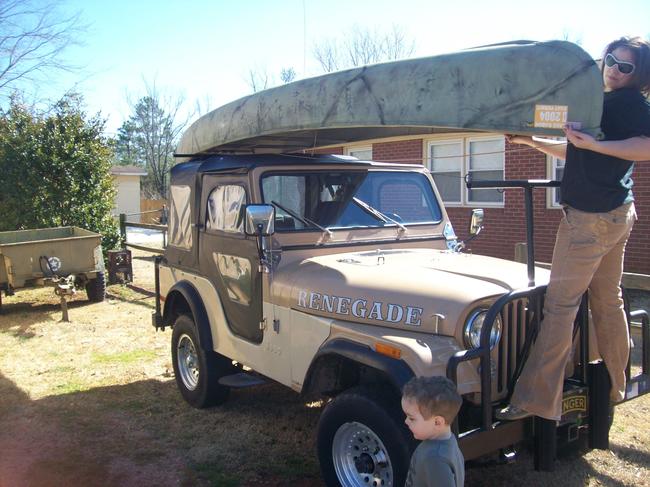
PS. USED MY QUICK CONNECT CANOE RACK TO TAKE 20 FOOT STICKS OF 2" AND 3" PVC PIPE TO HIS HOUSE (YEP, IT'LL DO IT ALL!)
Was this
answer
helpful?
Yes
No
Friday, August 14th, 2015 AT 5:20 PM
Tiny
CJ MEDEVAC
  • MECHANIC
  • 11,004 POSTS
"HIS"

BEING TO MY BROTHER IN LAWS HOUSE FROM THE PLUMBING SUPPLY HOUSE

THE MEDIC
Was this
answer
helpful?
Yes
No
Friday, August 14th, 2015 AT 5:23 PM
Tiny
JOEF1985
  • MEMBER
  • 28 POSTS
Well this is Mr. Joef1985,

I am still kicking and have all my digits still in working order!

Yeah sorry no update in a day or so.

Kinda bummed but should have expected it. Thursday after Misses grandpa drove the jeep 2 miles, when they pulled it back in the driveway, it was leaking chocolate milk out of the transmission/ transfer case area. After inspection it was leaking out of the front of the transfer case at the yolk.

I know it is a easy fix but finding the output shaft seal/ yolk seal/ transfer case seal/ every other name I heard it called proved to be difficult. But tomorrow morning they will be here and begin work on changing out the fluids and replacing seals.

I bought the front and rear seal for the transfer case, pinion seal for front and rear differential, and some gasket maker for the pumpkin. (I figured someone would make a gasket for that, but no luck) So I will spend my day changing fluids and reapplying seals and gaskets to the drive line.

So that is the update to date. I guess I shouldn't be bummed because I should have figured there may be water in the tranny when mud was caked up underneath to the top of the tranny. I guess the previous owners were HARDCORE Jeepers! Or thought maybe it had dual use as a boat!

We did smooth out the idle and in the short distance they drove it, there was no backfire and stalling. So I believe the carb is properly adjusted, it may still be running a little rich but after I resolve the chocolate milk issue we can move back to that!

Is there anything that sticks out in your mind about replacing those seals? Hope all is well and by the first picture it looks like you have an excellent quick connect PVC pipe hauler. I am transportation and you keeping moving things around like that, I may have to put you to work!

Thank you
Joe
Was this
answer
helpful?
Yes
No
Saturday, August 15th, 2015 AT 5:43 PM
Tiny
CJ MEDEVAC
  • MECHANIC
  • 11,004 POSTS
LET'S HOLD OFF ON THE REAR DIFF PINION SEAL (IF IT AIN'T LEAKING),

KINDA A SPECIAL WAY YOU GOTTA DO IT, AND IT IS CRITICAL!

AS FAR AS NEW JUICE IN THE DIFF, THE GASKET IS A CIRCLE MADE OF RUBBER, IT'S IN IT'S OWN SLOT, JUST INBOARD OF THE BOLTS. REMOVING THE COVER "IS" THE CORRECT WAY TO DRAIN IT CORRECTLY.

LETS USE OEM FLUIDS IN ALL OF THESE DRIVE TRAIN COMPONENTS. (DO YOU HAVE A TRAC-LOC - LIMITED SLIP POSITIVE TRACTION DIFF - WHICH NEEDS AN ADDITIVE) DO NOT ADD ANY ADDITIVES, LIKE LUCAS, ETC. THEY ARE SO THICK AND WILL NOT SLING INTO THE HOLES/ CHUTES TO LUBRICATE THE BEARINGS (THAT HUMP ON TOP FROM THE BODY TO THE PINION YOKE)

THE TORX BOLTS WILL BE YOUR NIGHTMARE. I GOT YOU COVERED!

https://www.2carpros.com/questions/2008-saturn-outlook-remove-rr-brake-rotor-outlook-necessary-torx-retainer-same-o

WHEN THEY ARE ALL OUT, REPLACE THEM WITH "GRADE 8" HEX BOLTS THE SAME LENGTH. WHEN ALL IS INSTALLED AND GOOD TO GO, SLING THEM TORX BOLTS ACROSS THE WOODS!

ANY DOUBTS ON WHAT I EXPLAINED TO DO, JUST ASK!

IF THE OLD GASKET LOOKS GOOD, CLEAN IT WELL AND A VERY VERY VERY THIN COAT OF RVT GASKET ON BOTH SIDES WILL GET YOU BY.

SEE "MY ANSWER" ON Jan 9, 2012 IN THIS POST, AS FAR AS RVT USAGE

https://www.2carpros.com/questions/1992-ford-crown-victoria-aod-transmission-time-shift-2nd-gear-roughly-30mph-locks

OK AS FAR AS SEAL REMOVAL AND INSTALLATION ON THE TRANSFER CASE

I WILL WRITE ANOTHER ANSWER AFTER I DO A FEW HONEY-DOs!

THEN THIS WON'T BE A MILE LONG!

GIMME A BIT

THE MEDIC

Was this
answer
helpful?
Yes
No
Saturday, August 15th, 2015 AT 6:21 PM
Tiny
JOEF1985
  • MEMBER
  • 28 POSTS
Good Evening,

As far as they diffs I believe the front is a dana 30 and rear dana 20 but I may be wrong. I planned on when I was down there really figuring that out.I know I have the pumpkin that is round. I looked everywhere for the gaskets and no one had it and was told to by several people( even the 4x4 centers) to use RTV in place.I read the post about the Diff crack! I assure you, I was kinda appalled when everyone was forcing RTV on me to make a new gasket. I would prefer to use a gasket with a lil RTV then just RTV. What is your thought on this?

As far as the TORX bolts you dont think my twin hammer impact wouldnt be a good fit for this? I have impact TORX bits. LOL I am well acquainted with my old friend the TORX bolt. It seems most tractor trailers accessories and such, used torx bolts.

So then what is your thought on the windshield brackets because it has torx bolts as well? They have a pan head so they fit flush into the bracket. What should I use there because if I use hex bolts the heads will protrude out of the bracket.

I have not locked down a special oil type for the transmission and diffs in my books. I am assuming 90W, is this correct OEM for the application? How would I determine if I have Trac-Loc or not? If I have Trac loc diff where do I find this special lubricant?

Glad I messaged you. You always seem to have most the answers to my situations. I am turning in for the night to tackle jeep fluid change extravaganza 2015!

Enjoy the Honey DO's and I appreciate all the help!

Thank you
Joe
Was this
answer
helpful?
Yes
No
Saturday, August 15th, 2015 AT 7:12 PM
Tiny
CJ MEDEVAC
  • MECHANIC
  • 11,004 POSTS
As far as they diffs I believe the front is a dana 30 and rear dana 20

FRONT IS CORRECT/ REAR IS AN AMERICAN MOTORS (AMC) MODEL 20 CORPORATE AXLE

I looked everywhere for the gaskets and no one had it

SEE WHAT THE OLD ONE LOOKS LIKE (IT IS RUBBER AND DOES NOT GET SQUISHED OR GNARLED UP) IT MAY BE REUSABLE W/ THIN RVT

HERE'S ONE PLACE I SOMETIMES GET STUFF FROM. NOT ALWAYS THE CHEAPEST, BUT THEY HAVE MOST EVERYTHING

http://www.jeep4x4center.com/?gclid=CPaB0KTLrMcCFUUkgQodf8cKxg

I read the post about the Diff crack!

THAT WAS MY TRANSFER CASE TAILPIECE AND THE CASE ITSELF!

I would prefer to use a gasket with a lil RTV then just RTV. What is your thought on this?

AIRBORNE! ON BIG COVERS AND SUCH I USE A GASKET + RVT

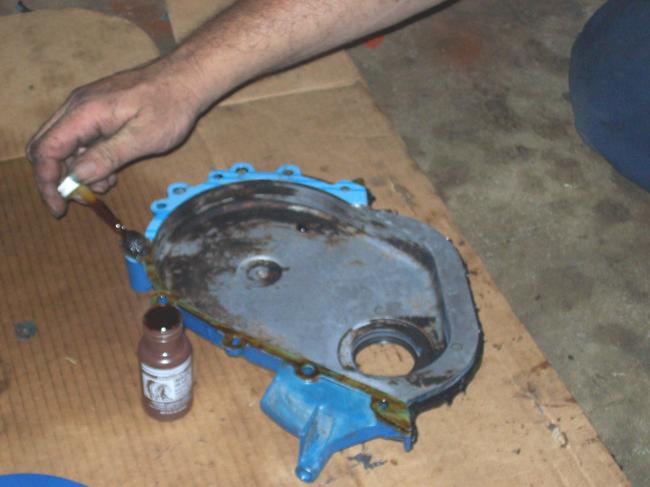
- ON MACHINED MATING SURFACES THAT ARE SUPER FLAT (LIKE THERMOSTAT HOUSING, LOCKING HUBS, TIMING CHAIN COVER, ETC. I COAT BOTH SIDES OF THE "PAPER" GASKET (OR THIN CARDBOARD LIKE GASKET) WITH "INDIAN HEAD GASKET SHELLAC". THERE ARE OTHER NAMES OUT THERE, THEY ARE IN THE EXACT SAME BOTTLE. (SEE PIC 1) STORE IT UPRIGHT, IT WILL OOZE OUT!

As far as the TORX bolts you dont think my twin hammer impact wouldnt be a good fit for

I HOPE YOU UNDERSTOOD "A LITTLE CCW PRESSURE AND TAPPING", TRY IT YOUR WAY! WHEN YOU BREAK A BIT, TRY IT MY WAY! (I HOPE THOSE PICS 'SPLAINED MY WAY WELL)

So then what is your thought on the windshield brackets because it has torx bolts as well? They have a pan head so they fit flush into the bracket. What should I use there because if I use hex bolts the heads will protrude out of the bracket.

YOUR OWN PERSONAL PREFERENCE

THERE IS NOT ONE SINGLE TORX LEFT ON MY JEEP! THE BOLT HEADS KINDA REMIND ME OF THE OLE ERECTOR SET! SORTA GIVE HIM THAT "RUGGED LOOK" (BUT THAT'S JUST ME!)

ALL STAINLESS HEX BOLTS AND STAINLESS WASHERS AND STAINLESS SCREWS WHERE STEEL SCREWS WERE! THIS INCLUDES THE SUN VISOR BRACKETS, THE DASH, AND THE BOLTS ON THE SIDES OF THE BODY THAT HOLD THE ROLL BAR IN (MY ROLL BAR IS A '77, IT SITS ON TOP OF THE FENDER WELLS, NOT DOWN TO THE FLOOR) SEE THESE "BOLT PICS" (PICS 2-4)

I have not locked down a special oil type for the transmission and diffs in my books. I am assuming 90W

CORRECT! GOES IN ALL OF THE DRIVE TRAIN

How would I determine if I have Trac-Loc or not? If I have Trac loc diff where do I find this special lubricant?

LET'S SEE WHAT YOU HAVE 1st!

LEAVE HIM IN GEAR - GET BOTH REAR WHEELS OFF OF THE GROUND

TURN A WHEEL FORWARD, DOES THE OTHER GO FORWARD TOO? YES? THIS IS POSI-TRAC DIFFERENTIAL (LET ME KNOW BEFORE YOU FILL IT FULL OF 90W)

IF THE OTHER WHEEL GOES THE OPPOSITE DIRECTION, YOU HAVE A "STANDARD DIFFERENTIAL" (PLAIN JANE, RUN OF THE MILL)

OK, STARTING ONE MORE ON THE SEALS

THE MEDIC
Was this
answer
helpful?
Yes
No
Saturday, August 15th, 2015 AT 8:44 PM
Tiny
CJ MEDEVAC
  • MECHANIC
  • 11,004 POSTS
IF YOU WANNA MAKE YOUR OWN FRONT DIFF COVER GASKET

SNATCH OFF THE COVER AND HOLD IT UP TO THE CORN FLAKES BOX,

FIT?

DRAW IT AND CUT IT OUT, LET'S MARK THE HOLES TOO!

IF YOU DON'T HAVE A HOLE PUNCH SET, GRAB AN EXPENDED 30-06 CASING OR A 38 SPECIAL CASING, ETC. (OR SEVERAL, THEY WEAR OUT FAST!) PLACE YOUR GASKET ON A SOFT CHUNK OF WOOD (STUD, ETC) LINE UP ON YOUR HOLE AND SMACK IT WITH YOUR HAMMER!

REMOVAL OF THE SEALS

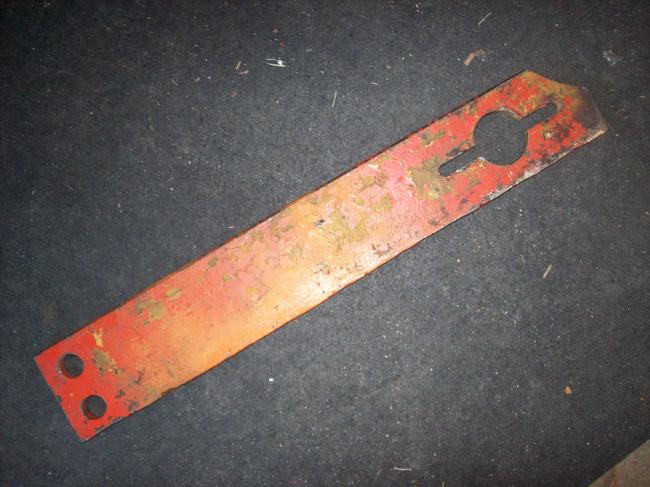
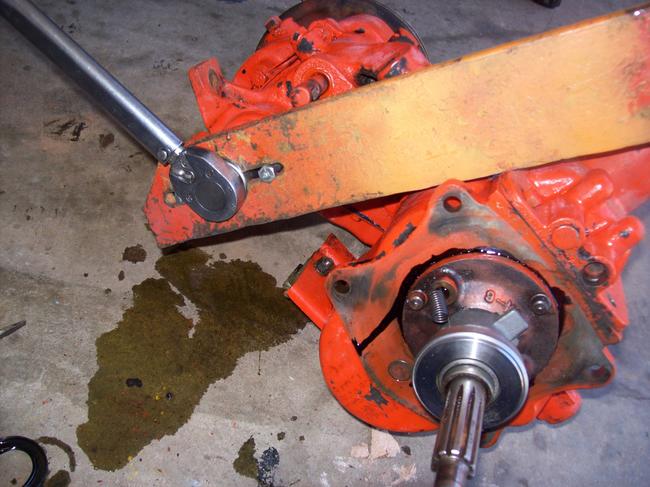
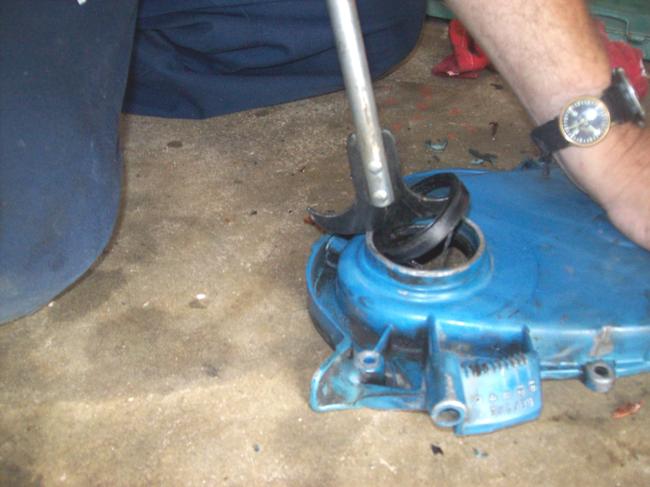
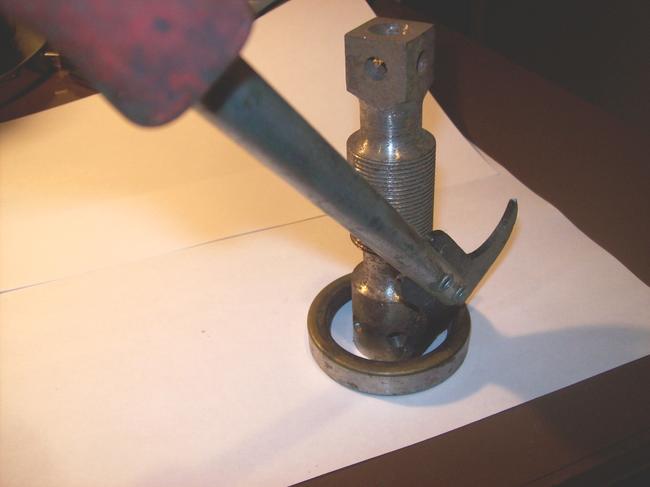
TO REMOVE THE YOKE, YOU NEED TO BACK HOLD THE YOKE, NOT LET THE GEARS INSIDE HOLD IT. I HAD THE LOCAL HIGH SCHOOL MACHINE SHOP (STUDENTS) WHIP MINE OUT FOR COST OF THE METAL (NEAR NOTHING). YOU CAN WHIP ONE OUT WITH A CUTTING TORCH (MAYBE NOT A PERTTY, BUT FUNCTIONAL) SEE PICS OF ME WORKING ON "WILLYS" SEALS

INSURE YOU DON'T DRAG OUT ANY SHIMS, WHEN YOU PULL THE YOKES OFF

SEE MY 4th AND 5th PICS, THIS WILL STILL PULL A SEAL, EVEN WITH THE OUTPUT SHAFT IN THE WAY

INSTALL THE SEAL EVENLY WITH A BIG DEEP SOCKET OR PIPE THAT FITS THE SEAL WELL, AND WILL NOT HIT THE SHAFT WHEN YOU DRIVE IT IN. IF NOTHING ELSE IS AVAILABLE, TAPPY, TAPPY, TAPPY EVENLY ALL THE WAY AROUND WITH A BALL PEEN HAMMER (DIRECTLY ON THE SEALS EDGE) WILL WORK IN A BIND! LUBRICATE THE INNER RUBBER SURFACE OF THE SEAL, AND THE OUTER PART OF THE YOKE.

NOW HERE'S THE KICKER

BACK HOLD THE YOKE HOLDER AGAINST THE GROUND OR FRAME AND TIGHTEN THE NUT TO 240 FT-LBS (THAT GOES FOR BOTH YOKES)

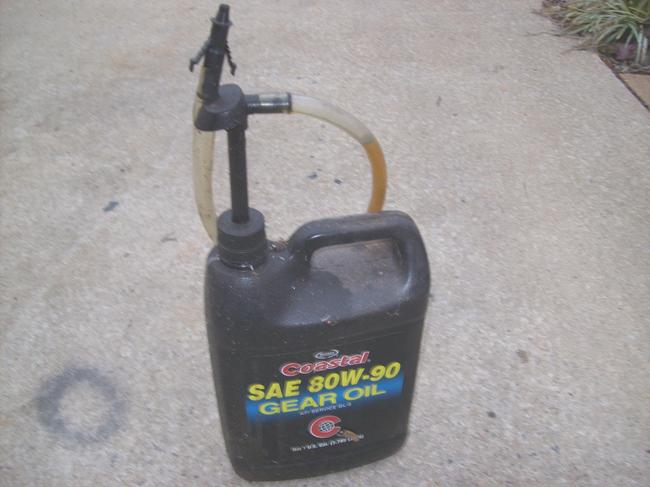
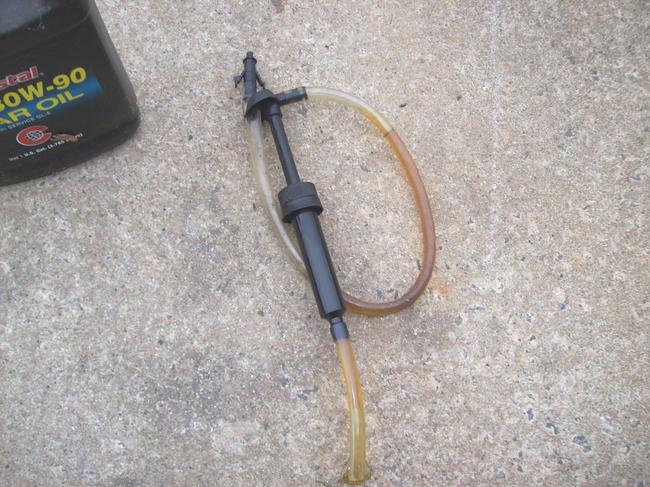
WE NEED TO HAVE THE JEEP LEVEL. WE WANNA FILL TRANNY AND THE TRANSFER CASE (AND DIFFS) UNTIL THE 90W JUICE STARTS COMING BACK OUT OF THE FILL HOLE. GIVE IT 2 OR 3 MORE FAST PUMPS THEN PUT THE PLUG BACK IN. (WHEN YOU CHECK IT AT A LATER DATE, THE FLUID SHOULD STILL "DROOL OUT" OF THE FILL HOLE, IF IT DON'T, IT NEEDS FLUID!)

THIS $5 TO $7 ITEM WILL BE YOUR PAL, WHEN IT COMES TO INSTALLING YOUR JUICE (SEE PICS 6 AND 7)

MIDNIGHT 40!

NITE-NITE

THE MEDIC
Was this
answer
helpful?
Yes
No
Saturday, August 15th, 2015 AT 10:02 PM
Tiny
JOEF1985
  • MEMBER
  • 28 POSTS
We have the plain jane run of the mill differential. The tires are moving in opposite directions.
Was this
answer
helpful?
Yes
No
Sunday, August 16th, 2015 AT 11:26 AM

Please login or register to post a reply.

Sponsored links