Test ignition mod and coil: Here's how.
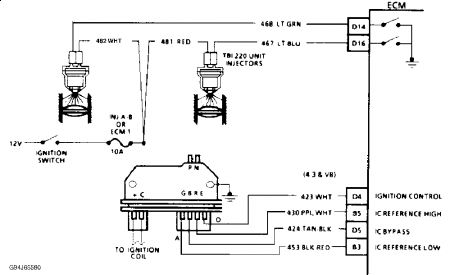
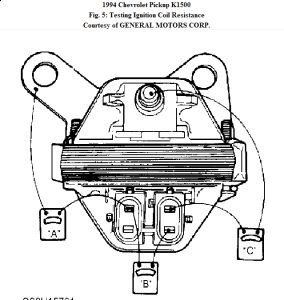
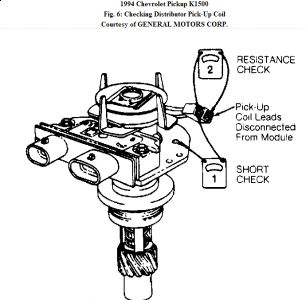
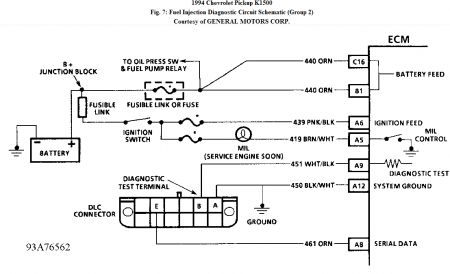
Ignition System 1. Disconnect tachometer wire at distributor tachometer terminal (if equipped). A shorted tachometer or tachometer circuit prevents vehicle from starting. Ensure TP sensor and coolant sensor codes are not present and sensors are not out of calibration. 2. Check for battery voltage at "+" terminal of ignition coil with ignition on. See Fig. 1 - Fig. 4 . Repair as necessary. 3. Connect Spark Tester (ST-125) to end of one plug wire. Crank engine. If spark is present, check fuel delivery. 4. If spark does not occur, disconnect 4-wire EST connector at distributor and check for spark at ignition coil tower using Spark Tester (ST-125). If spark now occurs, check cap and rotor for damage or wear. Check for open in coil wires. 5. If spark does not occur, reconnect EST connector. Leave spark tester connected to coil tower for remainder of test. Disconnect ignition coil Black 2-wire connector, and check voltage on "C" and "+" terminals with ignition on. 6. If voltage on both terminals is 10 volts or greater, go to next step. If voltage on both terminals is less than 10 volts, repair wire from "+" terminal on module to "B" terminal on coil Black 2-wire connector. If voltage is less than 10 volts on "C" terminal only, check for open or short to ground in circuit from "C" terminal of ignition module to ignition coil. If circuit is okay, problem is faulty coil or coil connections. 7. Connect voltmeter between ground and tachometer terminal at coil with ignition on. Tachometer terminal may be taped back against harness. If voltage is greater than 10 volts, go to step 9). 8. If voltage is 1-10 volts, replace ignition module and check for spark at coil tower using Spark Tester (ST-125). If voltage is less than one volt, repair open in tachometer lead or tachometer connector. After repairs, recheck voltage at tachometer terminal. 9. Connect test light between ground and tachometer terminal. Crank engine. If test light remains on (steady), go to next step. If test light flashes, replace ignition coil with a known-good unit and recheck for spark. If spark does not occur, reinstall original ignition coil and replace ignition module. 10. Remove distributor cap. Unplug ignition module pick-up coil connector. Connect voltmeter between ground and tachometer terminal. Turn ignition on. Using jumper wires, connect positive end of a known-good 1.5-volt battery to terminal "P" of module. Observe voltmeter at tachometer terminal as negative end of test battery is momentarily grounded to distributor housing. 11. If voltage at tachometer terminal does not drop, check ignition module ground. Check for open in wires from ignition coil to module. If all is okay, replace ignition module. 12. If voltage at tachometer terminal drops, check for spark at spark tester as jumper is removed from terminal "P". If spark does not occur, go to next step. If spark occurs, check pick-up coil connections. Check for 500-1500 ohms resistance at pick-up coil leads. Ensure leads are not shorted to ground. Repair as necessary. 13. Test ignition module with module tester. If module tests okay, check ignition coil wire. If module tester is not available, replace ignition coil, and touch terminal "P" again. If spark occurs, system is okay. If spark does not occur, reinstall original ignition coil, and check coil wire from distributor cap. If no problem is found, replace ignition module. Page 1 of 1 BASIC TESTING - GASOLINE -1994 Chevrolet Pickup K1500 3/6/2009


Thursday, November 30th, 2017 AT 10:33 AM
(Merged)


