Introduction
While your engine is running, a crankshaft angle sensor is designed to detect the rotation of the crankshaft and is responsible for triggering the fuel injection and ignition system via the main PCM computer. This guide provides a highly detailed, technical, and step-by-step walkthrough on replacing an automotive engine crankshaft sensor.
Location:
There is no "one place" a crankshaft position sensor is located because each manufacture has their own idea of where it should be on any particular engine. The sensor can be in an obvious location such as on the side of the engine block, or at the harmonic balancer, but it can be as difficult as being at the timing belt drive pulley inside the timing cover. If you are unsure of the sensor location, our experts are happy to help.
Tools, Materials, and Safety Equipment
Before starting the replacement process, gather the following tools and materials:
- New crankshaft sensor (OEM recommended)
- Socket set with appropriate sockets and extensions
- Screwdrivers (flathead and Phillips)
- Wrenches (metric or SAE, depending on your vehicle)
- Pliers and a trim removal tool
- Dielectric grease (for electrical connections)
- Clean shop towels and a small container for bolts
- Safety gloves and eye protection
- Jack and jack stands (if required for better access)
Crankshaft Sensor Replacement
Start by locating the sensor, you will also need to jack the car up and support it on jack stands in most cases, also wear protective gloves and eyewear.
1. Battery Disconnection
Anytime you are working with the inner workings of the engine its a good idea to disconnect the battery to avoid a short circuit to the car's electrical system.
2. Clear Location Access
A particular crankshaft sensor can be behind the starter motor which must be removed to gain access to the sensor. Use a shop light to help see what you are doing when working under the car. If the crankshaft angle sensor is oily, now is a good time to use a small amount of carburetor cleaner to remove the oil to get a clean start on the job.
3. Electrical Connector Release
An electrical connector will be held to the sensor using a plastic clip which you much push down or pull outward to release, gently wiggle the connector loose from the sensor. Sometimes this connector can be a little stuck due to the weather pack seal which helps keep water out that can cause corrosion at the sensor terminals. Once the connector is removed check it for rust and clean or replace the pigtail if needed, this problem alone will cause the engine to stall or not start at all.
4. Crankshaft Sensor Removal
Most crankshaft sensors will have just one mount bolt which will typically be 10mm in wrench size. Use a small wrench or socket to remove the bolt by turning it counterclockwise and place to the side for safe keeping. Use a small pick or standard screwdriver to wedge under the sensor mounting tab to pry it loose.
Bock Mounted Sensors Only:
Removing the crank sensor can be a little difficult because they get stuck. Be careful not to apply to much pressure because these sensors have a long stem and have been known to break off leaving a part of the sensor inside the block. When this happens sometimes you will have the option of pushing the broken piece inward so it falls into the oil pan where it will stay, or you can remove the oil pan to remove the broken piece. Once the sensor is loose, firmly grasp it and with a twisting motion pull it from the engine block.
5. New Crank Position Sensor Installation
- Wipe off any oil the old sensor has on it so you can clearly see any design changes the new sensor might have. Slight design updates are common when installing new sensors such as mounting tabs. One thing that "cant" be different is the length of the sensor stem because if the stem is too long it will contact the crankshaft, and if it is too short it will not read correctly.
- Use a shop towel to clean the position sensor port hole to ensure a proper seal to the new sensor O ring. Motor oil will be present at this port so do not spray carburetor cleaner inside the port. You can spray cleaner on the shop towel to aid the cleaning process, (if applicable).
- Position the new crank sensor squarely into the sensor port hole and firmly push it into place while aligning the mounting plate hole to the threaded bolt hole in the block or mounting bracket.
- Use a small amount of clean engine oil or WD40 to lubricate the O ring seal to avoid damage to the seal which will cause an oil leak, (if applicable).
- Insert the mounting bolt and thread it in by hand by turning it clockwise to avoid cross threading and gently tighten.
- Apply a thin layer of dielectric grease to the sensor’s electrical connector to prevent corrosion and facilitate a secure connection. Push the electrical connector into place while listening for a click telling you the connector is successfully installed and ready for operation.
6. Programming
On newer cars you will need to initiate or relearn the crankshaft position sensor to have the engine computer recognize it. This is why sometimes when you replace the sensor the engine will not start. Connect a CAN scanner of other high end scanner to start the process by following the screen prompts and choosing, "crankshaft relearn procedure" and continue until completed and you are all set.
Conclusion
Clear an trouble codes that have might have been set during or before the repair. Inspect the wiring harness connected to the sensor for any signs of damage, fraying, or corrosion. Faulty wiring can mimic sensor failure and may need to be repaired or replaced.
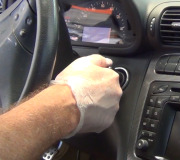
Watch the Video!
Please watch this video of the job being done to glean additional helpful information.
Credits
This guide knowledge base was created by the 2CarPros Team, and by Ken Lavacot: Automobile repair shop owner and certified master automobile technician of over 30 years. If you have question or need help please ask one of our experts we are happy to help. Please visit our 2CarPros YouTube Channel.

Article published 2025-02-22