Introduction
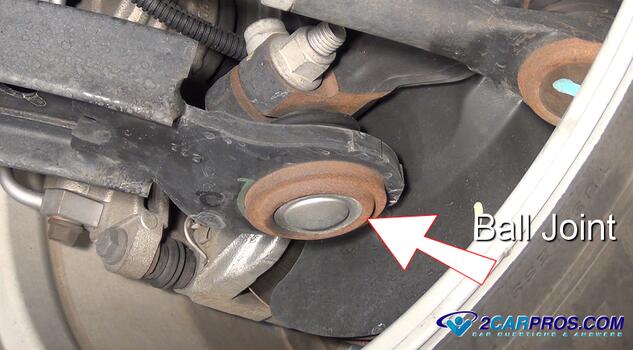
Ball joints are used to connect lower and upper suspension control arms to the steering spindle. Before you start to replace the ball joint do some research because most of the time the ball joint is serviced with the control arm, so you will get a new control arm, ball joint and bushings which is a superior repair. There are two types of ball joints, sealed units which do not require any lubrication, and standard ball joints that require grease to be pumped into a Zerk fitting to lubricate the joint. Over time, ball joints can wear out, leading to poor handling, uneven tire wear, and potential suspension failure.
Tools and Materials Needed
- Jack and jack stands
- Wheel chocks
- Lug wrench
- Socket set and wrenches
- Ball joint separator or pickle fork
- Ball joint press kit
- Hammer
- Pry bar
- Torque wrench
- Penetrating oil
- Grease
- Safety glasses and gloves
- Tool set
Before You Begin
Before you start, park the car on level ground, in park with the emergency brake set. Raise the car up and remove the wheels, also wear protective clothing, gloves and eyewear.
Warning! You will be dealing with the suspension spring which can be dangerous and cause personal injury or death if handled improperly!
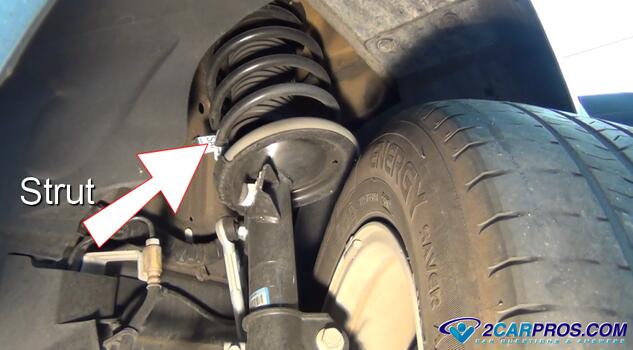
There are three kinds of suspension configurations: Strut type, this is the much easier suspension to deal with because the spring is contained within the strut so there is less danger. Here is what the strut style of suspension looks like which is most common.
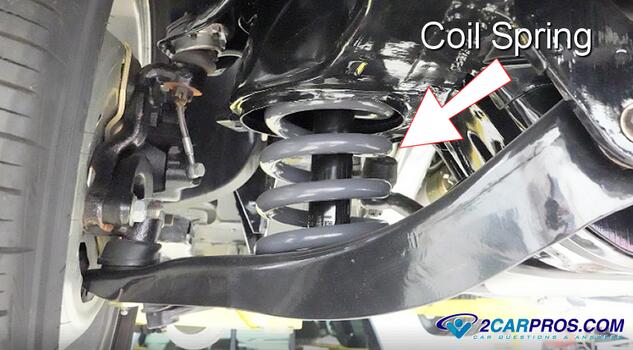
The other two are coil spring, and torsion bar style of suspension in which the spring presses against the lower control arm. For this style of suspension you must use a spring compressor, or release the torsion bar tension before replacing the ball joints. Here is an example of the coil spring suspension.
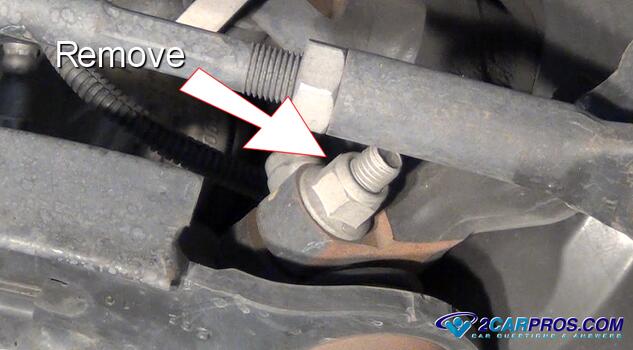
1. Remove the ball joint retainer nut or pinch bolt which will be at the end of the control arm connecting the spindle. If the ball joint has a nut the tapper joint will need to be released. This tapper joint release guide is on a tie rod but the process is the same. The pinch bolt may require you to wedge the spindle slot open and help in it's removal.
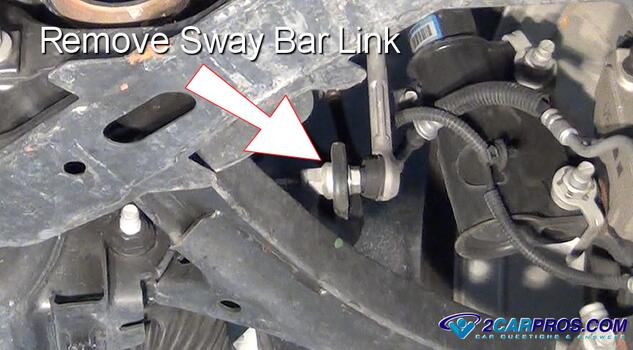
2. Locate and remove the sway bar link from the lower control arm.
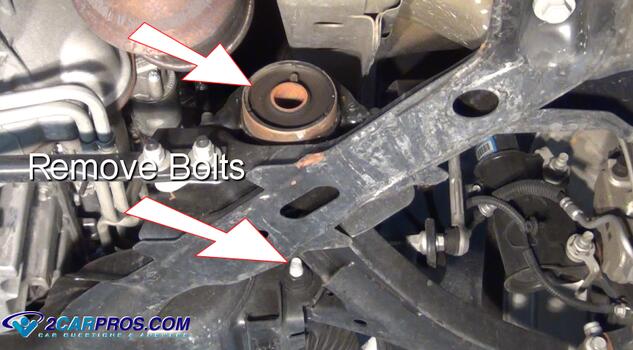
3. Loosen and remove the lower control arm bushing bolts, keep your hands on it because it will drop down from here.
4. Now the control arm or ball joint is ready to be replaced. If you are replacing the ball joint separately you can heat up the outer ring of the control arm to help loosen the joint. Then use a ball joint press tool and help in it's removal, once removed, clean the surfaces and install the new part. The ball stud may be riveted to the control arm, using a drill you can remove the rivets and remove the ball stud from the control arm.
5. Reassemble the lower control arm in the same order you removed it and tighten the nuts and bolts to manufacturers recommended torque and you are all set.
Conclusion
Replacing a suspension ball joint is a detailed process that requires precision and the right tools. Regular inspection and maintenance of suspension components are crucial for preventing more severe issues down the road.
Related Car Repair Information
- Ball Joint Questions
- How Steering Works
- Replacing a Shock
- How to Replace a Strut
- How to Replace a Control Arm Bushing
Credits
This guide knowledge base was created by the 2CarPros Team, and by Ken Lavacot: Automobile repair shop owner and certified master automobile technician of over 30 years. If you have question or need help please ask one of our experts we are happy to help. Please visit our 2CarPros YouTube Channel for additional car repairs.
