You gotta understand I don't know what steps you've taken or what you found, so for my understanding, I have to go in a systematic order, just like I did for many years with tvs and vcrs. If I was standing right next to you, I could find test points right in the middle of the circuit to start from. That is the fastest and most efficient way to find the defect, but the next best way is to start at the beginning of the circuit and go through it step by step. I could add a lot more clues, but that just gets to be way too confusing for you, and won't help us solve this.
If I had to guess by throwing a dart at a board, I'd aim for this being caused by a defective turn signal switch, but unless you have a replacement laying around, I'm not going to suggest you spend money on a new one as a test, at least not until testing proves it is the likely suspect.
Leaking brake fluid can turn on the red "Brake" warning light in two of its three ways, but it has nothing to do with the rear brake lights. The first way is simply due to low brake fluid in the reservoir. Not all vehicles have a low-fluid switch, but most models did by 1994. The second way is from the "pressure-differential switch". When the vehicle does not have anti-lock brakes, that switch sits on top, in the middle of the combination valve. That valve sits on the frame rail, right under the brake master cylinder. You can also find it by following the two steel lines from the master cylinder down to that valve. There's three valves in the combination valve. The pressure-differential valve is in the middle and sits centered in its bore, as long as both hydraulic circuits build equal pressures when you press the brake pedal. That can't happen when there's a leak in one of the systems.
When your vehicle does have anti-lock brakes, there is usually no combination valve. The pressure differential valve is built into the hydraulic controller. There were two different ABS versions available. I'm doing this from memory, so you'll need to correct me here when I'm wrong. As I recall, the four-wheel-ABS system had a hydraulic controller just under or near the master cylinder and it had the pressure differential valve built in. The rear-wheel-ABS system was more common, and is identified by the less-complicated "dump" valve mounted to the left frame rail, right under the driver's foot area. That system did use the combination valve.
The third way the red "Brake" warning light is turned on is with a switch on the parking brake pedal assembly. The ignition switch must be on, then, if you don't know which switch is turning the warning light on, it's a simple matter of unplugging them, one at a time. If it's due to the pressure differential valve, as is likely with your brake fluid leak, that valve is spring-loaded to recenter itself on Chrysler and GM products, when you release the brake pedal, however, it is real common for them to stick. Usually a good hard jab to the brake pedal will shock the valve to pop it back to its centered position. (That valve is not spring-loaded on Ford vehicles and can be extremely frustrating to recenter it after it has been tripped).
You can also get a clue by leaving the engine off, ignition switch on, then watch the warning light very closely as you start to push the parking brake pedal. If the warning light is NOT on due to the parking brake, it will get just a tiny bit brighter when you apply the parking brake. If the brightness doesn't change, most likely the warning light is on due to the parking brake light switch being damaged and is grounded against the toothed gear. It's just a copper-colored tin strip that can become deformed. They're replaced by removing two small mounting bolts. Other types of failures are very rare, so you'll have an easy time finding a good replacement at any salvage yard. A lot of Chrysler models and years used the same switch.
If we need to continue this conversation later, we should start a new question related to just that topic. That is because these get categorized by topic and by model to help others researching a similar problem. By including a second topic here, it won't show up on any list, and what you find for a solution will never be known by someone who might really need to learn it.
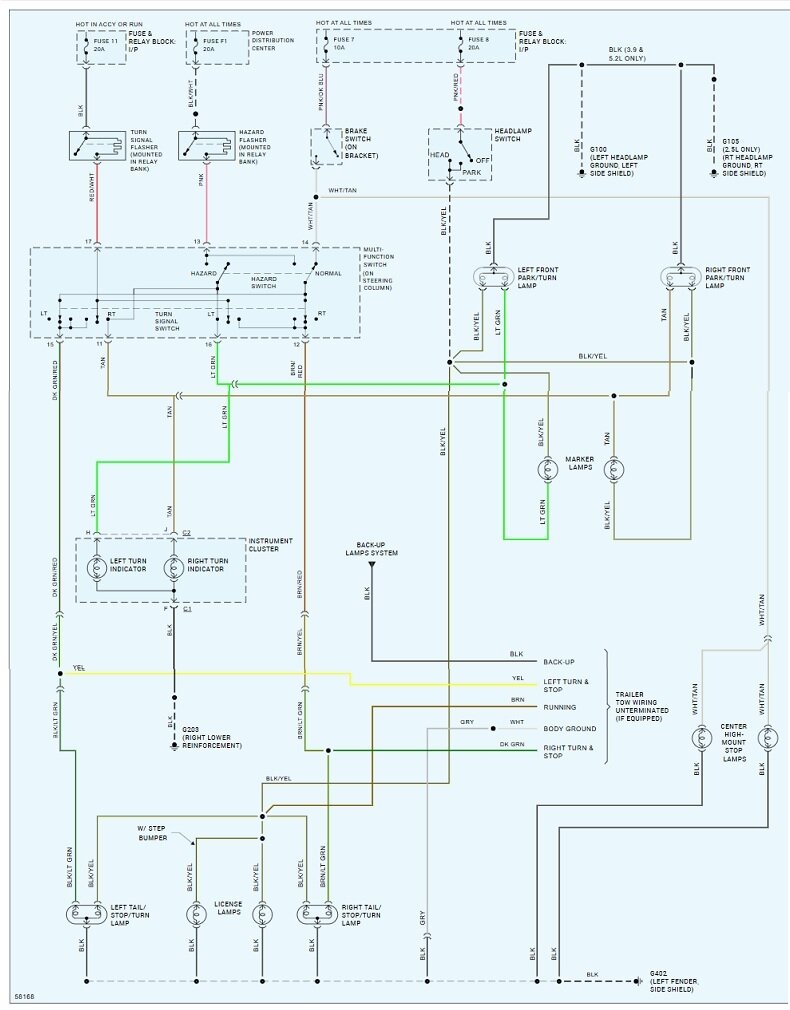
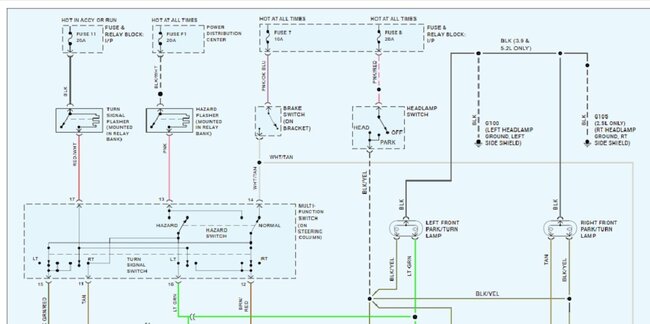
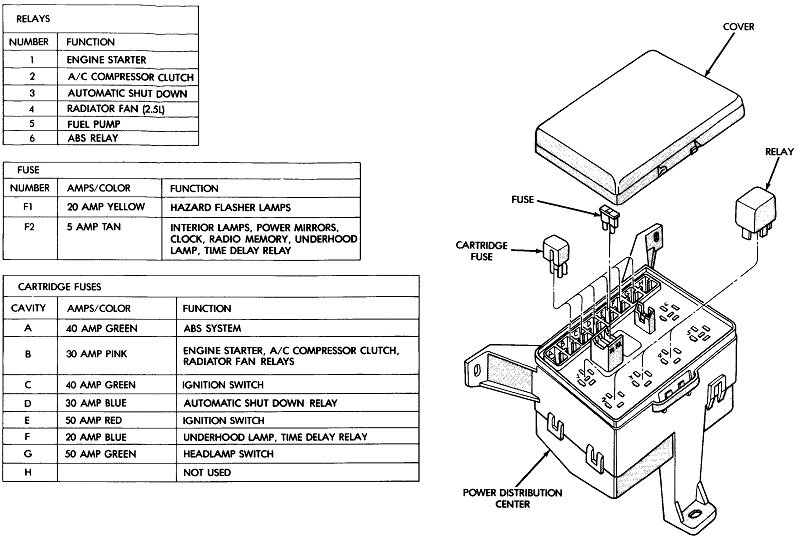
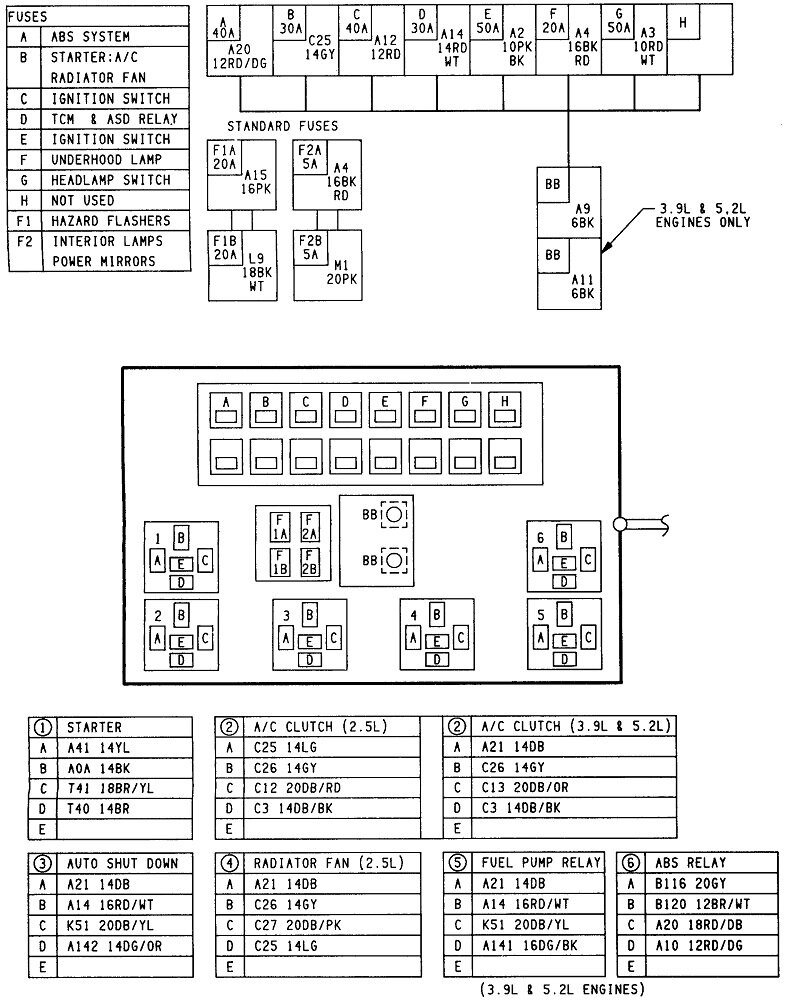
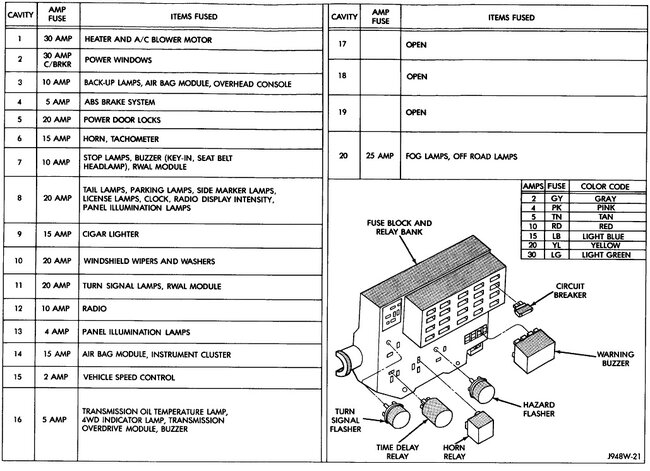
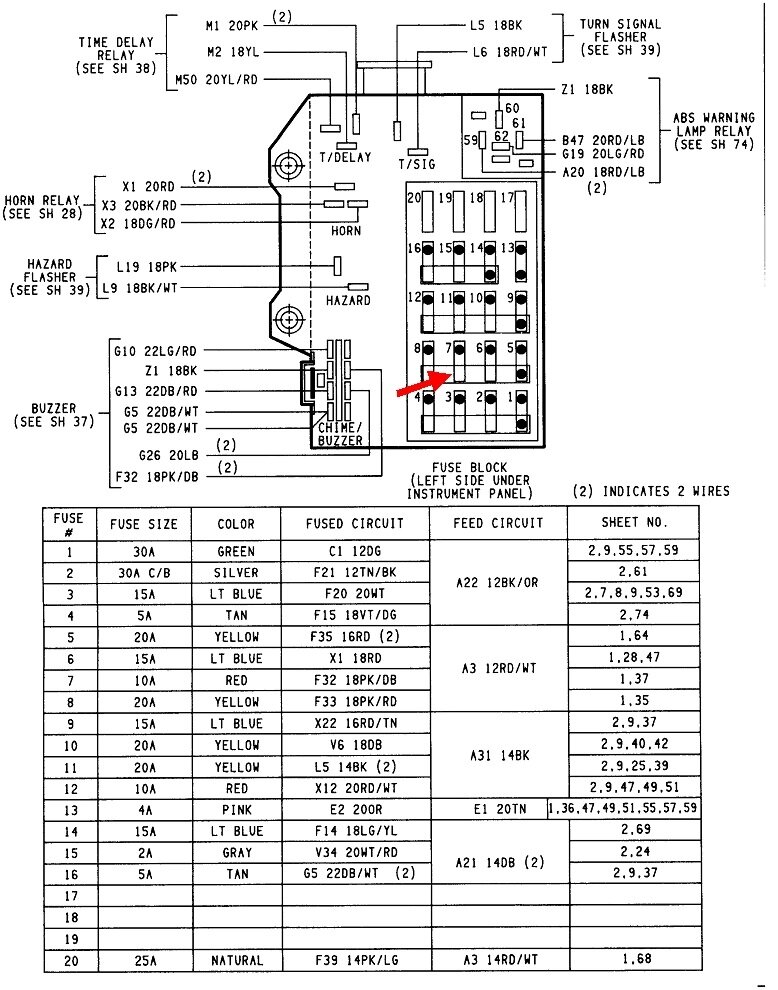
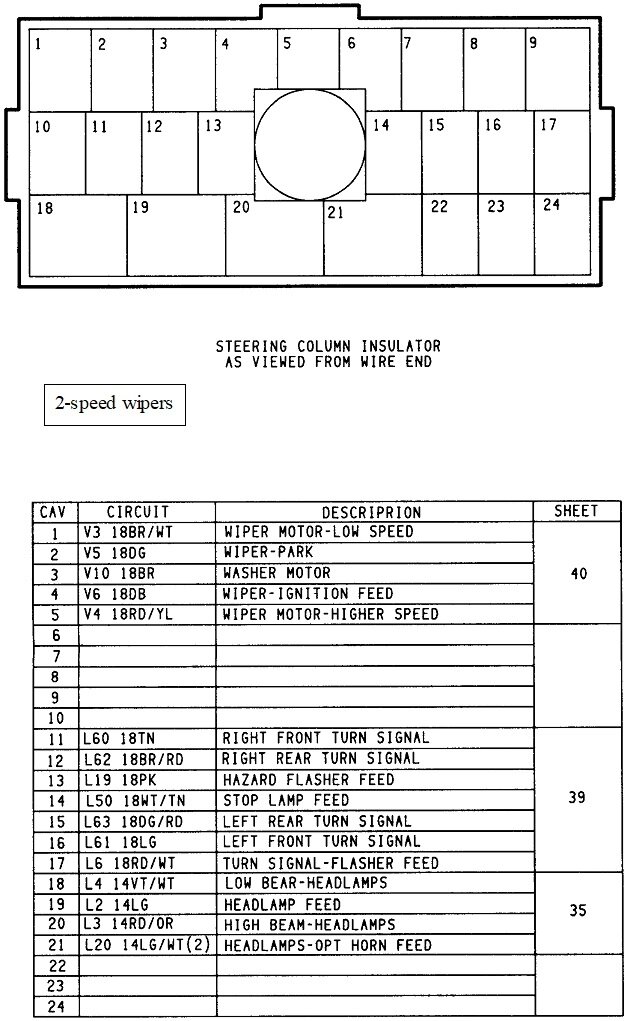
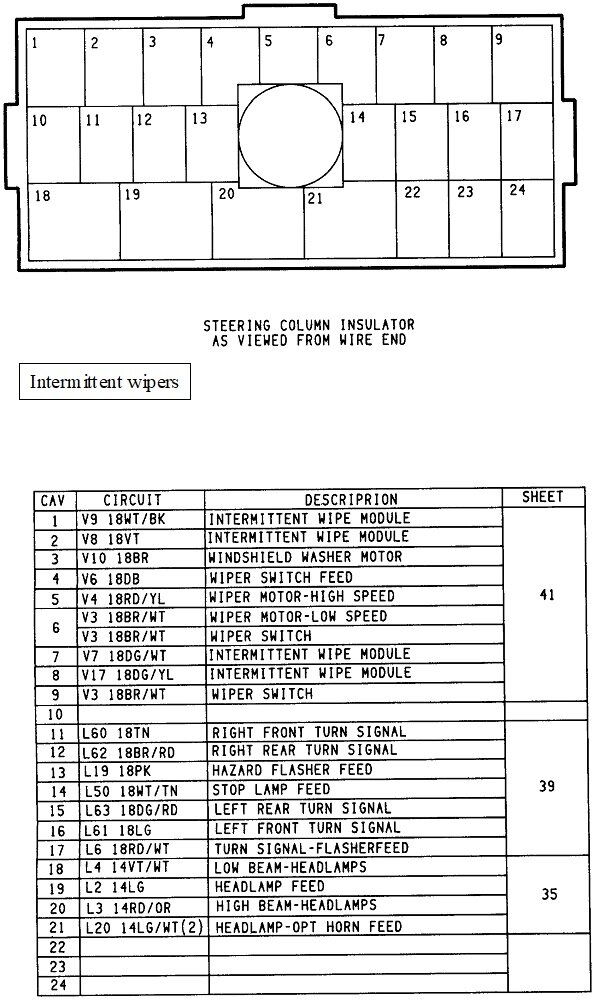
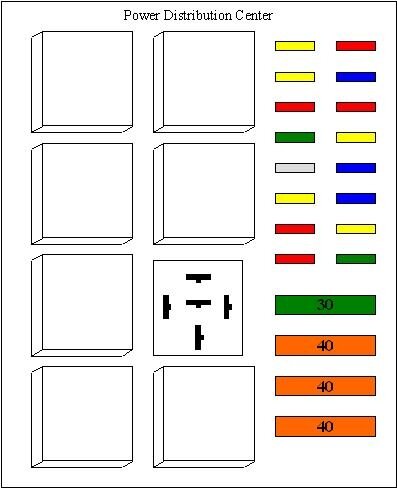
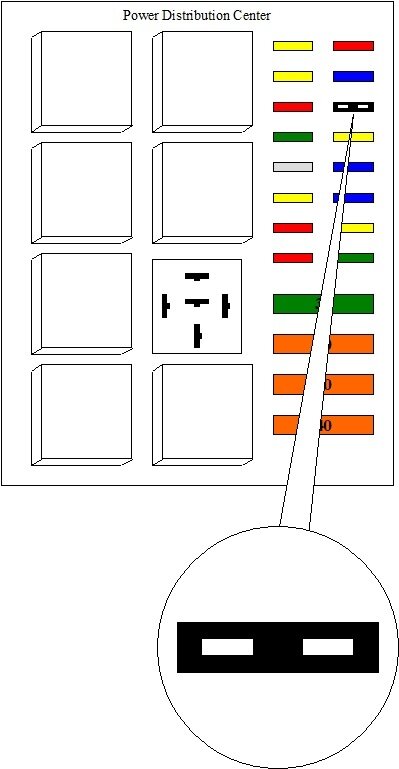
Getting back to your brake lights, to catch anyone else up, these first two drawings are for the Power Distribution Center, (PDC / under-hood fuse box). The next two are for the Junction Box, (inside fuse box). I added a red arrow pointing to fuse # 7 that powers the brake lights. Note fuse # 7 also runs the key-in buzzer, so if that buzzer works, you know the fuse is okay.
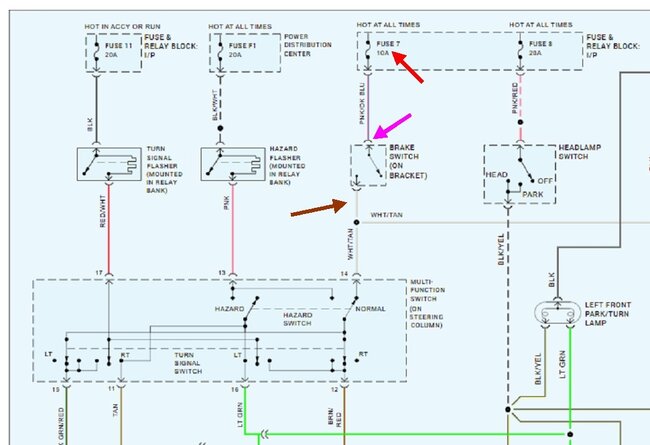
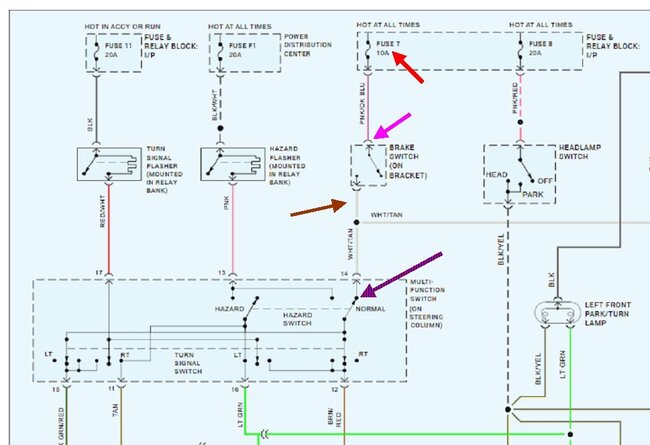
To continue on, the next step is to check for 12 volts on that white / tan wire at the multifunction switch connector. This switch design is a real lot easier to remove than the older style, but there's still some work involved. We can skip ahead in hopes the switch is okay, then back-track if necessary. The common problem with this switch is the right half of hazard switch where the white / tan wire comes in on terminal # 14 When that part develops an arced or pitted contact, current to the brake lights can't get through. A potential clue is if you hold the brake pedal down, the brake lights might flicker when "irritating" the hazard switch. That switch can also become deformed inside and short intermittently, blowing fuse # 7.
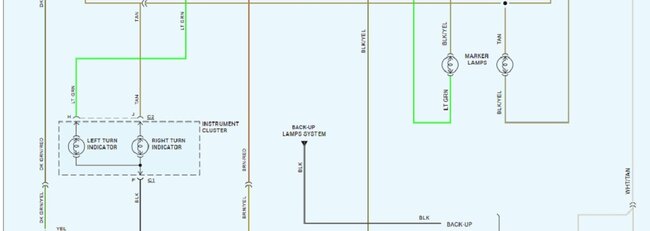
Also note 12 volts for the signals comes in on a different circuit from fuse # 11, then through the flasher, and to the signal switch on terminal # 17. Being on a different circuit, this is why the signals might work while the brake lights don't, or the other way around
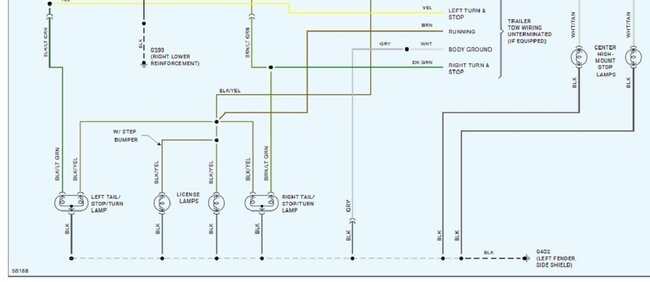
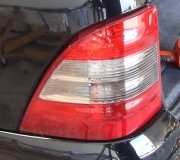
The easiest way to proceed is to go back to the tail light housings and check for 12 volts at the sockets. If you don't have a helper, use a stick from the driver's seat to the brake pedal to hold the pedal down a little. On the right side, look for 12 volts on the brown / light green wire. If it's there, that bulb should light up. If there's no 12 volts there, have a helper turn the signal switch to the left-turn position. That leaves the signal switch contact connected to the brake light switch, but it slides the contacts across each other. That can identify a defective switch contact.
Do the same for the left rear brake light. Look for 12 volts on the black / light green wire. If there's 0.0 volts, turn the signal switch to the right. If that makes the left brake light work, suspect the signal switch.
If you find 12 volts on either wire at the rear sockets, at any time, that proves the wiring is okay. If you never find 12 volts at the rear, it's then that we have to go back to the signal switch. Once removed, there's a couple of ways to approach it. If you can get a test light or voltmeter probe in there, back-probe the connector to check for voltage. Another way is to use a small jumper wire to connect the white / tan wire, (terminal 14), to one of the brake light wires, (brown / red terminal # 12 or green / red terminal # 15). That bypasses the signal switch, and one brake light will work if the rest of the circuitry is okay.
Notice too, to add confusion to this story, the two brake light wires change color at a connector. The dark green and the brown stay the same, but the colors of the tracers change from red to yellow on both wires. I mention that so you don't get excited when the wire you expect to find is different.
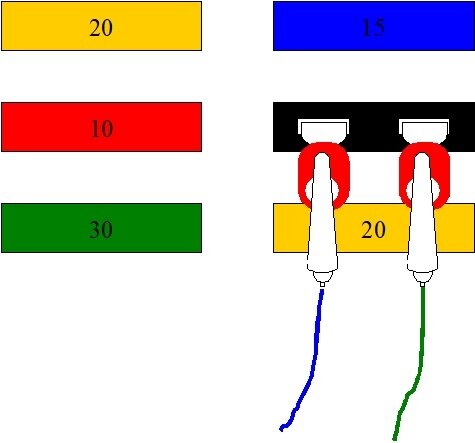
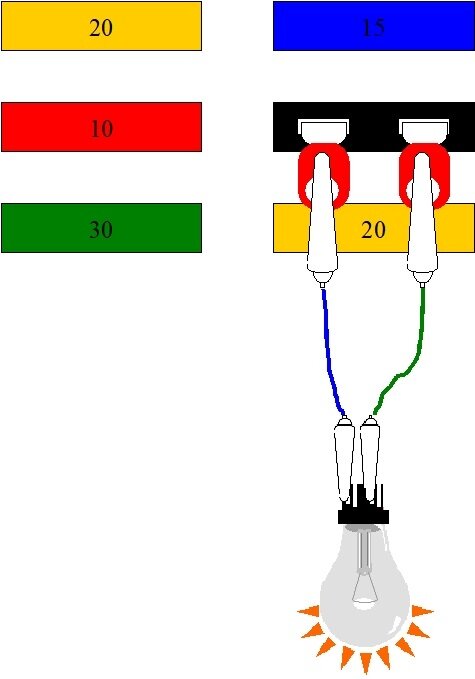
During any of these tests, if you should find one of them causes the fuse to blow, I have a trick to finding the short without constantly wasting a lot of fuses. I'll post the steps if that becomes necessary.
Images (Click to make bigger)
Monday, February 24th, 2025 AT 4:44 PM
