Welcome to 2CarPros.
If the other controls work and only the mode control is not the issue is not the fuse as it provides all of the power to the HVAC controls as well as the AC relay. It is fuse 30 in the under dash box.
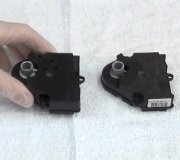
For the motor, that is likely a dealer only item, unless you can find a used one.
For the mode motor
Honda shows part number 79140-SDN-A01 for the 2 door unit and 79140-SDA-A01 for the 4 door.
Hondapartsnow. Com
Here are the tests for that motor for both the 2 and 4 door version.
To do these tests it would be easier to remove the mode motor first. Or leave it installed and if the motor moves you could move it using a couple of jumper wires to the power terminals as needed until you found a new motor.
Mode Control Motor Test
4-door
1. Disconnect the 7Pin connector from the mode control motor.
NOTE: Incorrectly applying power and ground to the mode control motor will damage it.
Follow the instructions carefully.
2. Connect battery power to the No.2 terminal of the mode control motor, and ground the No.1 terminal; the mode control motor should run smoothly, and stop at Vent. If it doesn't, reverse the connections; the mode control motor should run smoothly, and stop at Defrost. When the mode control motor stops running, disconnect battery power immediately.
3. If the mode control motor did not run in step 2, remove it, then check the mode control linkage and doors for smooth movement.
- If the linkage and doors move smoothly, replace the mode control motor.
- If the linkage or doors stick or bind, repair them as needed.
- If the mode control motor runs smoothly, go to step 4.
4. Use a digital multimeter with an output of 1 mA or less at the 20 kOhm range. With the mode control motor running as in step 2, check for continuity between the No.3, 4, 5 and 6 terminals and the No.7 terminal individually. There should be continuity for a moment at each terminal as the motor moves past the switch's terminal.
5. If there is no continuity for a moment at each terminal, replace the mode control motor.
2-door
1. Disconnect the 10P connector from the mode control motor.
NOTE: Incorrectly applying power and ground to the mode control motor will damage it.
Follow the instructions carefully.
2. Connect battery power to the No.2 terminal of the mode control motor, and ground the No.1 terminal; the mode control motor should run smoothly, and stop at Vent. If it doesn't, reverse the connections; the mode control motor should run smoothly, and stop at Defrost. When the mode control motor stops running, disconnect battery power immediately.
3. If the mode control motor did not run in step 2, remove it, then check the mode control linkage and doors for smooth movement.
- If the linkage and doors move smoothly, replace the mode control motor.
- If the linkage or doors stick or bind, repair them as needed.
- If the mode control motor runs smoothly, go to step 4.
4. Use a digital multi-meter with an output of 1 mA or less at the 20 kOhm range. With the mode control motor running as in step 2, check for continuity between the No.6, 7, 8 and 9 terminals and the No.10 terminal individually. There should be continuity for a moment at each terminal as the motor moves past the switch's terminal.
5. If there is no continuity for a moment at each terminal, replace the mode control motor.
Images (Click to make bigger)
Tuesday, December 1st, 2020 AT 12:52 PM
(Merged)


