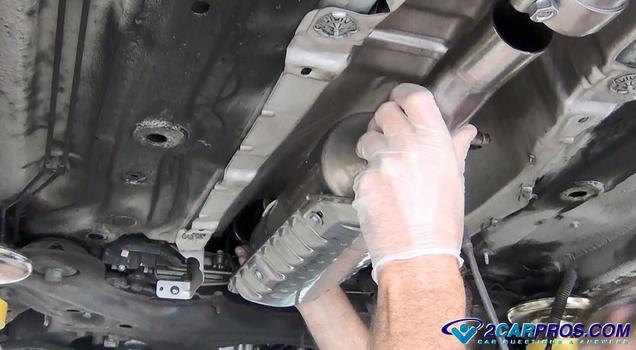
Disassembling the exhaust is a must when replacing system components such as the catalytic converter or muffler and when repairing other parts of the car such as removing the transmission, transfer case or fuel tank. All exhaust systems are generally set up the same and are not that difficult to remove.
What goes wrong?
Heat and moisture play a big part in the life of an exhaust system and neither is good for nuts, bolts and gaskets. This repetition of cycles can cause threads of the nut to seize and bolts to break when removing. This is why it's a good idea to treat metal parts with an anti-rust well before work begins. Allow the system to cool sufficiently to avoid burns.
Getting ready
Unless you are working on a lifted 4x4 you will need to raise the car and support it on jack stands which should be done on level ground. Have something you can put underneath such as a creeper or old blanket to lay on. Use eye protection because rust particles will become airborne when working with the system, gloves are a good idea as well.
Basic Steps
- Disconnect battery
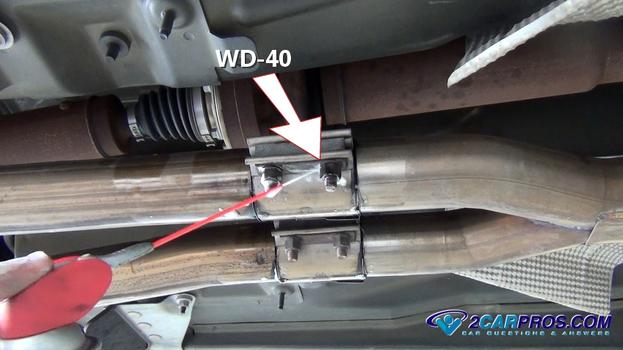
- Apply WD40 or equivalent to nuts and bolts
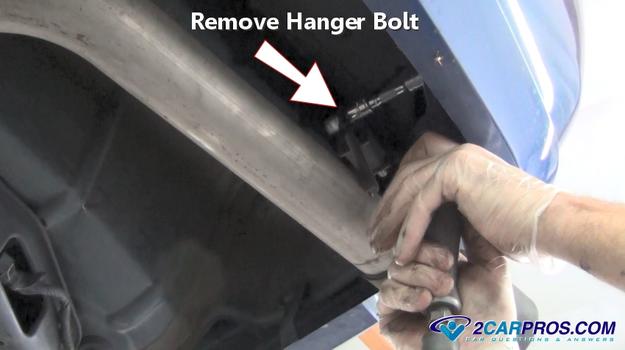
- Remove rear hangers
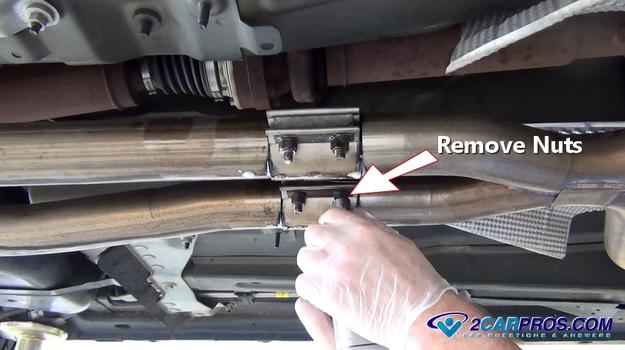
- Unbolt muffler clamp and remove muffler
- Disconnect secondary transfer tubes
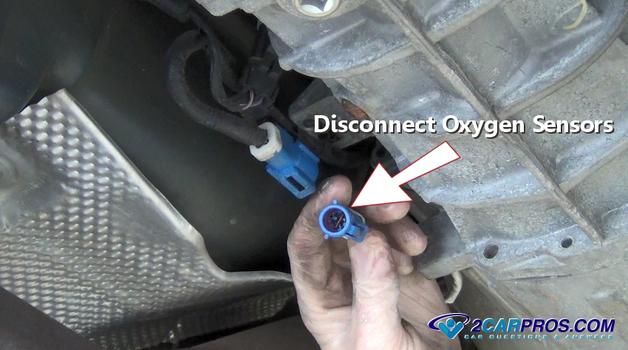
- Undo oxygen sensor electrical connectors
- Remove catalytic converter
- Disconnect head pipe
- Remove exhaust manifold
Let's Begin
- Start by removing the battery negative cable to avoid a short circuit. Cutting
power the car and namely the starter motor which most exhaust system run close
to is a good idea.
- Apply antirust like WD40 to all nuts and bolts of the system and allow it
to sit for at least an hour. The system may have either at the secondary tubes
or muffler slip joints the antirust should be applied to as well.
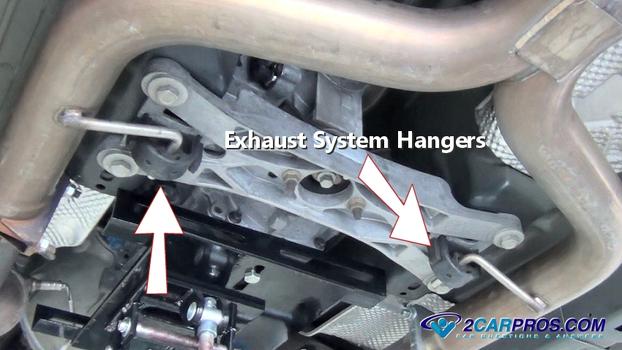
- Identify the system hangers which aids in the support of the system under
the car frame or body. When removing parts it's good to know what parts with
remain at particular points of the disassembly.
- Use good tools to break the exhaust fasteners loose this will help you see
if you have any problem child's such a seized nut or bolt.
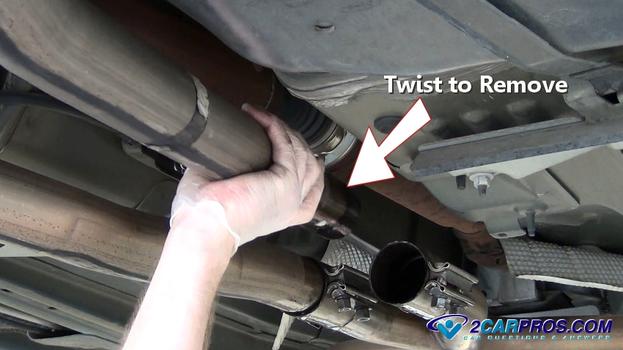
- Grasp tubes firmly and twist back and forth while pulling outward to disconnect
secondary exhaust or mufflers. A mallet can be used to help jar the tube loose.
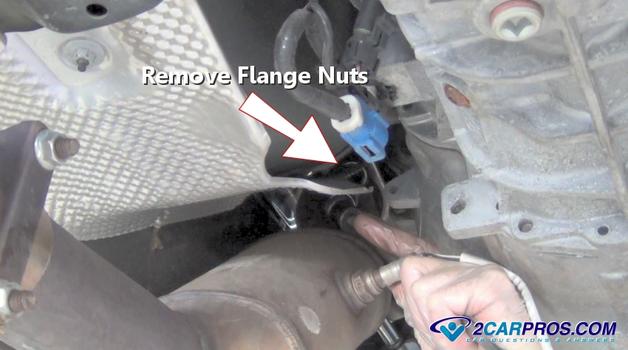
- Disconnect the oxygen sensors and then remove the catalytic converter head
pipe bolts, be ready to hang onto it. If the converter falls and strikes to
ground it can break apart internally which can lead to
replacement.
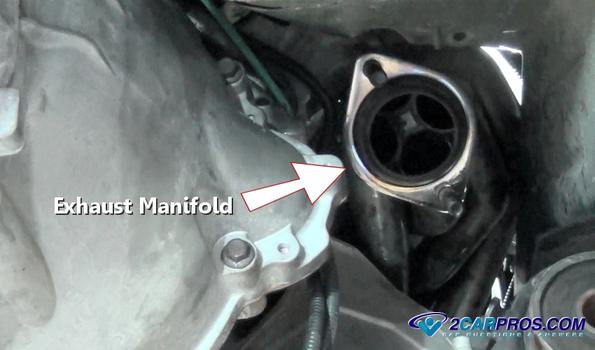
- The final item of the system is the exhaust manifolds which if the spark plugs interfere with the removal need to be removed prier. Loosen the manifold bolts evenly to remove the manifolds, these can be heavy.
Reassembly
- Tighten exhaust components evenly and at an equal position, do not pull
down or push up when tightening. This will cause the system to misalign creating
exhaust leaks due to irregular mating surfaces. Always use a
torque wrench and follow manufacturers
tighten recommendations.
- Have new gaskets ready for reassembly, old gaskets have a tendency to fall
apart when the system is disassembled.
- Inspect mounting bolts and nuts and replace if stripped or broken
Let's See!
Apply WD40 to all mounting and manifold flange bolts to ease removal.
Remove tube connector nuts to start to disassemble.
Remove rear exhaust system hanger bolts to allow more room.
Twist and pull simultaneously to remove secondary tubes.
Locate and disconnect all oxygen sensors
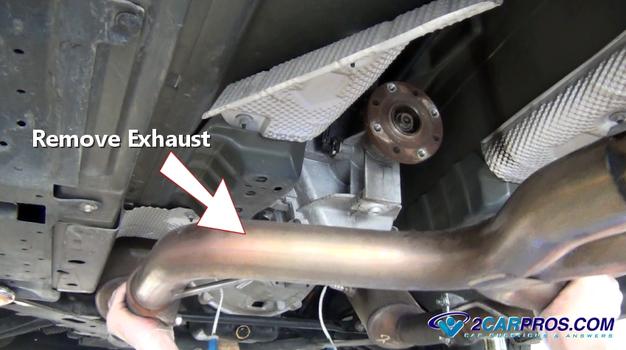
Locate and remove flange mounting nuts or bolts, the primary section of the system will become loose. The primary system will need to be pulled back away from the exhaust manifolds before complete removal.
Remove primary exhaust hangers.
Firmly grasp the primary system and pull outward to remove.
Inspect the exhaust manifold flange for damage. (Note: Some systems use a gasket to seal the head pipe to the flange.)
Questions?
Our certified technicians are ready to answer exhaust system questions for free. We hope you saved money and learned from this guide. We are creating a full set of car repair guides. Please subscribe to our 2CarPros YouTube channel and check back often for new videos which are uploaded regularly.
