Introduction
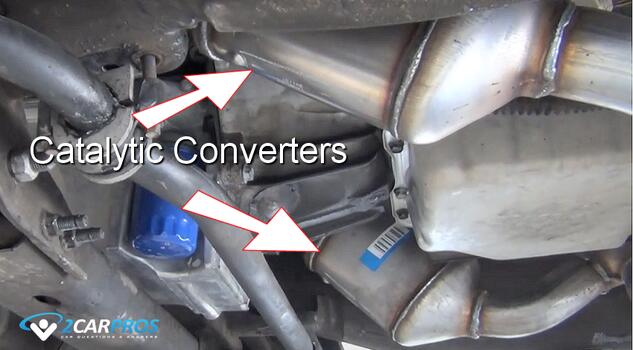
The catalytic converter is a critical component of your vehicle's exhaust system, responsible for reducing harmful emissions by converting toxic gases into less harmful substances. This service guide will help you save money by replacing the part yourself, or at least see what you are paying for when having it done at a repair shop.
Tools and Materials Needed
- New catalytic converter
- Socket set and ratchet (various sizes)
- Wrenches (metric and SAE as needed)
- Penetrating oil (e.g., WD-40)
- Jack and jack stands
- Safety goggles and gloves
- Oxygen sensor socket (optional)
- Torque wrench
- Exhaust sealant (optional)
- Anti-seize compound (optional)
Park your vehicle on a level surface and set the parking brake. If necessary, block the rear wheels to prevent the vehicle from rolling.
Catalytic Converter Replacement
Begin with the car safely supported with jack stands high enough to work on the exhaust system. Make sure the car's engine is cold which will ensure the exhaust system being cool enough to work on. Please wear protective gloves and eyewear. Replacing a catalytic converter can be a manageable DIY task with the right tools and approach.
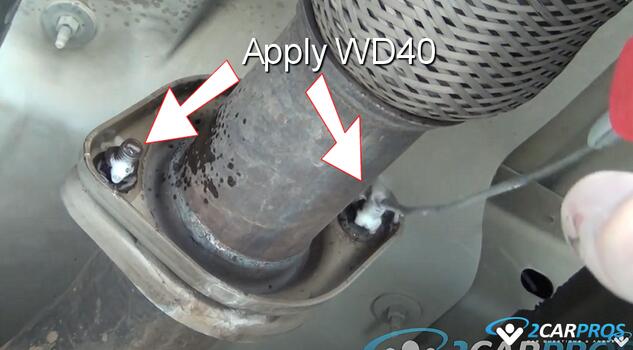
1. You will get a better result if you apply WD40 or an equivalent to the front exhaust flange and tail pipe flange connection bolts, along with the oxygen sensors before you begin. Allow time to pass for the penetrating oil to do its job while dissolving rust.
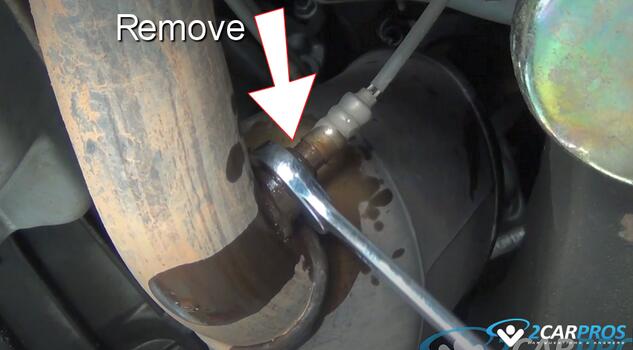
2. While the penetrating oil is settling in, locate and disconnect the oxygen sensor electrical connectors that are mounted on the catalytic converter, and sometimes in the head pipe. You can leave the oxygen sensor plugged into the wiring harness and it will just twist, which is not a problem.
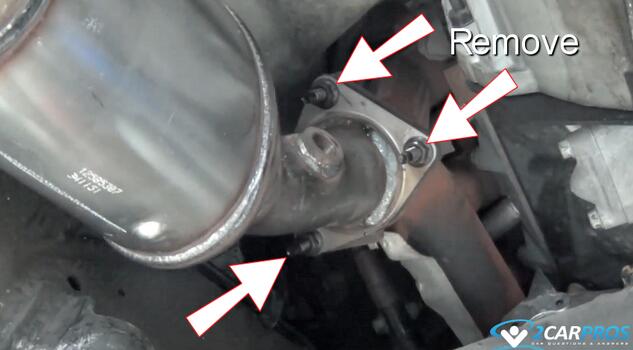
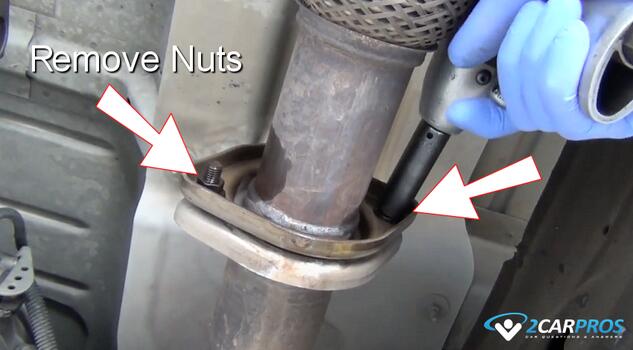
3. Remove the catalytic converter head pipe nuts, typically there will be two to three nuts, these were 15mm but yours might be different, this will help the converter come loose from the exhaust manifold.
4. Continue by removing the exhaust pipe coupler mounting nuts using a 15mm or 16mm wrench or socket at the rear of the catalytic converter. Once the rear exhaust mount has been removed use a plastic or rubber hammer to separate the muffler from the catalytic converter outlet pipe. It may require some wiggling to free it from its position.
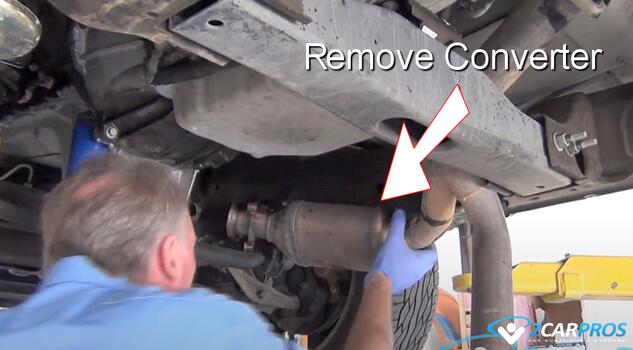
5. Grasp the catalytic converter with both hands and maneuver it out from the exhaust manifold and rear exhaust system. Some catalytic converter's have a heat shield which can be sharp so be carful not to cut yourself.
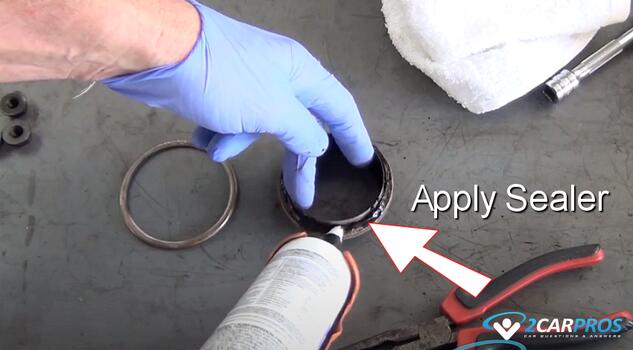
6. Match the old converter to the new unit to ensure a proper installation. Use a gasket scraper and a small wire brush to clean the gasket sealing surfaces, this will help the new gasket conform to the sealing surface which will avoid leaks. Also, apply a small amount of heat resistant gasket sealer.
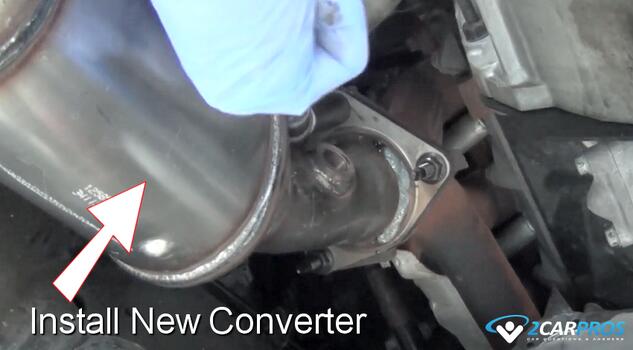
7. The new catalytic converter is now ready for installation, apply a small amount of anti-seize compound to the threads of the bolts. Gently position the catalytic converter back up into the exhaust manifold flange making sure the gasket is still in position. Guide the flange coupler onto the head pipe over the exhaust manifold studs. Some applications will use bolts instead of nuts, in which case simply align the bolt holes.
8. Hand thread in the mounting nuts or bolts and but do not tighten. Use a socket to take up the slack while still leaving them loose. The final tightening will be done after the rear of the catalytic converter outlet pipe has been reconnected. If you tighten these nuts or bolts prematurely it will cause a strain, and a possible leak as the unit will need to be forced into position to connect the rear of the unit. Look up the torque specs for your particular job for the final tighten and you are all set.
9. Complete the installation by reassembling the heat shields and oxygen sensors and allow the sealant to dry completely before starting the engine.
Conclusion
Each application will vary, and some converters may need to be cut out using a Sawzall, and then welded up once the new catalytic converter has been installed. They also make a exhaust pipe repair kit that is basically a wide clamp which you can get from Amazon or the local parts store to put the pipes back together. Replacing a catalytic converter is a manageable DIY task for those with basic mechanical skills and tools.
Watch the Video!
Please watch this video of the job being done to glean additional helpful information.
Credits
This guide knowledge base was created by the 2CarPros Team, and by Ken Lavacot: Automobile repair shop owner and certified master automobile technician of over 30 years. If you have question or need help please ask one of our experts we are happy to help. Please visit our 2CarPros YouTube Channel for additional car repairs.


