REMOVAL & INSTALLATION
Removal
Disconnect battery cable. Remove air cleaner. Drain cooling system. Remove upper radiator hose. Remove shift lever boot, shifter assembly and starter.
Raise and support vehicle. Remove protective cover from under engine (if equipped). Remove clutch slave cylinder with hydraulic line connected. Disconnect front exhaust pipe from manifold and converter. Remove exhaust pipe from vehicle.
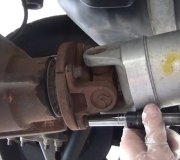
Disconnect speedometer cable and electrical leads from transmission. Remove drive shaft(s). Insert plug into extension housing to prevent oil spillage.
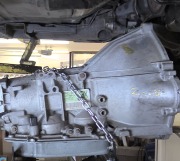
Support engine. Support transmission with transmission jack. Remove rear support crossmember. Remove transmission-to-engine bolts. Pull transmission to rear. Lower and remove transmission from vehicle.
Mark pressure plate and flywheel for reassembly reference. Loosen pressure plate attaching bolts alternately and evenly until pressure plate is released. Remove clutch disc and pressure plate.
Installation
Use aligning tool to center clutch disc on flywheel. Tighten pressure plate bolts alternately and evenly in a diagonal pattern to 14 ft. Lbs. (18 N.M).
Use feeler gauge and Diaphragm Aligner (09302-20021) to measure gap between spring tips and tool. If gap is larger then.020" (.50 mm), use Diaphragm Aligner (09301-00012) to bend springs into alignment.
Apply molybdenum disulphide grease to release fork and hub, hub and lever, hub and oil seal and hub and bushing. Apply grease to inside of bearing and inside clutch disc splines. Reverse removal procedure to complete installation.
SPONSORED LINKS
Wednesday, March 17th, 2010 AT 5:59 AM


