Hi bigplayRay,
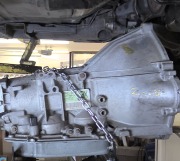
Here are the procedures for removal/installation of the transmission.
The labor time for 4WD is 9.8 hours.
RWD is 6.1 hours.
You decide which is smarter.
Removal (1995 2WD 3.0L V6 & 4WD 2.4L 4-Cyl.)
1. Disconnect negative battery cable. Remove transmission oil dipstick, dipstick tube and "O" ring. Disconnect throttle valve cable from throttle body.
2. Raise and support vehicle. Remove lower engine cover. Remove starter. Disconnect shift linkage at transmission. On 4WD models, remove transfer case shift lever from transmission.
3. On 2WD models, disconnect front exhaust pipe at exhaust manifold. Remove front exhaust pipe support bracket. It may be necessary to remove front exhaust pipe.
4. On all models, disconnect necessary electrical connectors for transmission removal. Remove transmission oil cooler pipes and brackets as necessary.
5. Support transmission with floor jack. On 2WD models, remove rear transmission mount from rear of transmission. On all models, remove transmission crossmember located below transmission.
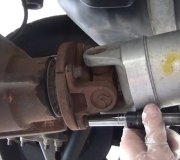
6. Place reference marks on drive shaft flanges for reassembly reference. Remove drive shaft(s) as necessary. On 2WD models, remove stabilizer bar.
7. On all models, remove stiffener plates located on each side of cylinder block. Stiffener plate fits between side of cylinder block and front of transmission.
8. Remove cover from front of transmission for access to torque converter bolts. Remove torque converter bolts. Remove transmission-to-cylinder block bolts. Lower transmission from vehicle.
Installation (1995 2WD 3.0L V6 & 4WD 2.4L 4-Cyl.)
1. Before installing transmission, use dial indicator to check drive plate runout. Drive plate runout should be checked right next to starter ring on drive plate. Replace drive plate runout if runout exceeds.0079" (.200 mm).
2. Install torque converter on transmission. To ensure torque converter is fully seated, torque converter depth should be checked. Using straightedge and caliper, measure torque converter depth from torque converter bolt lug on torque converter to surface on transmission.
3. Torque converter depth should be more than.787" (20.00 mm). If torque converter depth is less than specified, check for improperly seated torque converter.
4. To install, reverse removal procedure. Tighten all bolts/nuts to specification. When installing torque converter bolts, apply Loctite to torque converter bolt threads before installing.
5. Use NEW gasket when installing front exhaust pipe. Adjust all cables, shift linkages and fill with ATF.
Removal (1995 4WD 3.0L V6)
1. Disconnect negative battery cable. Remove transmission oil dipstick, dipstick tube and "O" ring. Disconnect throttle valve cable from throttle body.
2. Raise and support vehicle. Remove lower engine cover. Disconnect shift linkage at transmission. Disconnect shift linkage for transfer case at transfer case shift linkage cross shaft located at rear of transfer case. Remove transfer case shift linkage cross shaft.
3. It may be necessary to remove front exhaust pipe located between exhaust manifolds and catalytic converter on rear exhaust pipe. Disconnect speedometer cable, necessary electrical connectors for transmission and transfer case removal. Remove transmission oil cooler hose, pipes and brackets as necessary.
4. It may be necessary to lower or remove front differential assembly for transmission removal. Support transmission with floor jack. Remove transmission crossmember located below transmission and transfer case. Place reference marks on drive shaft flanges for reassembly reference. Remove drive shafts.
5. Remove stabilizer bar. Remove stiffener plates located on each side of cylinder block. Stiffener plate fits between side of cylinder block and front of transmission.
6. Remove cover from front of transmission for access to torque converter bolts. Remove torque converter bolts. Remove transmission-to-cylinder block bolts. Lower transmission with transfer case from vehicle.
Installation (1995 4WD 3.0L V6)
1. Before installing transmission, use dial indicator to check drive plate runout. Drive plate runout should be checked right next to starter ring on drive plate. Replace drive plate if runout exceeds.0079" (.200 mm).
2. Install torque converter on transmission. To ensure torque converter is fully seated, torque converter depth should be checked. Using straightedge and caliper, measure torque converter depth from torque converter bolt lug on torque converter to surface on transmission.
3. Torque converter depth should be more than.709" (18.00 mm). If torque converter depth is less than specified, check for improperly seated torque converter.
4. To install, reverse removal procedure. Tighten all bolts/nuts to specification. When installing torque converter bolts, apply Loctite to torque converter bolt threads before installing.
5. Use NEW gasket when installing front exhaust pipe. Adjust all cables, shift linkages and fill with ATF.
SPONSORED LINKS
Tuesday, June 29th, 2010 AT 11:46 AM


