Welcome back:
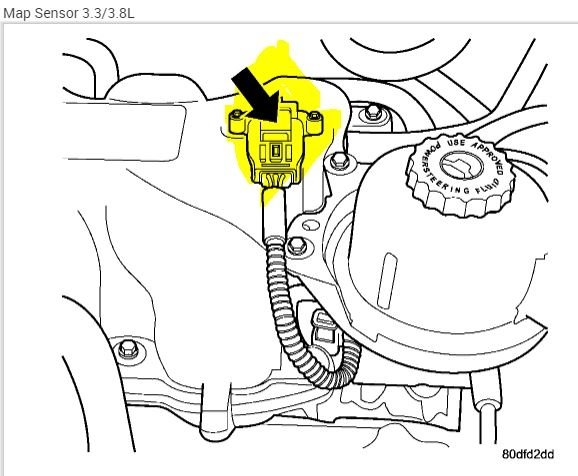
Yes, the reservoir will need removed and the upper intake. The only other thing I can think of is the MAP sensor, but feel it would be more likely to cause a random misfire and not just that one. Also, a compression variation in that cylinder can cause it.
Here are the directions for the intake removal:
UPPER INTAKE MANIFOLD
REMOVAL- UPPER INTAKE MANIFOLD
1. Disconnect battery negative cable.
2. Disconnect Inlet Air Temperature (IAT) sensor electrical connector.
3. Remove air inlet resonator to throttle body hose assembly.
4. Disconnect throttle and speed control cables from throttle body.
5. Disconnect make-up air hose support clip from throttle cable bracket.
6. Disconnect the Automatic Idle Speed (AIS) motor and Throttle Position Sensor (TPS) wiring connectors from throttle body.
7. Disconnect the Manifold Absolute Pressure (MAP) sensor electrical connector.
8. Disconnect the vapor purge vacuum hose from throttle body.
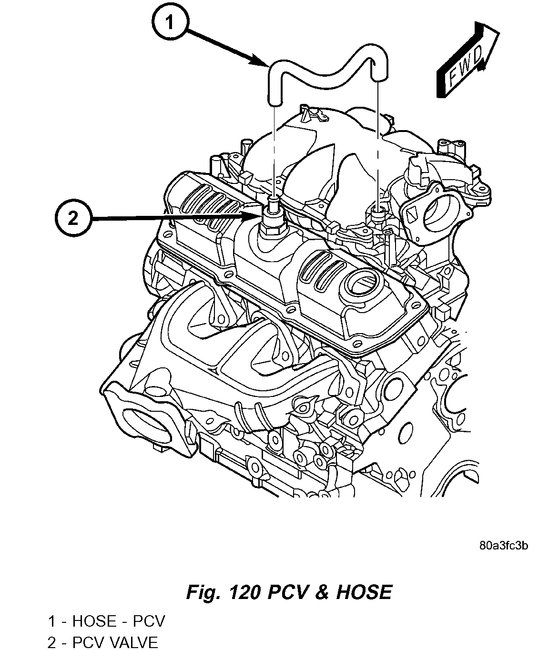
Fig.120
pic 1
9. Disconnect the PCV hose (Fig. 120).
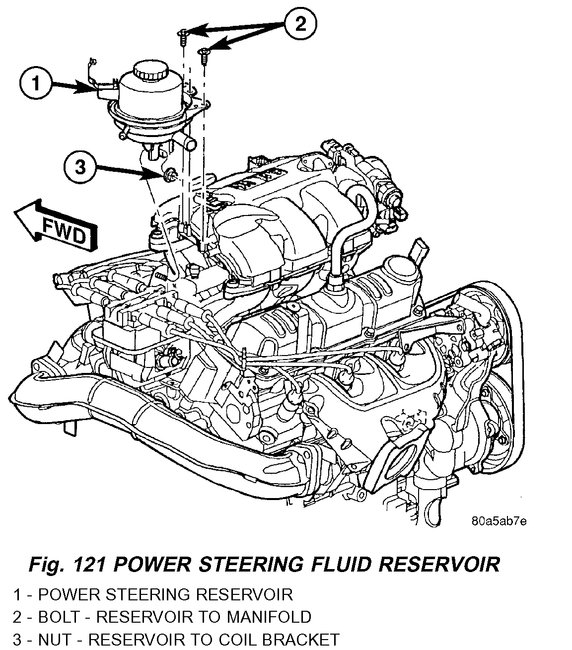
Fig.121
pic 2
10. Remove the power steering reservoir attaching bolts and only loosen the nut (Fig. 121). Lift reservoir up to disengage lower mount from stud. Set reservoir aside. Do not disconnect hose.
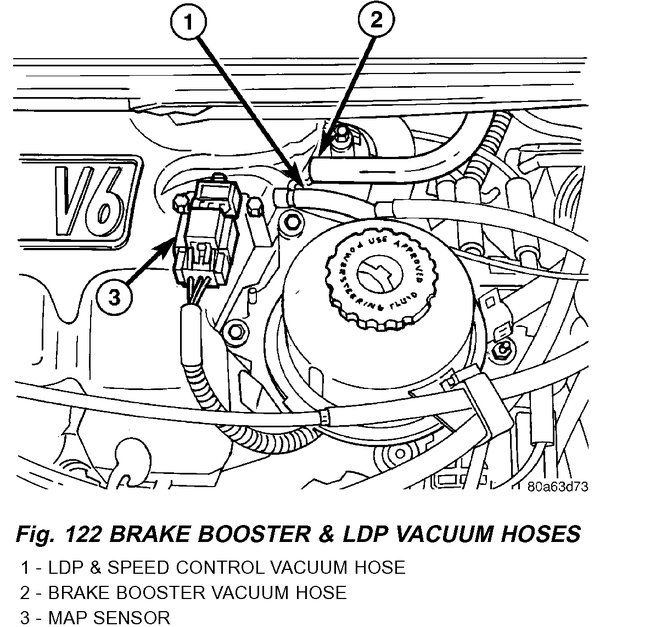
Fig.122
pic 3
11. Disconnect the brake booster and Leak Detection Pump (LDP) hoses from intake manifold (Fig. 122).
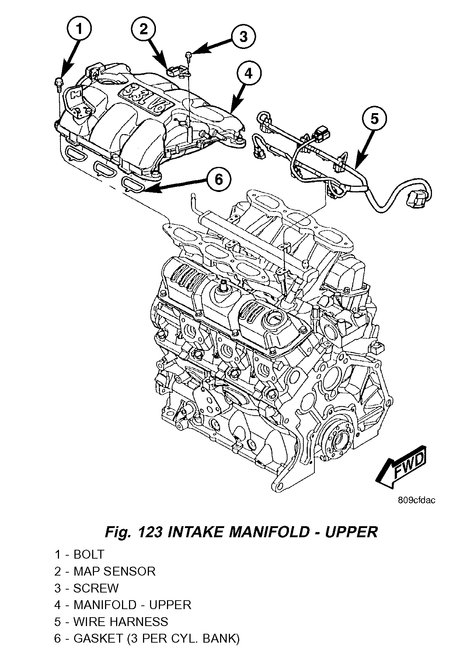
Fig.123
pic 4
12. Remove intake manifold bolts and remove the manifold (Fig. 123).
13. Cover the lower intake manifold with a suitable cover while the upper manifold is removed.
14. Clean and inspect the upper intake manifold.
CLEANING
1. Discard gasket(s).
2. Clean all sealing surfaces.
INSPECTION
Check manifold for:
- Damage and cracks.
- Mounting surface distortion by using a straightedge and thickness gauge.
INSTALLATION - UPPER INTAKE MANIFOLD
1. If the following components were removed from manifold, install and tighten to specifications:
CAUTION: The special screws used for the composite manifold attached components must be installed slowly using hand tools only. This requirement is to prevent the melting of material that causes stripped threads. If threads become stripped, an oversize repair screw is available.
- MAP sensor - 1.7 Nm (15 in. Lbs.)
- Throttle cable bracket - 5.6 Nm (50 in. Lbs.)
2. Remove covering on lower intake manifold and clean surfaces.
3. Inspect manifold gasket condition. Gaskets can be re-used, if not damaged. To replace, remove gasket from upper manifold (Fig. 123). Position new gasket in seal channel and press lightly in-place. Repeat procedure for each gasket position.
Fig.124
pic 5
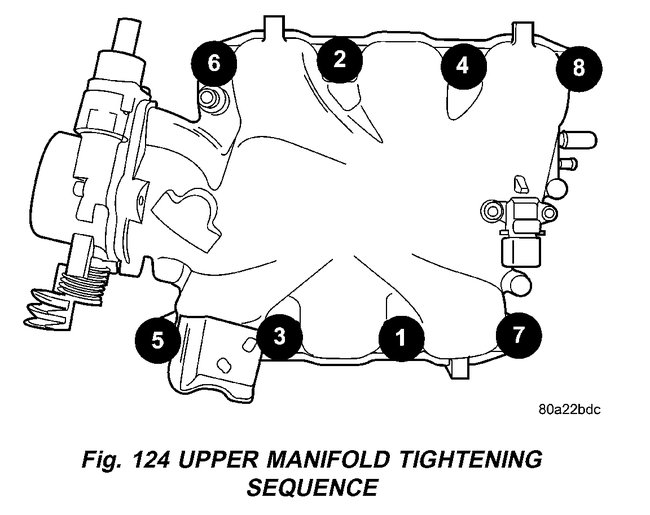
4. Position upper manifold on lower manifold (Fig. 123). Install and tighten bolts to 12 Nm (105 in. Lbs.) Following torque sequence in (Fig. 124).
5. Connect the MAP sensor electrical connector.
6. Connect the brake booster and LDP vacuum hose to intake manifold (Fig. 122).
CAUTION: The special screws used for attaching the EGR tube and power steering reservoir to the manifold must be installed slowly using hand tools only. This requirement is to prevent the melting of material that causes stripped threads. If threads become stripped, an oversize repair screw is available.
7. Install the power steering reservoir (Fig. 121). Tighten screws to manifold to 5.6 Nm (50 in. Lbs.).
8. Connect throttle and speed control cables to throttle body.
9. Attach make up air hose clip into the hole in the throttle cable bracket.
10. Connect the wiring connectors to the Throttle Position Sensor (TPS) and Automatic Idle Speed (AIS) motor.
11. Install air cleaner and air inlet hose assembly.
12. Connect the Inlet Air Temperature (IAT) sensor electrical connector.
13. Connect battery negative cable.
________________________________
Let me know if you need anything.
Joe
Images (Click to make bigger)
Monday, July 27th, 2020 AT 9:39 AM
(Merged)
