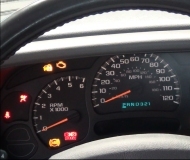
It seems like a vapor lock and rough idle problem, when car is warm

Tiny
JINGYUGU
  • MEMBER
  • 1993 TOYOTA PICKUP
  • 2.4L
  • 4 CYL
  • 2WD
  • AUTOMATIC
  • 167,000 MILES
The car starts and drives fine in the morning when the car is cold. Once it's driven and it needs to restart, it begins to choke out. I have to force on the gas pedal for about one to two minutes, it will start to drive smoothly again. It seems like a vapor lock and rough idle problem, because the problem starts to act up only when the car is warm.
The car is well maintained regularly. This problem starts only two to three weeks ago.
I don't know if it is an coincidence. I usually only add Shell's Super gas, but I had to add some non-brand gas once about three weeks ago.
Thursday, May 16th, 2019 AT 3:40 PM

7 Replies

Tiny
JACOBANDNICKOLAS
  • MECHANIC
  • 109,644 POSTS
Welcome to 2CarPros.

We need to start at the beginning because there are a few different things that can cause this.

First, I need you to check for diagnostic trouble codes.

Here is a link that explains how to get them on a Toyota OBD1 system. No special tools are required other than a small jumper wire or even a paper clip.

https://www.2carpros.com/articles/toyota-trouble-code-definitions-and-code-gathering-method-1990-1995

____________________________

Once you do that, let me know what codes are found.

Next, based on your description, I question if there is a fuel pressure regulator issue, fuel pump issue, or even a partially plugged catalytic converter. Take a look through these links and inspect these things.

https://www.2carpros.com/articles/bad-catalytic-converter-symptoms

https://www.2carpros.com/articles/how-to-test-a-catalytic-converter

https://www.2carpros.com/articles/how-to-check-fuel-system-pressure-and-regulator

_______________________________

Here are the directions for testing fuel pressure specific to your vehicle. The attached pictures correlate with these directions.

FUEL PRESSURE TEST
SET-UP
1. Check that the battery voltage is above 12 volts.
2. Disconnect negative (-) terminal cable from of the battery.

pic 1

3. Disconnect the wiring connector from the cold start injector.
4. Put a suitable container or shop towel under the cold start injector pipe.

pic 2

5. Slowly loosen the union bolts of the cold start injector pipe and remove the bolts, cold start injector pipe and 4 gaskets.
6. Drain the fuel from the delivery pipe.

pic 3

7. Install a gasket, fuel pressure gauge, another gasket and union bolt to the delivery pipe (fuel rail) as shown in the illustration. (SST 09268-45012)
8. Wipe off any splattered gasoline.
9. Reconnect the negative (-) terminal cable to the battery.

CHECK FUEL PRESSURE

pic 4

1. Using jumper, connect terminals FP and +B of the DLC1. (SST 09843-18020)
2. Turn the ignition switch ON.

pic 5

3. Measure the fuel pressure.

Fuel pressure: 265 - 304 kPa (38 - 44 psi)

If high. replace the pressure regulator.
If low, check the following parts:
Fuel hoses and connections
Fuel pump
Fuel filter
Pressure regulator
4. Remove SST from the DLC1.
5. Start the engine.

pic 6

6. Disconnect the vacuum hose from the pressure regulator and plug it closed.
7. Measure the fuel pressure at idling.

Fuel pressure: 265 - 304 kPa (38 - 44 psi)

pic 7

8. Reconnect the vacuum hose to the pressure regulator.
9. Measure the fuel pressure at idling.

Fuel pressure: 226 - 265 kPa (33 - 37 psi)

If not within the specified pressure, check the vacuum hose and pressure regulator.

10. Stop the engine. Check that the fuel pressure remains above 147 kPa (21 psi) for 5 minutes after the engine is turned off.
If not within the specification, check the fuel pump. pressure regulator and/or injectors.
11. After checking fuel pressure. disconnect the battery ground strap and carefully remove the fuel pressure gauge to prevent gasoline from splashing.
12. Using new gaskets. reconnect the cold start injector pipe to the delivery pipe and cold start injector.
13. Connect the wiring connector to the cold start injector.
14. Start the engine and check for fuel leakage.

_______________________________

Check these things and let me know what you find.

Take care,
Joe
Was this
answer
helpful?
Yes
No
Thursday, May 16th, 2019 AT 6:58 PM
Tiny
JINGYUGU
  • MEMBER
  • 5 POSTS
Thanks for your reply. I'll do my error codes check this weekend and will let you know the finding once it's done. I hope I can follow all of your instructions and find the answer.
Thanks so much for your help.
Was this
answer
helpful?
Yes
No
Thursday, May 16th, 2019 AT 7:43 PM
Tiny
JACOBANDNICKOLAS
  • MECHANIC
  • 109,644 POSTS
Welcome back:

First, you are very welcome. I will do my best to help. And second, If you run into trouble or have questions, please feel free to ask away. I'm not on the site 24 / 7 but I am on it for a few hours 7 days a week.

Take care,

Joe
Was this
answer
helpful?
Yes
No
Friday, May 17th, 2019 AT 7:15 PM
Tiny
JINGYUGU
  • MEMBER
  • 5 POSTS
Hi Joe, started finding diagnostic codes. However, my diagnostic connector box is different from the linked website picture. The instruction asks to look fro the "Toyota OBD1" by "Using a jumper wire to connect the TE1 and T1 terminals" for my pickup. Please see the picture of my pickup's box attached. It has TE1, but not T1. It has instead, Tc, Ts and Tt. Which one or any other one shall I use? Thanks.
My pickup runs smoothly after I jam the gas petal for a few minutes, when the pickup starts warm and starts to choke. It will sputter a little. But once it pushes the fuel through, it runs smoothly for as long as I've been driving, as long as the pickup is not turned off and starts again. Does not choke any more while the pickup keeps running. Does that mean the gas pump and the fuel delivery system can be okay?
I remember I had the similar problem about two years ago. Sent to a local mechanic, who diagnosed it as an oxygen sensor on the exhaust was faulty. Replaced it. I noticed he cranked up the idle speed quite a lot. The pickup ran well since then and until about three weeks ago.
Do you think it is possible another sensor was the problem?
Thanks again.
Was this
answer
helpful?
Yes
No
Saturday, May 18th, 2019 AT 3:20 PM
Tiny
JINGYUGU
  • MEMBER
  • 5 POSTS
I read online for the 1993 pickup or 4runner, which I vin number says it is, the jump wire should connect +B to fP. Is this right? Is it risky if I connect them wrong? Thanks.
Was this
answer
helpful?
Yes
No
Saturday, May 18th, 2019 AT 5:40 PM
Tiny
JINGYUGU
  • MEMBER
  • 5 POSTS
I jumper wire connected my diagnostic box's +B and fP, the engine check light stays on steadily, no blinking. It gives constant steady blinking, never stops, when I jumper wire connected TE1 with E1.
I cannot find description on this kind of reading. What do you think?
Thanks.
Was this
answer
helpful?
Yes
No
Saturday, May 18th, 2019 AT 6:44 PM
Tiny
JACOBANDNICKOLAS
  • MECHANIC
  • 109,644 POSTS
Welcome back:

TE1 and E1 are correct. If there aren't any codes, the light will continue to flash two times in a series off and constantly continue.

Sorry about the pictures. It won't let me delete them.
Was this
answer
helpful?
Yes
No
Saturday, May 18th, 2019 AT 8:58 PM

Please login or register to post a reply.

Sponsored links