Hello -
First the directions
FWD AXLE SHAFT
Removal
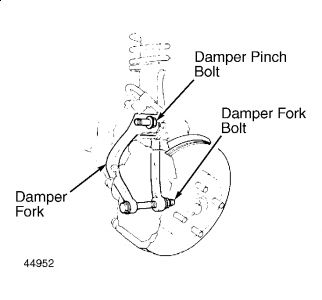
1. Raise and support vehicle. Remove front wheels. Drain transaxle if removing right or both axle shafts. Draining transaxle is unnecessary if removing left axle shaft only. Spread locking tab on spindle nut and remove nut. Remove damper fork bolt and damper pinch bolt. Remove damper fork. See Fig. 1 .

2. Remove lower ball joint cotter pin, and loosen castle nut half length of ball joint threads. Using a ball joint puller, separate ball joint from front hub. Remove ball joint castle nut. Lower control arm and steering knuckle. Pull steering knuckle outward and remove axle shaft from hub assembly. If necessary, use a plastic hammer to drive axle shaft out of hub.
NOTE: DO NOT pull on inner CV joint or disassembly may occur. Be careful not to damage seals.
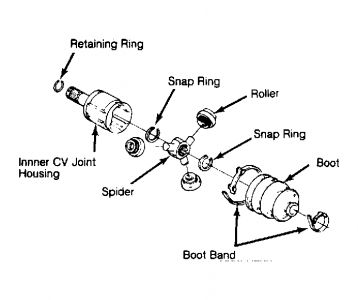
3. Using a large screwdriver, carefully pry inner CV joint and shaft assembly about .5" (12.7 mm) out of transaxle, dislodging retaining ring from its groove at end of drive axle. Grip both sides of inner CV joint and remove axle shaft and CV joint from vehicle.
Installation
1. Slide axle into transaxle or intermediate shaft. Ensure inner joint housing locks into differential side gear groove and joint sub-axle bottoms in differential or intermediate shaft.
2. Install damper fork over drive shaft and onto lower control arm. Install damper in damper fork so aligning tab aligns with slot in damper fork. Loosely install damper pinch bolt using NEW damper fork nut.
3. Pull hub assembly away from axle shaft, and slide axle into hub assembly. Install and lightly tighten spindle shaft nut. Position ball joint in hub. Raise lower control arm using floor jack, and install ball joint nut. Tighten ball joint nut to specification. See TORQUE SPECIFICATIONS .
4. Install and secure cotter pin. Remove floor jack. Tighten spindle nut to specification. Install wheels. Lower vehicle. With vehicle weight on damper, tighten damper pinch bolt to specification. Refill transaxle.
Just a couple of notes. . .. . .. . ..
Make sure the car is properly supported as you will be under it tugging and pulling. . .you don't want it to fall on you so please be careful.
If you are planning to replace just the CV boot. . ..I would HIGHLY recommend to just remove and replace the entire shaft. Many times it is cheaper and much easier.
When pulling the new axle out of the box, it is best to put wire at one end and tie it to the other to keep the shaft from separating. If it does. . ..you most likely will not be able to put it back together. So place the wire on it so it isn't in your way yet it doesn't allow the shaft to separate. Many times there is supposed to be a lock clip inside to prevent this. . ...many times they forget to put it on.
You will need a new nut for sure so please review all of the directions prior to doing to ensure you have all of the part.
If you don't have the tools, you can go to Auto Zone (AZ) or O'Reilly's (OR) and use their tool check out program.
When you are pulling it out or remember you are trying to overcome the Retaining Ring in the pic below that is holding it in. . .. . .. . .it will take a good tug or pry. . .. . ..putting it in isn't too bad.

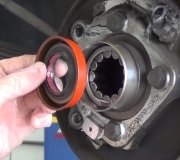
You also may consider changing the transaxle, axle seals. . ..you are there, it is apart. . .. . .I would. AZ also has tools to install these.
Hope that helps. . .. . .. . .be careful and good luck.
Wednesday, August 26th, 2009 AT 7:02 PM


