The heat on my driver’s side sometimes stops working - blend door actuator?

Tiny
CRCOTE320
  • MEMBER
  • 2015 CHEVROLET TAHOE
  • 4WD
  • AUTOMATIC
  • 65,000 MILES
Hi,

If I shut my vehicle off and restart it then it usually starts working again. I’m told this is most likely the driver’s side blend door actuator failing. Can someone please help me locate where this part is in the vehicle and how I would go about replacing it? The dealer wants to charge me $1,300.00. So I’m hoping I can do this myself.
Sunday, December 15th, 2019 AT 11:48 PM

65 Replies

Tiny
DANNY L
  • MECHANIC
  • 5,648 POSTS
Hello, I'm Danny.

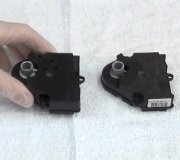
The actuator is located on the HVAC box under the dash. Here is a basic tutorial showing what is involved for its replacement:

https://www.2carpros.com/articles/replace-blend-door-motor

After replacement you will need to perform an actuator re-learn procedure. I've attached the location and replacement steps below. Let me know if you have any further questions on this issue.Hope this helps and thanks for using 2CarPros.
Was this
answer
helpful?
Yes
No
Sunday, December 15th, 2019 AT 11:58 PM
Tiny
EFMARQUARDT
  • MEMBER
  • 1 POST
  • 2014 CHEVROLET TAHOE
  • 130,000 MILES
No heat on the passenger side.
Was this
answer
helpful?
Yes
No
Thursday, September 24th, 2020 AT 10:32 AM (Merged)
Tiny
JACOBANDNICKOLAS
  • MECHANIC
  • 109,896 POSTS
Hi and thanks for using 2CarPros.

Pictures 1 and 2 show the heater box under the dash and the legend of what each component does. You are looking for component 2 in picture 1. Picture 3 shows the actuator being removed. Picture 4 are directions.

Let me know if this helps or if you have other questions.

Take care,
Joe
Was this
answer
helpful?
Yes
No
+2
Thursday, September 24th, 2020 AT 10:32 AM (Merged)
Tiny
TURBOJAY
  • MEMBER
  • 1 POST
The actuator cost me $84.00 all fixed
Was this
answer
helpful?
Yes
No
Thursday, September 24th, 2020 AT 10:32 AM (Merged)
Tiny
JOHNNY CHUN
  • MEMBER
  • 1 POST
Glad I found this site. The rear AC on my 08 Tahoe LTZ was blowing hot. I finally got around to trying to replace the rear blend door actuator. I bought a new actuator from RockAuto several months ago. After I got the rear panel off, I saw that the two actuators were on the backside. I was able to change the top actuator with a 1/4" ratchet and T-15 bit, by just putting my hands back there and feeling around. I think I only fixed part of the problem though. It doesn't blow hot anymore. It blows cool, but not cold. But a definite improvement. Thanks for the help!
Was this
answer
helpful?
Yes
No
Thursday, September 24th, 2020 AT 10:32 AM (Merged)
Tiny
BRYANM4218
  • MEMBER
  • 2 POSTS
I understand this thread is over 6 months old, but I wanted to add my experience in case someone comes across this while in the same predicament.

I have a 2013 Chevrolet Tahoe and the Blend Door Actuator began making a knocking noise. (Once the key was inserted into the ignition and the A/C came on, there would be a loud click/knocking noise coming from the rear A/C located beneath the back side panel on the passengers side of the vehicle.) I was able to remove the plastic coverings and of course, I have the BEHR model, with the Actuators located behind the unit, against the body of the vehicle. I removed the two 7mm bolts that hold both the duct work and blower to the body. I then removed the duct and was able to apply a small amount of force and pull the blower mount slightly away from the body of the vehicle (I did not disconnect blower or clear any lines). At this point I disconnected the plug from the Actuator. To remove the Actuator, I used a Torx bit to remove the 3 screws mounting it to the blower housing. It was tight, but not at all impossible. The top 2 screws can be accessed from the top/left hand side of the unit, the 3rd screw (located on the bottom of the actuator), can be accessed much easier from the bottom near the wheel well where you can actually see the screw. Once I removed the actuator I was able to reconnect the plug and start the vehicle, testing the actuator further to ensure it was truly my problem. I also was able to visually inspect inside the blend door and verify that there was not a break causing the issue.

I hope this helps! I am by no means a "mechanic", simply a guy that doesn't want to pay $1,000.00 for a job that I can do at the house for free! This thread was essentially the only thing I found on the internet related to this model and situation, so thank you all for your help! I did take some photos/video and I will try and upload them as well.
Was this
answer
helpful?
Yes
No
+6
Thursday, September 24th, 2020 AT 10:32 AM (Merged)
Tiny
FRANKY CARDENAS
  • MEMBER
  • 1 POST
Were you able to get the rear actuators out without removing the Freon? Also, how to you perform the calibration for these rear actuators on the 2016 Yukon?
Was this
answer
helpful?
Yes
No
Thursday, September 24th, 2020 AT 10:32 AM (Merged)
Tiny
BRYANM4218
  • MEMBER
  • 2 POSTS
I removed only one actuator and I didn’t have to mess with the Freon. The second actuator was directly beside it and it did not appear that you would need to mess with the Freon to replace it either.

Once you place the key in the ignition, the actuator cycles to self calibrate. When I initially reinstalled it, it wasn’t it the proper position. I was able to simply pull it back off and realign. Once I had it in place, I ran through all settings (A/C above and then to feet), I then tighten everything down and the job was complete. This was on a 2013 Chevroley Tahoe.
Was this
answer
helpful?
Yes
No
+1
Thursday, September 24th, 2020 AT 10:32 AM (Merged)
Tiny
JEFF_WRENCHONIT
  • MEMBER
  • 4 POSTS
  • 2011 CHEVROLET TAHOE
  • 5.3L
  • V8
  • 4WD
  • AUTOMATIC
  • 95,000 MILES
The rear HVAC is blowing hot when the AC is on. I had the dealership look at it and was told that the rear hvac temperature door actuator needed to be replaced. I ordered/received the new part and was able to remove the interior trim from the right/rear of the vehicle to access the rear hvac equipment. The actuator however is located BEHIND the hvac equipment. Pretty much between the blower/ductwork and the outside of the vehicle. My question is how do I pull the unit so I can access/replace the actuator? Do I need to pull the heater lines, and if so, will I lose fluids, etc. And what add'l service will be needed.
Thank You.
Was this
answer
helpful?
Yes
No
Thursday, September 24th, 2020 AT 10:32 AM (Merged)
Tiny
HMAC300
  • MECHANIC
  • 48,601 POSTS
Your pic didnt' come through however try pulling fuse for that for a minute then reinstall with key on it may reset the actuator. See pics for removal air bags need to be disabled.
Was this
answer
helpful?
Yes
No
+1
Thursday, September 24th, 2020 AT 10:32 AM (Merged)
Tiny
KEN L
  • MASTER CERTIFIED MECHANIC
  • 48,380 POSTS
Excellent addition to this thread! Please feel free to use 2CarPros anytime!
Was this
answer
helpful?
Yes
No
Thursday, September 24th, 2020 AT 10:32 AM (Merged)
Tiny
JEFF_WRENCHONIT
  • MEMBER
  • 4 POSTS
I'm going to try to attach the photo again in this reply. The first thing I did was pull the fuse and try to reset the actuator but no luck. The diagrams you provided show how to pull the interior trim.I already got that off with no problem. The sticking point is accessing the actual actuator which is behind the HVAC unit. Hopefully the attached photo will come through and you can see what I mean. Thanks.
Was this
answer
helpful?
Yes
No
+2
Thursday, September 24th, 2020 AT 10:32 AM (Merged)
Tiny
HMAC300
  • MECHANIC
  • 48,601 POSTS
Everything that I have in our manual is sowing the temp actuator in first pic and mode in 2nd pic, it says nothing about pulling the HVAC unit off the truck. I have checked 2010-2012 in both GMC and Chevrolet they both show the same setup. I have no further thing to tell you about this. Unless our manual is wrong. If you have to pull the HVAC unit you will have to blow the charge and evacuate and recharge entire system. It 's the same from 2009-2013.
Was this
answer
helpful?
Yes
No
+1
Thursday, September 24th, 2020 AT 10:32 AM (Merged)
Tiny
HMAC300
  • MECHANIC
  • 48,601 POSTS
Just rechecking your picture look at where the arrow is in this picture I put in. Are you sure that is not the actuator?
Was this
answer
helpful?
Yes
No
+1
Thursday, September 24th, 2020 AT 10:32 AM (Merged)
Tiny
WRENCHTECH
  • MECHANIC
  • 20,761 POSTS
Hi Guys, just wanted to let you know that I checked Alldata and got the exact same info that you did. It's on the outside.
Was this
answer
helpful?
Yes
No
+2
Thursday, September 24th, 2020 AT 10:32 AM (Merged)
Tiny
JEFF_WRENCHONIT
  • MEMBER
  • 4 POSTS
Thanks for the responses guys.
I'm now I'm really stumped! I took a picture of the full unit and you will see that there are no actuators on the face of the HVAC unit like illustrated in the diagrams posted.
I placed the new actuator on top of the HVAC unit and took a picture (see my next post) shooting down from the top, behind the unit. You can barely see the installed/defective actuator and you will see that the shape and tab are the same as the new actuator so I'm pretty confident I'm looking at the right thing!
Like I said.I'm stumped! Anyone have a suggestion on how to proceed? I would hate to have to recharge the system. That's well out of my wheel house and I have no idea where I'd even begin.
Thanks again.
Was this
answer
helpful?
Yes
No
+1
Thursday, September 24th, 2020 AT 10:32 AM (Merged)
Tiny
TNHARLEY
  • MEMBER
  • 6 POSTS
  • 2011 CHEVROLET TAHOE
  • 5.3L
  • V8
  • 2WD
  • AUTOMATIC
  • 137,000 MILES
Got an issue where air not coming out of four roof vents. Research tends to indicate blend actuator and I have a buddy in parts that will sell it to me for his employee cost. Already got paneling remover but OMG, they are behind the HVAC unit. What in the world?

How in the heck are you supposed to do this?
Was this
answer
helpful?
Yes
No
Thursday, September 24th, 2020 AT 10:32 AM (Merged)
Tiny
JEFF_WRENCHONIT
  • MEMBER
  • 4 POSTS
Other picture shooting down behind HVAC unit.
Was this
answer
helpful?
Yes
No
Thursday, September 24th, 2020 AT 10:32 AM (Merged)
Tiny
JACOBANDNICKOLAS
  • MECHANIC
  • 109,896 POSTS
Welcome to 2CarPros.

Actually, the blend actuator is to determine temperature which enters the vehicle. I believe you have a problem with what is called a mode door actuator. That is what determines where the air flow exits.

Now, I don't know if you have automatic climate control or manual, so I am going to include directions for the mode valve actuator replacement for both. All attached pictures correlate with the directions.

_____________________________

Manual HVAC

See pics 1 and 2 for location and directions.

____________________________

Auto HVAC

See Pics 3 and 4 for location and directions.

____________________________

Here are the directions for recalibration of the automatic HVAC. You can do it with a scanner or without.

HVAC - AUTOMATIC
Actuator Recalibration

When replacing the HVAC control module it will be necessary to allow the HVAC control module to perform a calibration process. When installing the HVAC control module be sure to perform the following:

Important: Do not adjust any controls on the HVAC control module while the HVAC control module is self-calibrating. If interrupted, improper HVAC performance will result.

1. Place the ignition switch to the OFF position.
2. Disconnect the scan tool.
3. Install the HVAC control module.
4. Connect all previously disconnected components.
5. Start the vehicle.
6. Wait 40 seconds for the HVAC control module to self-calibrate.
7. Verify that no DTCs have set as current DTCs.

When replacing the HVAC actuator it will be necessary to allow the HVAC control module to perform a calibration process. When installing the HVAC actuator be sure to perform one of the following:

Important: Do not adjust any controls on the HVAC control module while the HVAC control module is self-calibrating. If interrupted, improper HVAC performance will result.

Preferred Method (w/Scan Tool)
1. Clear all DTCs.
2. Place the ignition switch in the OFF position.
3. Install the HVAC actuator.
4. Connect all previously disconnected components.
5. Start the vehicle.
6. With the scan tool, initiate the Motor Re-calibration feature of the Heating and Air Conditioning Special Functions menu.
7. Verify that no DTCs have set as current DTCs.

Important: Do not adjust any controls on the HVAC control module while the HVAC control module is self-calibrating. If interrupted, improper HVAC performance will result.

Alternate Method (w/o Scan Tool)
1. Clear all DTCs.
2. Place the ignition switch to the OFF position.
3. Install the HVAC actuator.
4. Connect all previously disconnected components.
5. Remove the HVAC/ECAS fuse for a minimum of 10 seconds.
6. Install the HVAC/ECAS fuse.
7. Start the vehicle.
8. Wait 40 seconds for the HVAC control module to self-calibrate.
9. Verify that no DTCs have set as current DTCs.

______________________________

Manual HVAC

HVAC - MANUAL
Actuator Recalibration

When replacing the HVAC control module it will be necessary to allow the HVAC control module to perform a calibration process. When installing the HVAC control module be sure to perform the following:

Important: Do not adjust any controls on the HVAC control module while the HVAC control module is self-calibrating. If interrupted, improper HVAC performance will result.

1. Place the ignition switch to the OFF position.
2. Disconnect the scan tool.
3. Install the HVAC control module.
4. Connect all previously disconnected components.
5. Start the vehicle.
6. Wait 40 seconds for the HVAC control module to self-calibrate.
7. Verify that no DTCs have set as current DTCs.

When replacing the HVAC actuator it will be necessary to allow the HVAC control module to perform a calibration process. When installing the HVAC actuator be sure to perform one of the following:

Important: Do not adjust any controls on the HVAC control module while the HVAC control module is self-calibrating. If interrupted, improper HVAC performance will result.

Preferred Method (w/ Scan Tool)
1. Clear all DTCs.
2. Place the ignition switch in the OFF position.
3. Install the HVAC actuator.
4. Connect all previously disconnected components.
5. Start the vehicle.
6. With the scan tool, initiate the Motor Re-calibration feature of the Heating and Air Conditioning Special Functions menu.
7. Verify that no DTCs have set as current DTCs.

Important: Do not adjust any controls on the HVAC control module while the HVAC control module is self-calibrating. If interrupted, improper HVAC performance will result.

Alternate Method (w/o Scan Tool)
1. Clear all DTCs.
2. Place the ignition switch to the OFF position.
3. Install the HVAC actuator.
4. Connect all previously disconnected components.
5. Remove the HVAC/ECAS fuse for a minimum of 10 seconds.
6. Install the HVAC/ECAS fuse.
7. Start the vehicle.
8. Wait 40 seconds for the HVAC control module to self-calibrate.
9. Verify that no DTCs have set as current DTCs.

______________________________
Let me know if this helps or if you have other questions.

Take care,
Joe
Was this
answer
helpful?
Yes
No
Thursday, September 24th, 2020 AT 10:32 AM (Merged)
Tiny
HMAC300
  • MECHANIC
  • 48,601 POSTS
See if you can take out the bolts/screws of housing around blower and see if it will move enough to get to actuator screws they should be 7mm if memory serves me correct. Or maybe take the clips off that duct work and if it will remove give you enough space to replace it with both things off and out of way.
Was this
answer
helpful?
Yes
No
+1
Thursday, September 24th, 2020 AT 10:32 AM (Merged)

Please login or register to post a reply.

Sponsored links