Welcome to 2CarPros.
If the new motor keeps blowing a fuse, either you have a bad motor or you pinched a wire and caused a short. First, make sure nothing is pinched or damaged. Make sure the plug that connects to the motor doesn't have pins that are bent or damaged causing a short. Check out the diagrams (Below).
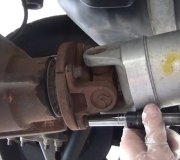
Here are the directions specific to your vehicle for replacing the encoder motor. I'm attaching them so you can confirm everything was done correctly. The attached pictures correlate with the directions.
TRANSFER CASE MOTOR/ENCODER REPLACEMENT
Transfer Case Motor/Encoder Replacement
Removal Procedure
1. Raise the vehicle. Refer to Vehicle Lifting.
2. Remove the transfer case shield from the vehicle.
3. Remove the motor/encoder electrical connector.
4. Remove the motor/encoder mounting bolts.
5. Remove the motor/encoder assembly.
6. Remove the motor/encoder gasket.
Installation Procedure
Important: When performing this service procedure make sure that the motor/encoder unit is flat against the transfer case for proper installation.
1. Install the motor/encoder to the transfer case.
2. Install the motor/encoder gasket to the transfer case.
Notice: Refer to Fastener Notice in Service Precautions.
3. Install motor/encoder mounting bolts to the transfer case.
Tighten the motor/encoder mounting bolts to 20 Nm (15 ft. Lbs.).
4. Install the motor/encoder electrical connector.
5. Install the transfer case shield.
6. Lower the vehicle. Refer to Vehicle Lifting.
Check out the diagrams (Below). Please let us know if you need anything else to get the problem fixed.
Images (Click to make bigger)
Tuesday, September 3rd, 2019 AT 8:38 PM


