12- Battery Disconnect Direct Battery input to PCM disconnected within last 50 ignition key-on cycles. Normal if battery has been disconnected, otherwise check battery power and ground connections
35- Radiator Fan low
speed relay circuit Open or short in the radiator fan relay wiring
44- Battery temp sensor
volts out of range An open or short in the engine coolant temperature sensor circuit or a problem in the PCM's battery temperature circuit.
55- End of message code. A DTC 55 is used to end all DTC messages. This code does not show on the DRB tool and indicates a completion of the stored codes on the Malfunction Indicator Lamp (check engine lamp).
Here are the codes you are getting. Do this testand please let me know what the results are and we will go from there thank you.
To test the ignition system perform the test procedures in a particular sequence. Start with the secondary spark test, commence to the coil test (located under the coil procedures later in this section) and finally perform the failure-to-start test. Performing the tests in this order will narrow down the ignition system problem in the easiest manner.
SECONDARY SPARK TEST
CAUTION
The Direct Ignition System generates approximately 40,000 volts. Personal injury could result from contact with this system.
Since there are 2 independent coils in the assembly, each coil must be checked individually. Cylinders 1 and 4, and 2 and 3 are grouped together.
Remove the cable from the No. 1 spark plug, then insert a clean spark plug into the spark plug boot.
Due to the high secondary voltage and risk of electrical shock, it is advisable to wrap a thick, dry cloth around the boot before grasping it.
WARNING
Spark plug wire damage may occur if the spark plug is moved more than 1/4 in. (6mm) away from the engine ground.
Ground the plug to the engine (touch the spark plug metal body to the engine block or other piece of metal on the car).
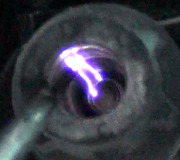
Crank the engine and look for spark across the electrodes of the spark plug.
Repeat the test for the three remaining cylinders. If there is no spark during all cylinder tests, refer to the failure-to-start test. If one or more tests indicate irregular, weak or no spark, refer to the coil test.
FAILURE TO START TEST
Using a Digital Volt/Ohmmeter (DVOM) measure the voltage from the negative (-) battery terminal to the positive (+) battery terminal. The voltage should be at least 12.66 volts. This amount of voltage is necessary for an accurate inspection of the system.
Detach the ignition coil harness connector.
Connect a suitable test light to the B+ (battery voltage) terminal of the ignition coil electrical connector and ground. The center terminal of the connector supplies battery voltage.
Turn the ignition key to the ON position. The test light should flash on and then off. Leave the ignition key ON.
If the test light flashes momentarily, the PCM grounded the ASD relay. Proceed to the next step.
If the test light did not flash, the ASD relay did not energize. This is caused by either the relay or one of the relay circuits.
Crank the engine. (If the key was placed in the OFF position in Step 4, turn the key to the ON position before cranking. Wait for the test light to flash once, then crank the engine).
If the test light momentarily flashes during cranking, the PCM is not receiving a camshaft/crankshaft position sensor signal. A DRB or equivalent scan tool must be used to test the sensor and related circuitry.
For 1995 vehicles, if the test light did not flash during cranking, unplug the camshaft position sensor connector. Turn the ignition key to the OFF position. Turn the key to the ON position, wait for the test light to momentarily flash once, then crank the engine. If the test light momentarily flashes, the camshaft position sensor is shorted and must be replaced. If the light did not flash when the engine was cranked, the cause of the no-start condition is in either the crankshaft or camshaft position sensor 8-volt supply circuit to the crankshaft position sensor 5-volt output or ground circuits. Use a DRB or equivalent scan tool to test the crankshaft position sensor and related circuitry.
For 1996-99 vehicles, if the test light did not flash during cranking, unplug the crankshaft position sensor connector. Turn the ignition key to the OFF position. Turn the key to the ON position, wait for the test light to momentarily flash once, then crank the engine. If the test light momentarily flashes, the crankshaft position sensor is shorted and must be replaced. If the light did not flash when the engine was cranked, the cause of the no-start condition is in either the crankshaft or camshaft position sensor 8-volt supply circuit to the crankshaft position sensor 5-volt output or ground circuits. Use a DRB or equivalent scan tool to test the crankshaft position sensor and related circuitry.
Tuesday, October 14th, 2008 AT 7:03 PM
