Hi,
I'm going to start with the idea that yes, the swirl flap can be making the noise. The only thing is that it seems odd it would stop when it warms up.
Next, the tensioner can be replaced without removing the chain, but you have to make sure to keep tension on the chain when it is removed to prevent it from jumping time.
_______________________
I am going to provide the directions for the chain and tensioner replacement. You will only need to do the tensioner and I would recommend the guide as well, but that's your call. The chain replacement is there in the event you decide to do it as well. All pics correlate with the directions.
_________________________
2003 Ford Truck Ranger 2WD L4-2.3L VIN D
Timing Drive Components
Vehicle Engine, Cooling and Exhaust Engine Timing Components Service and Repair Procedures Timing Drive Components
TIMING DRIVE COMPONENTS
Timing Drive Components
Special Tools
pic 1
Removal
CAUTION: Do not loosen or remove the crankshaft pulley bolt without first installing the special tools as instructed in the crankshaft pulley procedure. The crankshaft pulley and the crankshaft timing sprocket are not keyed to the crankshaft. The crankshaft, the crankshaft sprocket and the pulley are fitted together by friction, using diamond washers between the flange faces on each part. For that reason, the crankshaft sprocket is also unfastened if the pulley bolt is loosened. Before any repair requiring loosening or removal of the crankshaft pulley bolt, the crankshaft and camshafts must be locked in place by the special tools, otherwise severe engine damage may occur. See: Harmonic Balancer - Crankshaft Pulley > Service and Repair
1. Remove the engine front cover. See: Timing Cover > Removal and Replacement
pic 2
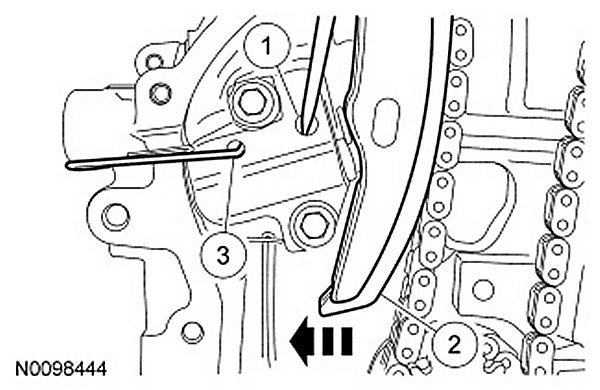
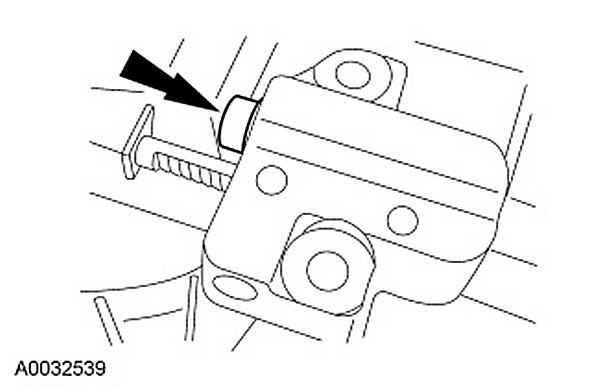
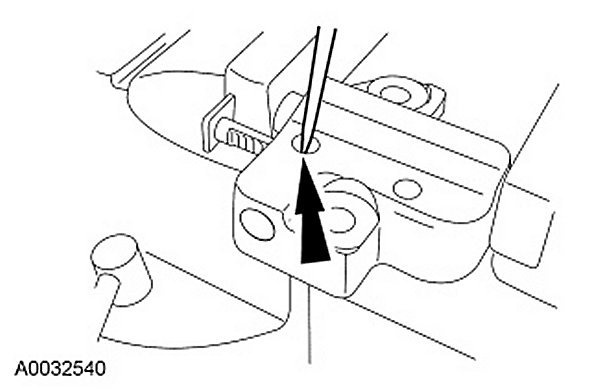
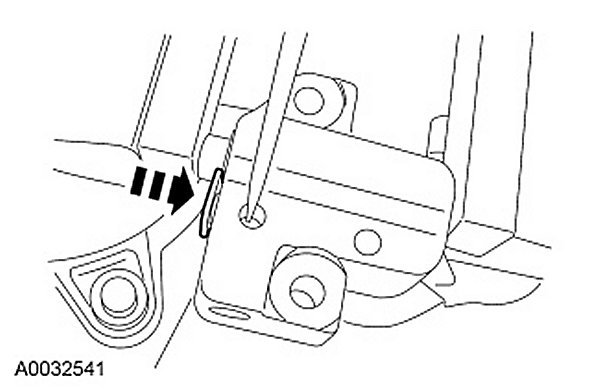
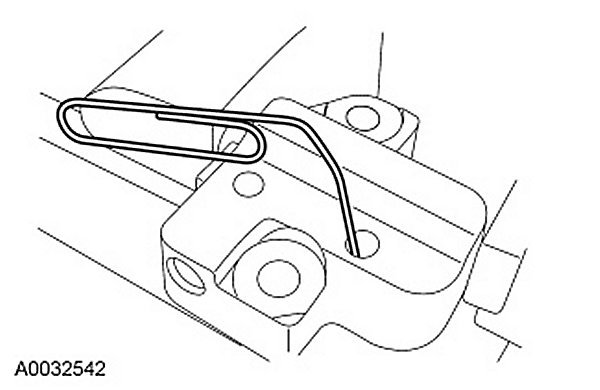
2. Compress the timing chain tensioner in the following sequence.
1. Using a small pick, release and hold the ratchet mechanism.
2. While holding the ratchet mechanism in the released position, compress the tensioner by pushing the timing chain arm toward the tensioner.
3. Insert a paper clip into the hole to retain the tensioner.
Pic 3
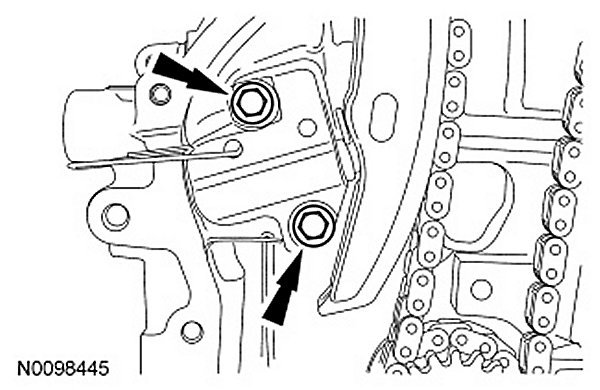
3. Remove the 2 bolts and the timing chain tensioner.
Pic 4
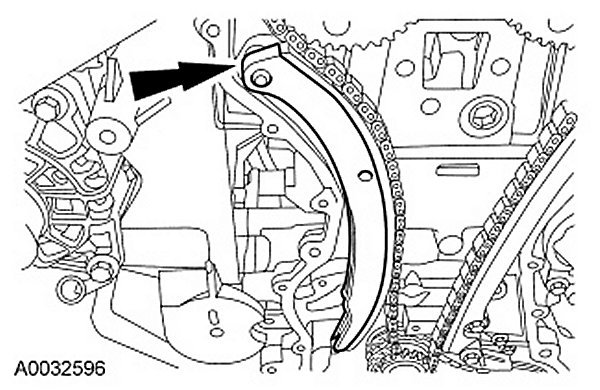
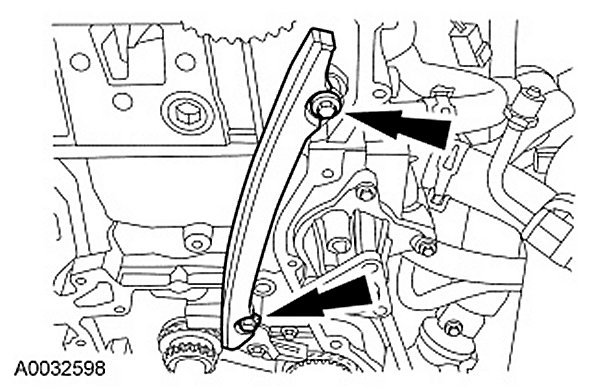
4. Remove the RH timing chain guide.
Pic 5
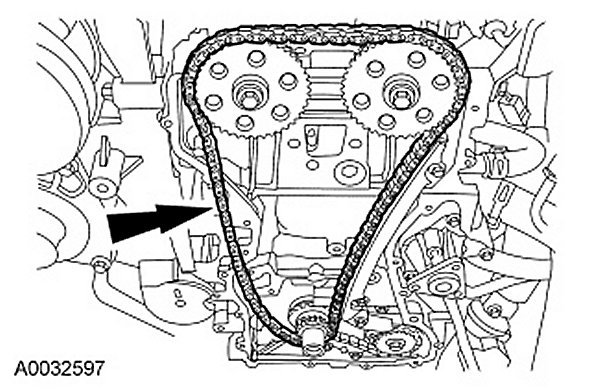
5. Remove the timing chain.
Pic 6
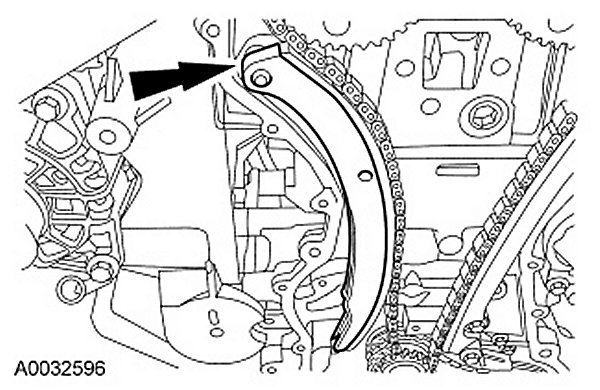
6. Remove the bolts and the LH timing chain guide.
Pic 7
7. NOTICE: Do not rely on the Camshaft Alignment Plate to prevent camshaft rotation. Damage to the tool or the camshaft can occur.
If necessary, remove the bolts and the camshaft sprockets.
Use the flats on the camshaft to prevent camshaft rotation.
Installation
pic 8
1. Remove the special tool.
Pic 9
2. NOTICE: Do not rotate the camshafts. Damage to the valves and pistons can occur.
If the camshaft sprockets were not removed, use the flats on the camshafts to prevent camshaft rotation and loosen the sprocket bolts.
Pic 10
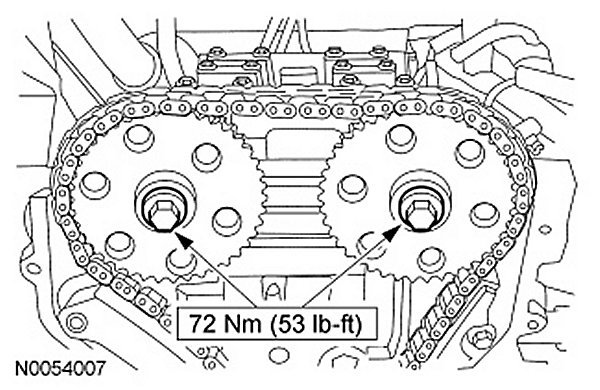
3. If removed, install the camshaft sprockets and the bolts. Do not tighten the bolts at this time.
Pic 11
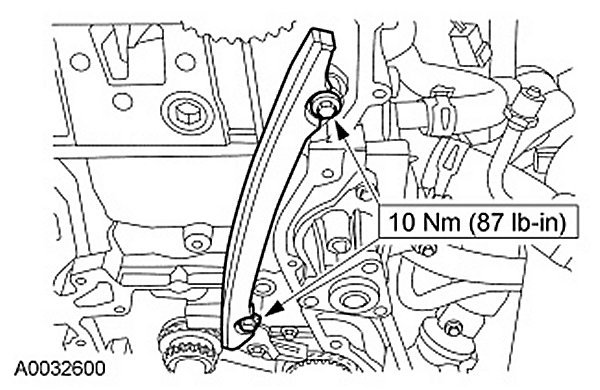
4. Install the LH timing chain guide and bolts.
Pic 12
5. Install the timing chain.
Pic 13
6. Install the RH timing chain guide.
NOTE: If the timing chain plunger and ratchet assembly are not pinned in the compressed position, follow the next 4 steps.
Pic 14
7. NOTICE: Do not compress the ratchet assembly. This will damage the ratchet assembly.
Using the edge of a vise, compress the timing chain tensioner plunger.
Pic 15
8. Using a small pick, push back and hold the ratchet mechanism.
Pic 16
9. While holding the ratchet mechanism, push the ratchet arm back into the tensioner housing.
Pic 17
10. Install a paper clip into the hole in the tensioner housing to hold the ratchet assembly and the plunger in during installation.
Pic 18
11. Install the timing chain tension and the bolts. Remove the paper clip to release the piston.
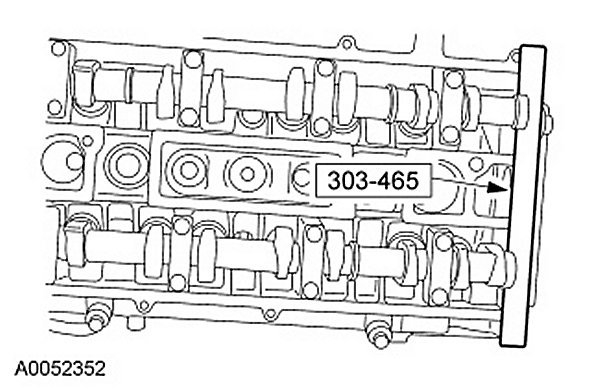
Pic 19
12. Install the special tool.
Pic 20
13. NOTICE: Do not rely on the Camshaft Alignment Plate to prevent camshaft rotation. Damage to the tool or the camshafts can result.
Using the flats on the camshafts to prevent camshaft rotation, tighten the bolts.
14. Install the front cover. See: Timing Cover > Removal and Replacement
______________________________
As far as the swirl valve, it could be the cause of the noise. However, you should notice a drivability issue with it if one is bad. Is that the case?
Joe
Images (Click to make bigger)
Monday, October 5th, 2020 AT 6:37 PM

