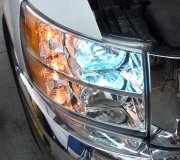
High/low beam stopped working?

Tiny
HKFROMNY.
  • MEMBER
  • 2011 DODGE CALIBER
  • 2.0L
  • 4 CYL
  • 2WD
  • AUTOMATIC
  • 122,000 MILES
The other day had the passenger side headlight went out, instantly thought, no problem, i'll put new bulb in, done this to all my cars over the years. Anyway, new bulb didn't work, thought why not check if a fuse went, no fuse for the headlights, then spoke to local mechanic, told him everything I tried, did I try the driver side bulb that works fine, in the other socket, no, tried, still nothing. Mind you, the turn signal works fine, just the headlight, low or high doesn't work. Took test light and checked for power at the plug end, no power, he mentioned might be a (module) down below. Have no idea where I might find it or what it actually looks like, now he is on vacation and i'm at a stand still. Any ideas? You've helped out on every other occasion, hope you can this time as well.
Thursday, July 11th, 2019 AT 12:10 PM

41 Replies

Tiny
SCGRANTURISMO
  • MECHANIC
  • 4,897 POSTS
Hello,

This could very well be a problem with Ground #102 on the left side of the engine compartment. A lot of times people will concentrate on the positive side of an electrical circuit, but often forget that it is only 1/2 of the circuit and forget about the ground side. In fact 75% of all automotive electrical circuits are poor ground related. Please check this ground and make sure it is clean, tight, corrosion free, and making good metal to metal contact. I have included a guide for checking grounds in the diagrams down below. Please go through this guide and check the ground and get back to us with what you are able to find out.

Thanks,
Alex
2CarPros
Was this
answer
helpful?
Yes
No
+1
Thursday, July 11th, 2019 AT 12:41 PM
Tiny
HKFROMNY.
  • MEMBER
  • 112 POSTS
Okay, first off, can you tell me exactly what the (T.I.M.) Looks like? Took a couple pictures of engine compartment. I hope what you're talking about isn't the thing with the two big lock down connectors on it. I was told to never disconnect these for it can fry the main computer if not done by service techs.
Was this
answer
helpful?
Yes
No
Thursday, July 11th, 2019 AT 2:37 PM
Tiny
STEVE W.
  • MECHANIC
  • 13,480 POSTS
That should say Totally Integrated Power Module aka TIPM. It is the fuse box, but in your case it is a lot more than just a fuse box, it controls pretty much every electrical component on the car, and they are a very well known failure item. In your center picture it is the black box next to the fender. It has a circuit board inside it with all the relays and controls for the electronics on it. To repair them, you replace the entire box or you can send them out for repair.
First however you will want to verify that the ground is good as it can corrode off and you lose the light, especially as you lost both high and low. An easy way to verify it would be to remove the connector from the bulb, use a test light connected to ground (battery negative) turn on the lights on either beam. Now probe the three wires, the light should come on when you touch either pin 1 or 3, switch to the other beam and check again, it should now light on one of those two, but the opposite of the first time. Now connect the light to battery positive and touch the light to the last terminal 2, if the light doesn't light the ground is bad. There are a couple ways to deal with this, the correct way is to follow the wire over to the ground connection and repair it as needed. The other way would be to splice a new wire into the existing and attach it to a different ground point.

If there is no power at either of the two (1&3) pins in either headlight position then it is likely a bad TIPM. There are ways to wire in other relays to bypass the internals, but the testing needs to be done first, and then you need to decide.
Was this
answer
helpful?
Yes
No
+1
Thursday, July 11th, 2019 AT 3:12 PM
Tiny
HKFROMNY.
  • MEMBER
  • 112 POSTS
Okay, I have a lot better idea of what to do now, first I must wait for better weather since we have no covered area to work on it, but, i'm a bit of a Mcgyver, so now I have this information, i'll give it a try, found a re-manufactured unit through Cardone for $300.00. I'm hoping I don't have to go that route. As always, thanks again, i'll be in touch.
Was this
answer
helpful?
Yes
No
Thursday, July 11th, 2019 AT 3:38 PM
Tiny
STEVE W.
  • MECHANIC
  • 13,480 POSTS
I have rebuilt a few. I've also created a few "altered" units by adding external relays. For instance in your case I would be tempted to test it all and be 100% sure it was in the TIPM and not a bad ground, then if needed add a relay to each of the high and low beam feeds from the working side and power the "bad" side from those. Don't try to power them directly, the relays in the TIPM are not that robust.
Was this
answer
helpful?
Yes
No
Thursday, July 11th, 2019 AT 7:16 PM
Tiny
HKFROMNY.
  • MEMBER
  • 112 POSTS
This method of wiring in from the working side will not effect how my fog lights work, ? I mean, when my fog lights are being used, when flip on my high beams the fog lights go off, and if my lights are not on, I can still use the flash method for signaling fellow drivers and such. In other words, everything will work as normal?
Was this
answer
helpful?
Yes
No
Thursday, July 11th, 2019 AT 7:52 PM
Tiny
STEVE W.
  • MECHANIC
  • 13,480 POSTS
It shouldn't as that is all still controlled inside the TIPM. The relays would simply send power to the existing lights. You would have one relay connected to the high beam and another to the low. If you look at the picture attached it would be almost identical to what you would do. The battery feed would be connected to both relays (gray wire) through a fuse, the ground (black wire) goes to a handy bare metal spot near the TIPM. The one tagged as low beam would go to the working low beam on one relay and to the high beam on the other relay. The 12 volts out goes to the correct light on the other side. When you turned on the lights on say low beam, the working light would come on and turn on the relay which would turn on the "bad" lights low beam. When you select high beam it would turn off the low beam relay and turn on the high beam relay.
This is pretty much the way the relays inside the box work, except in there they use a single relay that selects high beam when on and low beam when off. This is also the way you can add driving or fog lights on a computer controlled system or trailer lights on a newer vehicle. It is actually how many vehicles lights do work.

There actually were kits out there for some vehicles that added relays and feeds up front because it cut out a lot of high current wiring from the battery to the dimmer switch and then to the lights and would give you brighter headlights do to the lowered line resistance.
The kit was set up the same way those relays are.
Was this
answer
helpful?
Yes
No
Thursday, July 11th, 2019 AT 10:03 PM
Tiny
HKFROMNY.
  • MEMBER
  • 112 POSTS
Hello again, i'm in the midst of doing this process, called around for the relays, need to know one thing. Can you tell me if between the low and high beam relays there would be a specified one? ( I'm thinking the high beam takes a higher rated relay than the low) Because the guy at parts store has four post relays but don't know if it will work with both high and low?
Was this
answer
helpful?
Yes
No
Friday, July 12th, 2019 AT 8:53 AM
Tiny
STEVE W.
  • MECHANIC
  • 13,480 POSTS
Both light filaments are virtually the same rating 55W low 60W high. So figure about 6-7 amp draw at initial turn on. The common Bosch style that handle 20+ amps will last virtually forever in this application. Should look like the pictures. They are available in pretty much anyplace that sells electrical parts, even wal mart has them in the automotive area. What is your general area in NY?
Was this
answer
helpful?
Yes
No
Friday, July 12th, 2019 AT 10:59 AM
Tiny
HKFROMNY.
  • MEMBER
  • 112 POSTS
Thats fabulous news, you have no idea the relief all this help you guys provide does. I'll be in touch. Thanks a million!
Was this
answer
helpful?
Yes
No
Friday, July 12th, 2019 AT 11:21 AM
Tiny
HKFROMNY.
  • MEMBER
  • 112 POSTS
Well guys, good news is I have working headlights once again, but when I hooked up the relays it stopped both bulbs from working. Took them out, hooked up directly from working side and poof, both work as they should, for now anyway.
Was this
answer
helpful?
Yes
No
Saturday, July 13th, 2019 AT 1:08 PM
Tiny
STEVE W.
  • MECHANIC
  • 13,480 POSTS
Hmm that's strange, it shouldn't have done that as the relays draw less current than the bulbs and would isolate them from each other. But you have working lights now. Where abouts in NY?
Was this
answer
helpful?
Yes
No
Saturday, July 13th, 2019 AT 7:25 PM
Tiny
HKFROMNY.
  • MEMBER
  • 112 POSTS
East Meredith, Ny.
Was this
answer
helpful?
Yes
No
Sunday, July 14th, 2019 AT 7:23 AM
Tiny
STEVE W.
  • MECHANIC
  • 13,480 POSTS
Was down your way last week to visit a friend in Delhi.
I would probably be prepared for the lights to fail again, mainly because the internal relays are not able to handle the load of both bulbs. Could you give me the part number of the relays you used? The common ones would be wired as I said, but there are a couple that look the same but use a different pattern, not real common but they used to be out there. The only other thing I can think of would be if the "bad" light wiring was actually shorted to ground, but that should have shown up while testing in the first place.
Was this
answer
helpful?
Yes
No
Sunday, July 14th, 2019 AT 9:03 AM
Tiny
HKFROMNY.
  • MEMBER
  • 112 POSTS
I ran a continuity test and they both failed, mind you the guy at the auto parts store he had to get them out of back warehouse, not commonly used anymore e says, you are going old school with this job, he states it could be they were both no good, they are old ones and I already returned them for my money back, but, my pln is to hopefully keep them running long enough to save the money, then i'll change over the T.I.P.M. But for now this will have to do. Very tight SSI budget, i'm sure you know what I mean.
Was this
answer
helpful?
Yes
No
Sunday, July 14th, 2019 AT 12:41 PM
Tiny
STEVE W.
  • MECHANIC
  • 13,480 POSTS
Hmm, wonder if the ones you got were corroded internally from setting? Hmm must be a newer parts guy LOL. If you were a bit closer I'd come visit and wire in a couple for you. I keep them on hand for issues like this. There are a couple factory bypass methods by Chrysler and GM that use them for situations like yours. The big one is for the fuel pumps on both.
Was this
answer
helpful?
Yes
No
Sunday, July 14th, 2019 AT 2:19 PM
Tiny
HKFROMNY.
  • MEMBER
  • 112 POSTS
I appreciate the thought, besides woud have no way of paying for that. Oh, great, now I know I should keep my eyes on that. How many of you guys are there that give their services online like this?
Was this
answer
helpful?
Yes
No
Sunday, July 14th, 2019 AT 6:08 PM
Tiny
STEVE W.
  • MECHANIC
  • 13,480 POSTS
It's one of the downsides of the TIPM in the Chryslers, on the GMs it's because the relay can get hot and melts the OEM connector. I wouldn't worry much about it, the rebuilds usually use a heavier relay in the rebuilds.
We have quite a few folks answering questions.
Was this
answer
helpful?
Yes
No
Sunday, July 14th, 2019 AT 7:27 PM
Tiny
GABEANTON94
  • MEMBER
  • 1 POST
  • 2009 DODGE CALIBER
  • 151 MILES
I was wondering what are the fuse numbers for the headlights left and right on a 2009 caliber with a 2.0l engine?
Was this
answer
helpful?
Yes
No
Thursday, October 15th, 2020 AT 11:02 AM (Merged)
Tiny
ASEMASTER6371
  • MECHANIC
  • 52,797 POSTS
Good morning.

There are no fuses for the headlights. They are controlled by different module for operation starting with the headlight switch.

I attached a wiring diagrams (below) of the lights for you so you can see how the system works. The power comes from the TIPM or the fuse box based on input signals.

Headlamps:

The headlamp system includes the SCM, the EMIC, the TIPM, and the left (lighting) multi-function switch on the steering column. The headlamp bulbs have a path to ground at all times through their connection to the engine compartment wire harness. The engine compartment harness has takeouts with eyelet terminals that are secured by nuts to ground studs on the front end sheet metal within the engine compartment. The TIPM will store a Diagnostic Trouble Code (DTC) for any shorts or opens in the headlamp circuits.

The SCM monitors a hard wired multiplex input to determine the status of the left multi-function switch and whether the headlamp high or low beams are selected. The SCM then sends the appropriate electronic headlamp switch and headlamp beam select switch status messages to the EMIC over the LIN data bus. The EMIC then sends the appropriate electronic headlamp and headlamp beam request messages to the TIPM over the CAN data bus. The TIPM responds to these messages by providing a pulse width modulated voltage output to the headlamps through high side drivers on the right and left low and high beam feed circuits to illuminate the selected headlamp filaments. The TIPM also sends the appropriate electronic messages to the EMIC to control the illumination of the high beam indicator. When the optical horn feature is selected, the low beams will shut OFF about 200 milliseconds after the high beams are activated.

The TIPM also remembers which beams (LOW or HIGH) were selected when the headlamps were last turned OFF, and energizes those beams again the next time the headlamps are turned ON. The TIPM provides a battery saver (load shedding) feature for the headlamps, which will turn these lamps OFF if they are left ON for more than about eight minutes with the ignition switch in the LOCK position. The SCM and the EMIC each provide a fail-safe feature for the headlamps, which will cause the TIPM to turn the low beam headlamps ON automatically if there is no input available from the left multi-function switch. The TIPM also provides a fail-safe feature for the headlamps that will turn the headlamps ON automatically whenever a loss of CAN bus communication is detected with the ignition switch in the ON position.

Each headlamp includes an integral reflector adjustment screw to be used for static aiming of the headlamps. If the bulb is good here is how the TIPM is replaced it is easy.
Was this
answer
helpful?
Yes
No
Thursday, October 15th, 2020 AT 11:02 AM (Merged)

Please login or register to post a reply.

Sponsored links