Good morning,
Can you post some pictures of what you have?
https://www.2carpros.com/articles/how-to-release-a-ball-joint
Roy
Lower Ball Joint Replacement
Removal
Tools Required
J 24319-01 Steering Linkage Puller
J 36202 Torsion Bar Unloading Tool
J 29193 Steering Linkage Installer
J 9519-03 Ball Joint Remover and Installer
J 41435 Ball Joint Remover and Installer Kit
Consisting of J41435-1 Remover, J 41435-2 Installer, J 41435-3 Remover/Installer.
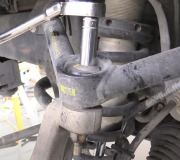
imageOpen In New TabZoom/Print
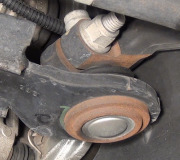
imageOpen In New TabZoom/Print
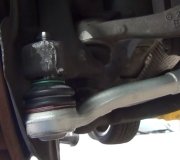
imageOpen In New TabZoom/Print
Raise the vehicle and support it with suitable safety stands.
1. Tire and wheel.
Place a floor jack under the control arm spring seat and raise it until it supports the control arm.
CAUTION: Floor jack must remain under the control arm spring seat during removal and installation to retain the spring and control arm in position or personal injury may result.
2. Brake caliper.
Important
Support the caliper with a piece of wire to prevent damage to the brake lines.
3. Cotter pin and the nut.
Use J 24319-01 to break the ball joint loose from the knuckle.
4. Lower control arm from the knuckle.
Guide the control arm out of the splash shield with a screwdriver while lifting the upper control arm with a pry bar.
Important
Block the knuckle assembly out of the way by placing a wooden block between the frame and upper control arm.
5. Lower ball joint from the lower control arm.
Inspect
The tapered hole in the steering knuckle and remove any dirt. If the hole is out of round, deformed or damaged, the knuckle must be replaced.
Installation
Tool Required
J 41435 with J 9519-30 Ball Joint Remover and installer Set
1. New ball joint into the lower control arm.
Press in the ball joint using tools J 9519-19 and J 9519-30.
The ball joint will bottom on the control arm.
2. Ball joint stud into the steering knuckle.
3. Stud nut onto the stud.
Tighten
Tighten nut to 115 Nm (84 ft. lbs.) and align the slot in the stud nut with the hole in the stud by tightening.
4. New cotter pin to the stud.
5. Brake caliper.
6. Tire and wheel assembly.
Lower the vehicle.
Important
Check the front end alignment.
Image (Click to make bigger)
Thursday, November 26th, 2020 AT 2:27 AM


