Hello -
Congrats on the acceptance... And your future bride? When did she?
Okay on the 21st.....I was just wondering the significance of the date.
Six years..... Wow..... Why so long? Did you ask her fathers permission to marry her?
How are you and the mother-in-law... Close also?
Father-in-law discouraged... Is this because he wants it out of his garage?(LOL) or because he has been working on this with you?
The positive..... Gives you and him more time together to grow closer working on this. In His time it will start.
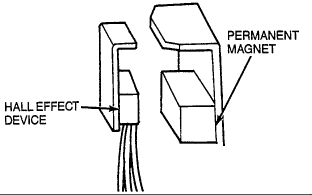
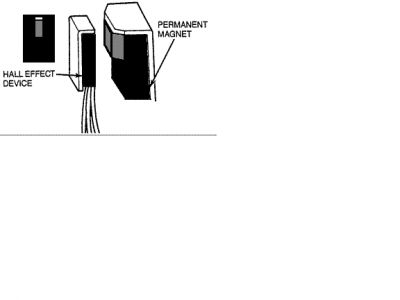
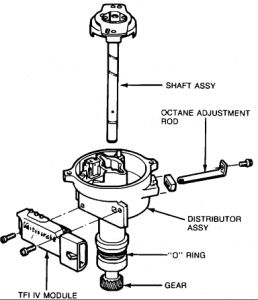
My thoughts... You cleaned off the Hall Effect Pick up. The Profile Ignition Pickup (PIP) signal is created in the Hall Effect and Stator assembly and indicates crankshaft position and engine rpm. The PIP signal is fed to both the Thick Film Integrated (TFI-IV) module and the Electronic Control Assembly (ECA).
Now - see what you think... It some were working before and now nothing and the only thing you did was on this... My thought; replace the pick up coil.....
Well, do you feel up to taking the distributor apart? Verify, but from what I see Auto Zone has the Hall Effect Pick Up for about $20 beans.....
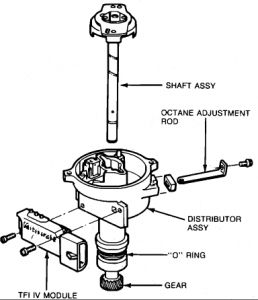
I have attached info on replacing it.......
I don't like, this is me, others have their own thoughts.....I don't like getting electrical parts from the junk yards... You don't know the history...A non electrical part... Say.....A seat... You can look at it, touch it see if it works....... Not an electrical part.
What to you think....... Maybe the Hall Effect?
For me..... After working on something - right prior to turning the key...A prayer is said...
Thanks for the donation
Please let us know if what the final fix was for your car so we can better assist others. Thanks!
Find a car repair manual for your car repair questions.
REMOVAL
NOTE: Do not replace stator without an arbor press.
Use a screwdriver to remove distributor cap. Position cap and wires to prevent interference with work area. Remove distributor harness connector.
Remove distributor from block, then remove rotor. Next, hold gear to loosen armature screws (Do not hold armature). Finally, remove armature.
Mark armature and gear to note orientation with felt tip pen. Remove and discard pin in gear.
Invert distributor and place in Axle Bearing/Seal Plate T75L-1165-B or equivalent, and press off gear using Bearing removal tool D84L-950-A or equivalent.
Deburr and polish shaft with emery paper and clean cloth so shaft slides out freely from distributor base.
Remove shaft assembly, stator assembly screws, and stator assembly.
Inspect base bushing for wear or signs of excess heat. Replace distributor assembly if damaged.
Inspect base and O-ring for cuts, cracks, wear or damage. Replace if necessary.
INSTALLATION
Place stator assembly over bushing and press down to seat.
Place stator connector in position. Fit tab in notch on base and align fastening eyelets with screw holes. NOTE: Prevent wires from interfering with moving parts.
Install and tighten stator screws 15-35 lb-in.
Apply a light coat of engine oil to distributor shaft below armature and insert shaft through base bushing. Place a 1/2 inch deep well socket over shaft, invert and place on arbor plate.
Place distributor gear on shaft end. Line up the mark on armature and gear. To ensure ease of roll pin insertion, the hole in the shaft and gear must be lined up as accurately as possible.
Place a 5/8 inch deep well socket over the shaft and gear and press gear to align with original drill hole. If the gear holes do not align, the gear must be removed and repressed. A drift punch will not align the holes.
Insert new roll pin through gear and shaft (Ensure pin has proper extrusion). Replace armature and tighten screws to 25-35 lb-in.
Check distributor for free movement over full rotation of shaft. If armature contacts the stator, replace the entire distributor.
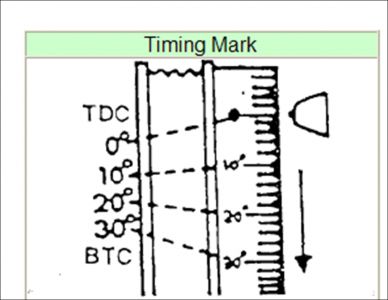
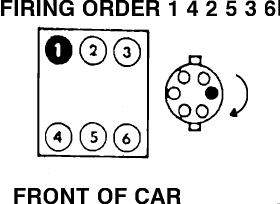
Install distributor into block and connect module to wiring harness. Replace rotor, cap and screws, and set engine timing.
Friday, November 28th, 2008 AT 11:41 PM
