I added below the procedure for the camshaft as well for you in case it needs to be replaced.
I also attached a YouTube video for you as well.
https://www.youtube.com/watch?v=bqnuqOoCKpc
and
https://youtu.be/RvBYxpRC464
Roy
Camshaft Replacement (LH6, LMG, LY2 and LY5)
EN 46330 Timing Belt Tensioner Retaining Pin
J 42386-A Flywheel Holding Tool
J 45059 Angle Meter
Removal Procedure
Important: If camshaft replacement is required, the valve lifters must also be replaced.
imageOpen In New TabZoom/Print
1. Remove the radiator support. Refer to Radiator Support Replacement .
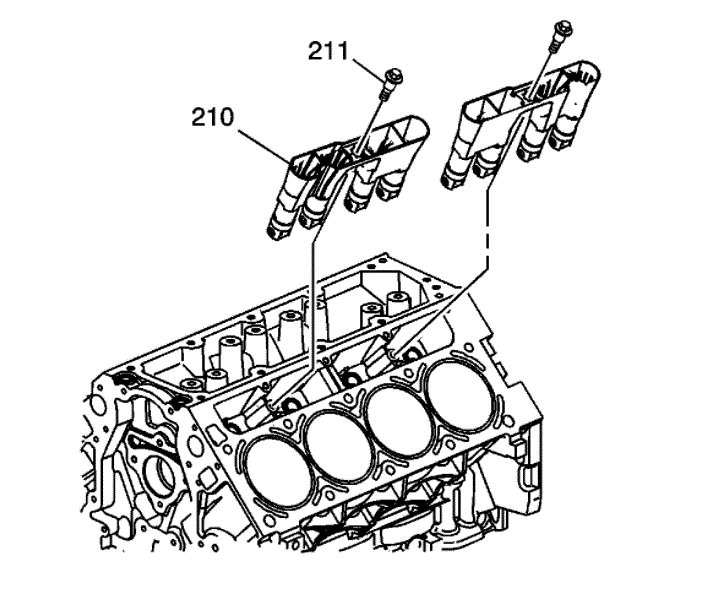
2. Remove the valve lifters. Refer to Valve Lifter Replacement (L92 - First Design) (See: Lifter / Lash Adjuster, Valve > Removal and Replacement > Valve Lifter Replacement (L92 - First Design))Valve Lifter Replacement (L92 - Second Design) (See: Lifter / Lash Adjuster, Valve > Removal and Replacement > Valve Lifter Replacement (L92 - Second Design))Valve Lifter Replacement (LY2 and LY6) (See: Lifter / Lash Adjuster, Valve > Removal and Replacement > Valve Lifter Replacement (LY2 and LY6))Valve Lifter Replacement (LH6, LMG, LY5 and L76) (See: Lifter / Lash Adjuster, Valve > Removal and Replacement > Valve Lifter Replacement (LH6, LMG, LY5 and L76)) .
3. Remove the engine front cover. Refer to Engine Front Cover Replacement (LC9, LH6, LMG, LY2 and LY5) (See: Timing Cover > Removal and Replacement)Engine Front Cover Replacement (LY6, L76 and L92) (See: Timing Cover > Removal and Replacement) .
4. Remove the starter motor. Refer to Starter Motor Replacement (4.3L) Starter Motor Replacement (4.8L, 5.3L, 6.0L, and 6.2L) Starter Motor Replacement (6.6L) .
Notice: Refer to Fastener Notice .
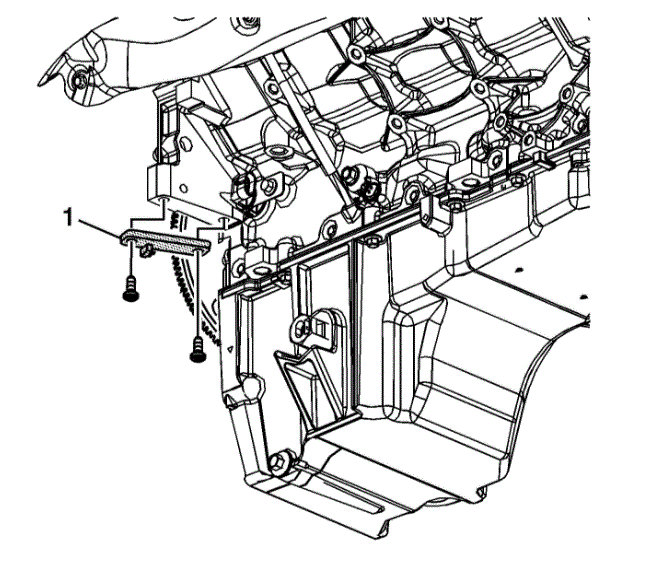
Important: Ensure that the teeth of the J 42386-A mesh with the teeth of the engine flywheel.
5. Install the J 42386-A (1) and bolts. Use one M10-1.5 x 120 mm and one M10-1.5 x 45 mm bolt for proper tool operation.
Tighten the J 42386-A bolts to 50 N.m (37 lb ft).
imageOpen In New TabZoom/Print
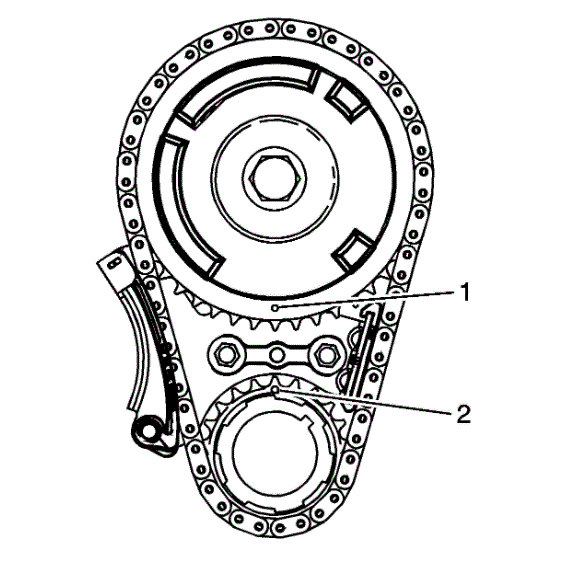
6. Rotate the crankshaft sprocket until the camshaft sprocket alignment mark (1) and the crankshaft sprocket alignment mark (2) are aligned.
imageOpen In New TabZoom/Print
Notice: Do not turn the crankshaft assembly after the timing chain has been removed in order to prevent damage to the piston assemblies or the valves.
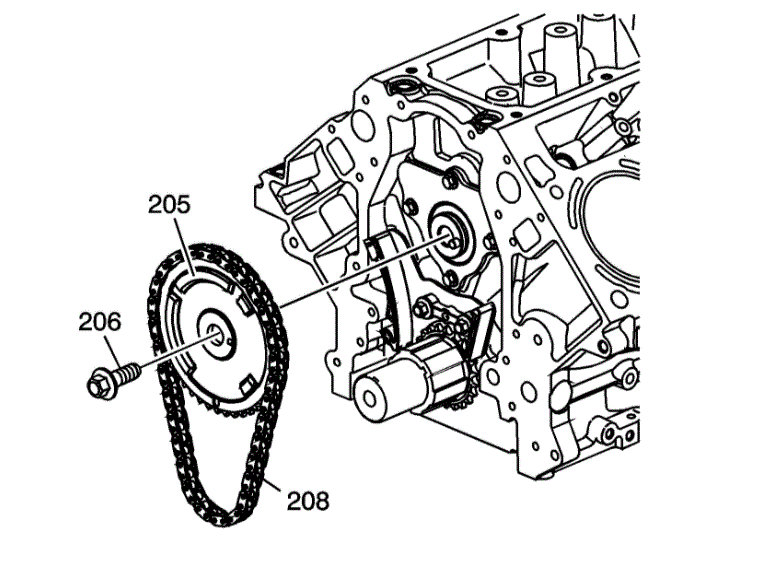
7. Remove the camshaft sprocket bolt (206).
8. Remove the camshaft sprocket (205) and timing chain (208).
imageOpen In New TabZoom/Print
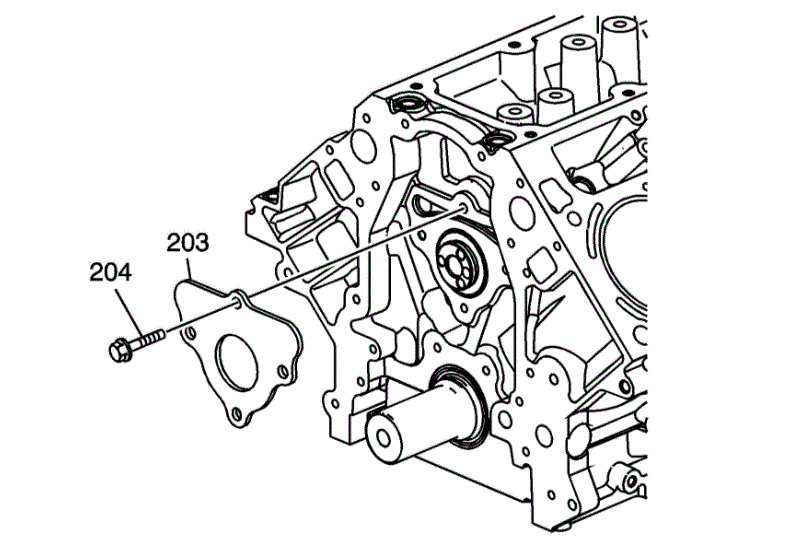
9. Remove the camshaft retainer bolts (204) and retainer (203).
imageOpen In New TabZoom/Print
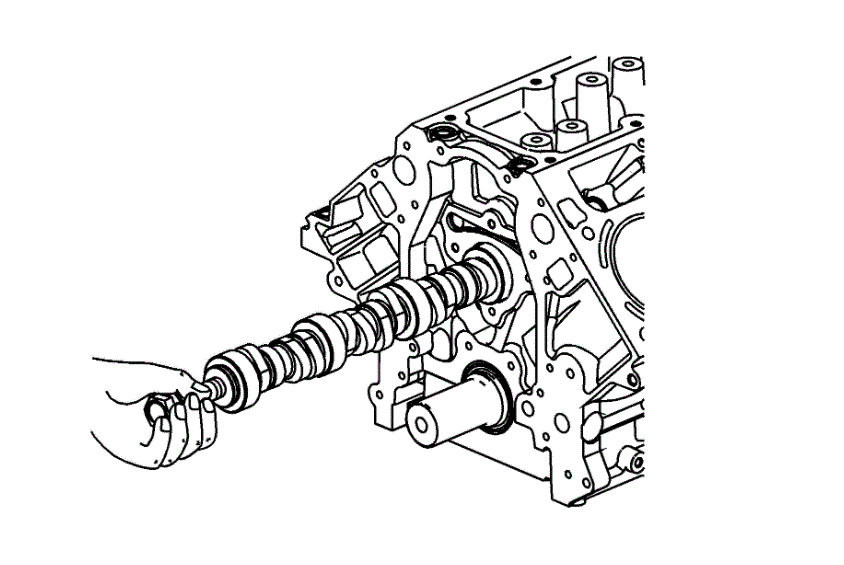
Notice: All camshaft journals are the same diameter, so care must be used in removing or installing the camshaft to avoid damage to the camshaft bearings.
10. Install the camshaft sprocket bolt into the camshaft front bolt hole.
11. Using the bolt as a handle, carefully rotate and remove the camshaft from the engine block.
12. Remove the bolt from the camshaft.
Images (Click to make bigger)
Friday, October 9th, 2020 AT 12:26 PM
