Introduction
Replacing an engine camshaft position sensor is a critical maintenance task that can restore your vehicle's performance and fuel efficiency. A faulty camshaft sensor can cause issues such as poor acceleration, engine stalling, and difficulty starting.
Tools and Materials Needed
- Replacement camshaft position sensor
- Socket set with ratchet (commonly 10mm socket)
- Screwdriver set (flathead and Phillips)
- Dielectric grease
- OBD-II scanner (optional)
- Safety gloves and glasses
Camshaft Position Sensor Replacement
Begin with the car on level ground, in park, with the engine off and the emergency brake set. Your engine may look a little different than what appears below, but the process is vary similar for most vehicles.
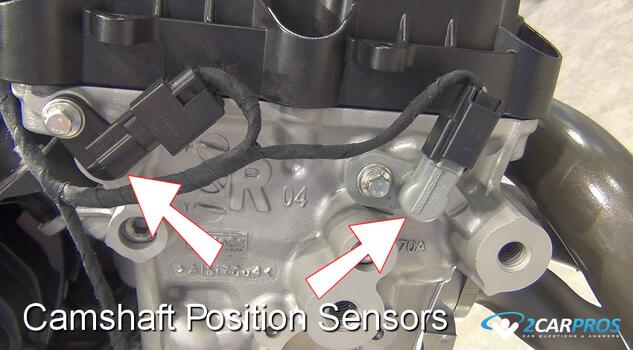
1. Camshaft Sensor Location: On overhead camshaft style of engines this sensor will be located at the top near the camshafts themselves. If you need help with the sensor location, please ask one of our experts, for free. Remove any components obstructing access to the camshaft position sensor. This may include the air intake hose, engine cover, or other parts.
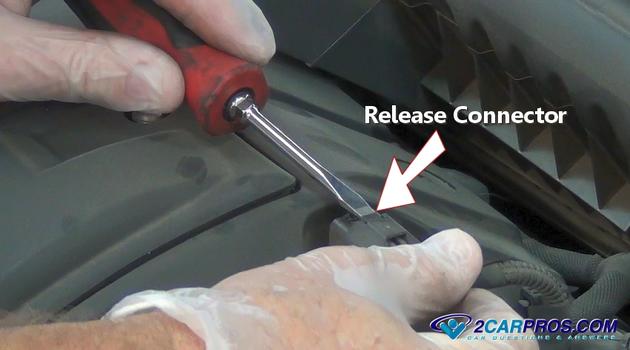
2. Remove Electrical Connector: Press the tab and gently pull the connector off the sensor, it can be a little stuck due to the weather pack seal inside the connector which is designed to keep out moister. Do not use excessive force as this could damage the wiring harness.
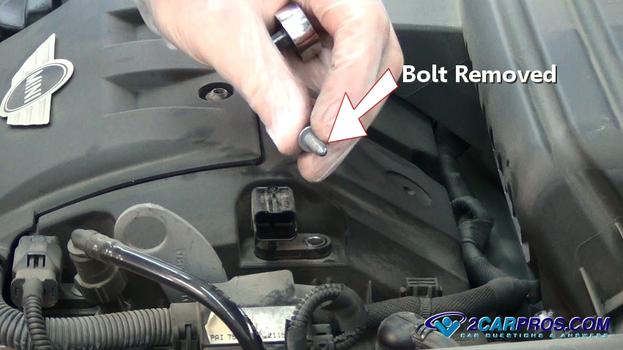
3. Remove the Camshaft Sensor Bolt: Using a 10mm (in most cases) socket or wrench remove the camshaft sensor mounting bolt by turning it counterclockwise.
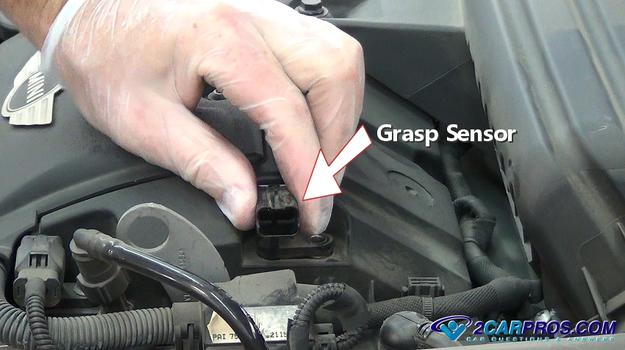
4. Remove the Camshaft Sensor: Grasp the sensor, and with a twisting motion pull the sensor from the engine. This to can be slightly stuck due of the O ring seal which is designed to control engine oil leakage.
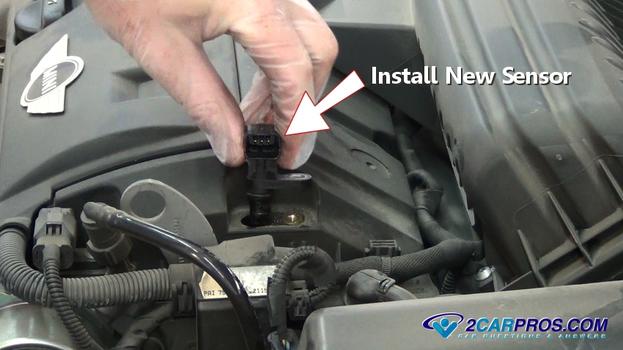
5. Install New Camshaft Sensor: After the old sensor has been removed, compare the new sensor to ensure a proper installation. Be sure the new sensor has a new O ring seal to avoid oil leaks. Use a shop towel to clean the area to help avoid leaks. Then apply a small amount of engine oil or WD40 to the O ring seal and gently push the sensor into position. The oil helps lubricate the seal, which will avoid damage during installation.
Insert and start the mounting bolt by hand to avoid cross threading, avoid starting the bolt while using a socket. Use a small socket or wrench and tighten the sensor mounting bolt, this bolt needs to be snug and not super tight because it only holds the sensor in place.
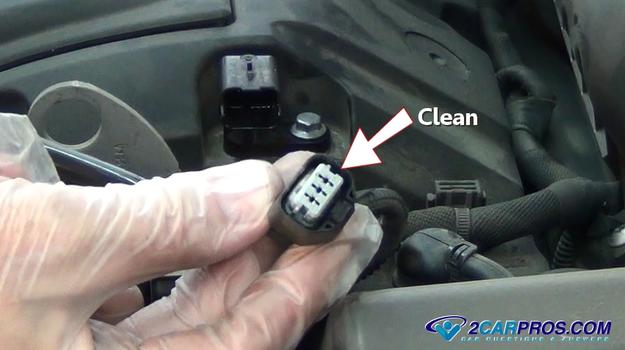
6. Reinstall Electrical Connector: Inspect the wiring connector to make sure it is free from grease, dirt and corrosion and clean if necessary, apply dielectric grease before installing it onto the new sensor. Inspect the wiring of the connector because this is usually where breaks can occur.
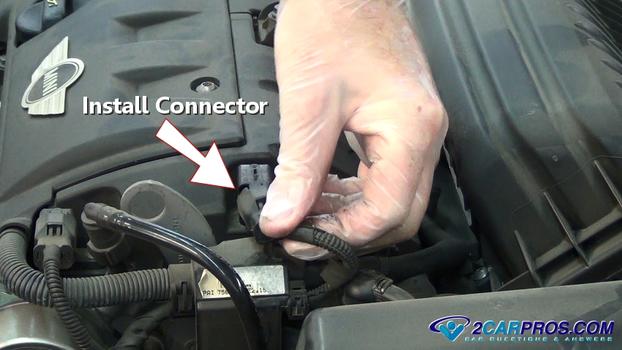
Firmly install the electrical connector by pushing it inward toward the connector. You should hear an audible click when it is completely installed. Once the repair is complete clear the codes and you are all set!
Tips for a Successful Replacement
- Always use a genuine or high-quality aftermarket replacement sensor to ensure proper functionality and longevity.
- If your vehicle has multiple camshaft position sensors, replace them in pairs to avoid future issues.
- Keep the work area clean and organized to prevent losing small parts or tools.
Conclusion
Replacing the camshaft position sensor is a straightforward process that can be completed with basic tools and mechanical knowledge. By following this guide, you can successfully replace your vehicle's camshaft position sensor and get back on the road with confidence.
Watch the Video!
Please watch this video of the job being done to glean additional helpful information.
Credits
This guide knowledge base was created by the 2CarPros Team, and by Ken Lavacot: Automobile repair shop owner and certified master automobile technician of over 30 years. If you have question or need help please ask one of our experts we are happy to help. Please visit our 2CarPros YouTube Channel for additional car repairs.


