Welcome to 2CarPros.
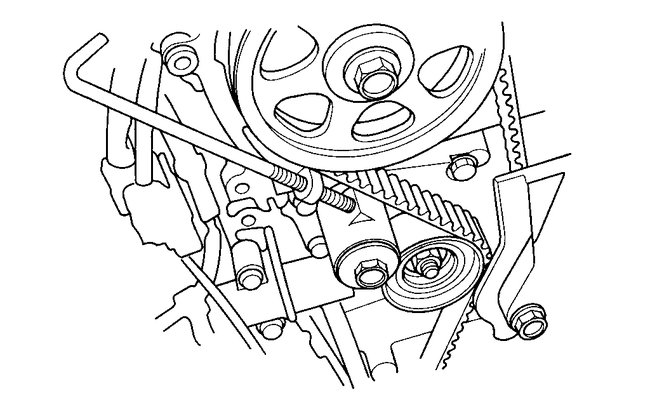
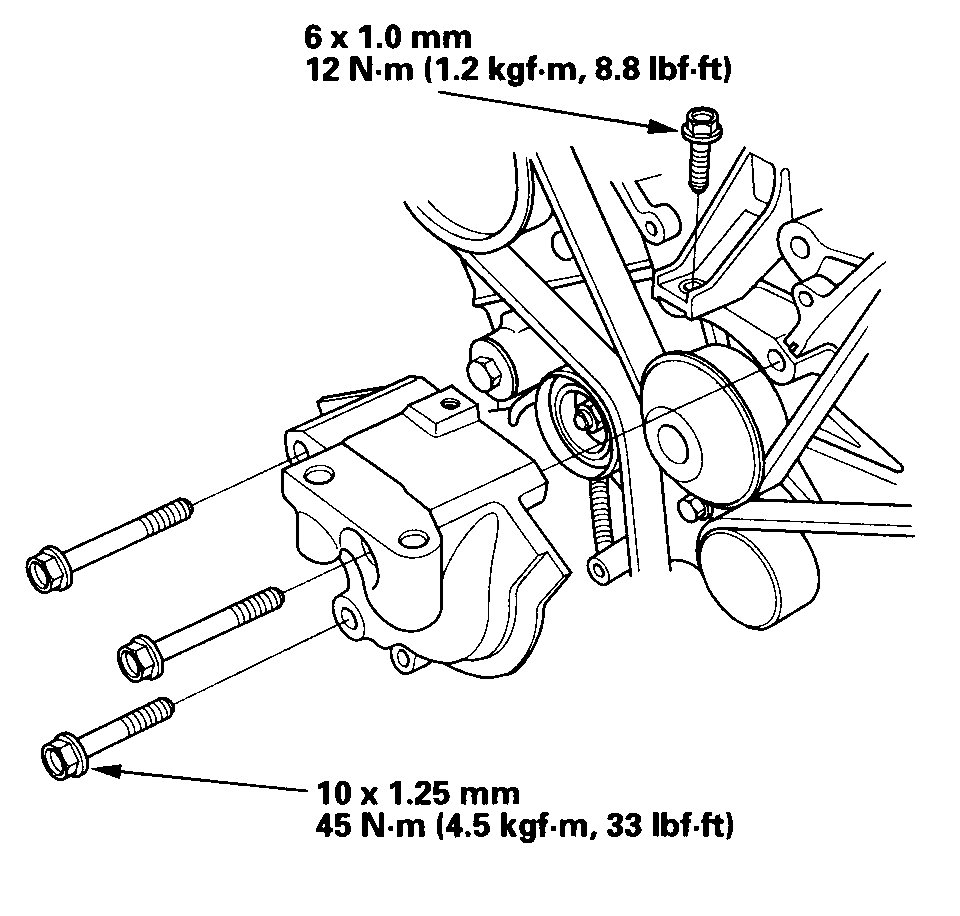
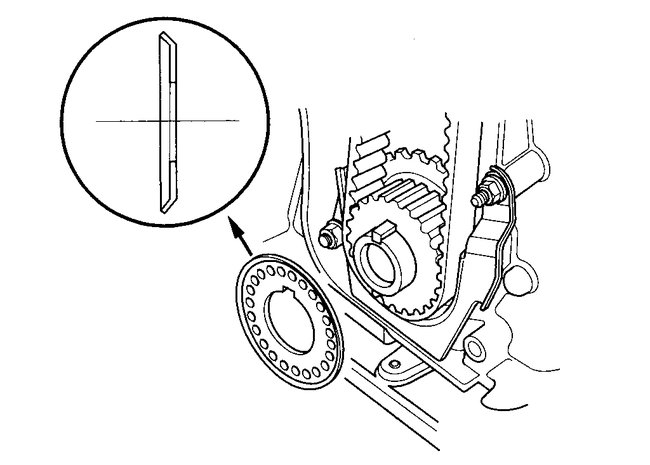
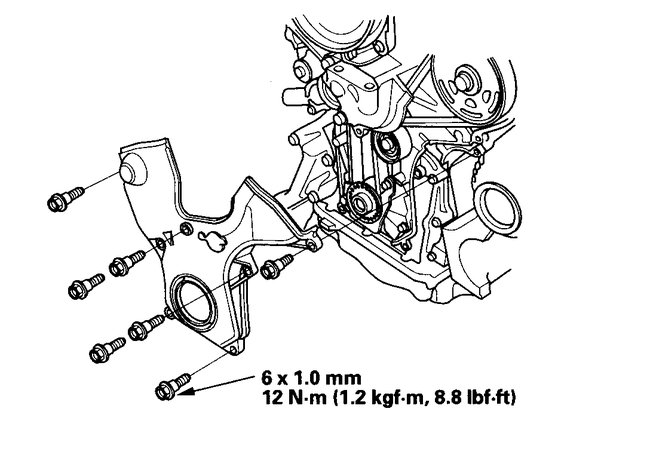
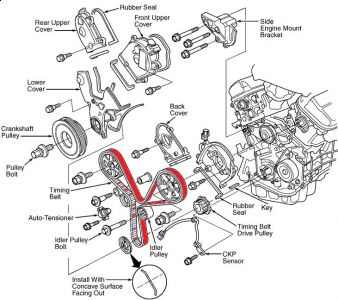
Here are the directions for replacing the belt. The attached pictures (below) correlate with the directions and include timing mark locations.
_________________________________________
2008 Honda Accord V6-3.5L
J35Z2 Engine
Vehicle Engine, Cooling and Exhaust Engine Timing Components Timing Belt Service and Repair Removal and Replacement Timing Belt Installation J35Z2 Engine
J35Z2 ENGINE
Timing Belt Installation
NOTE: The following procedure is for installing a used timing belt. If you are installing a new belt, refer to the timing belt replacement procedure.
1. Clean the timing belt pulleys, the timing belt guide plate, and the upper and lower covers.
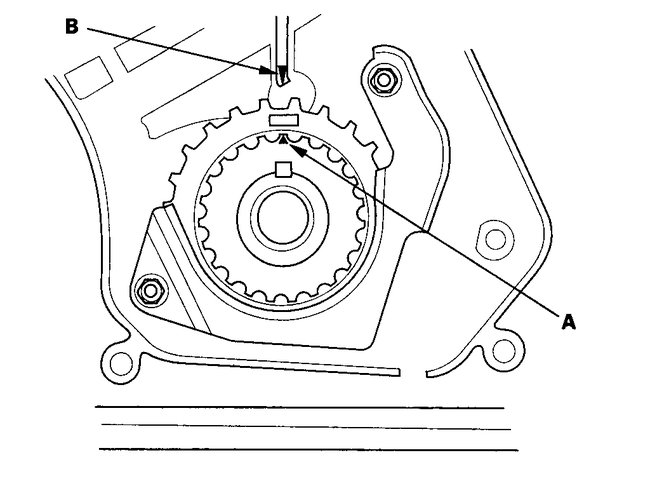
2. Set the timing belt drive pulley to top dead center (TDC) by aligning the TDC mark (A) on the tooth of the timing belt drive pulley with the pointer (B). On the oil pump.
Pic 1
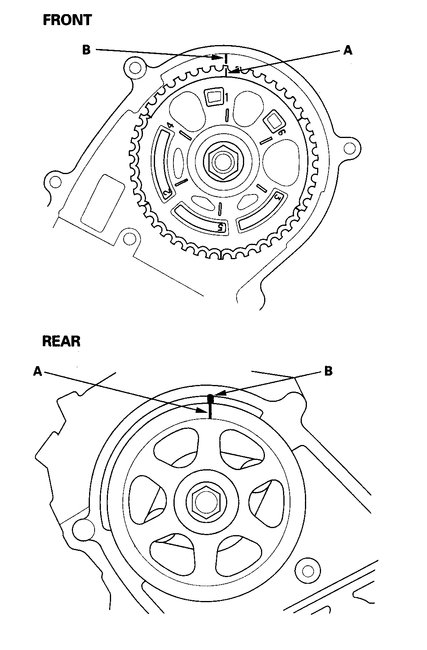
3. Set the camshaft pulleys to TDC by aligning the TDC marks (A) on the camshaft pulleys with the pointers (B) on the back covers.
Pic 2
4. Loosely install the idler pulley with a new idler pulley bolt so the pulley can move but does not come off.
5. If the auto-tensioner has extended and the timing belt cannot be installed, do the timing belt replacement procedure.
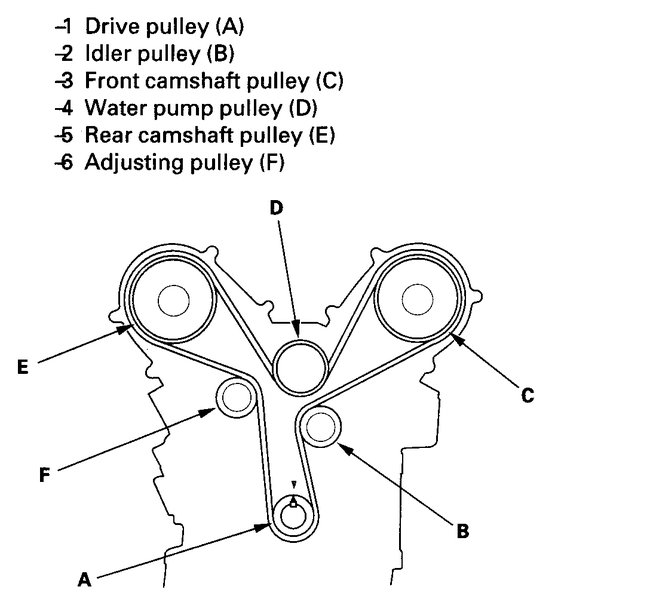
6. Install the timing belt in a counterclockwise sequence starting with the drive pulley. Take care not to damage the timing belt during installation.
Pic 3
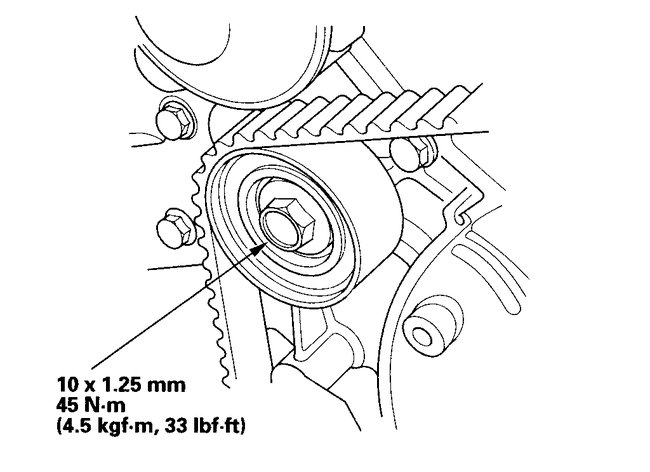
7. Tighten the idler pulley bolt.
Pic 4
8. Remove the battery clamp bolt from the back cover.
Pic 5
9. Install the lower half of the side engine mount bracket.
Pic 6
10. Install the timing belt guide plate as shown.
Pic 7
11. Install the lower cover.
Pic 8
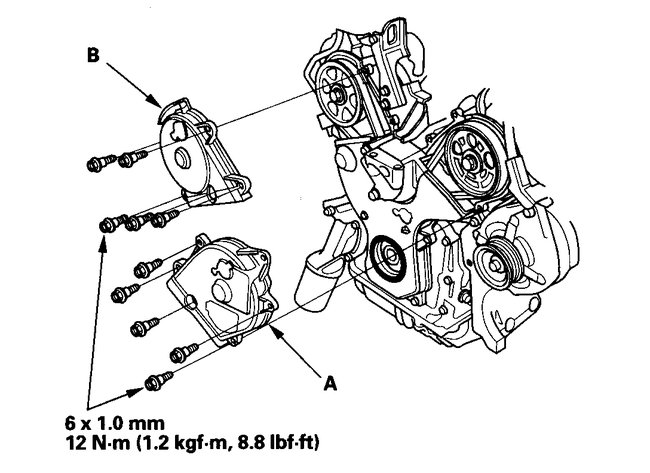
12. Install the front upper cover (A) and the rear upper cover (B).
Pic 9
13. Install the crankshaft pulley.
14. Rotate the crankshaft pulley about six turns clockwise so the timing belt positions itself on the pulleys.
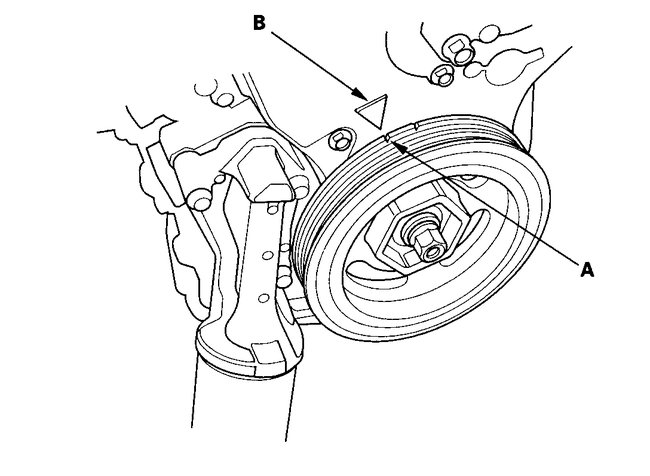
15. Turn the crankshaft pulley so its white mark (A) lines up with the pointer (B).
Pic 10
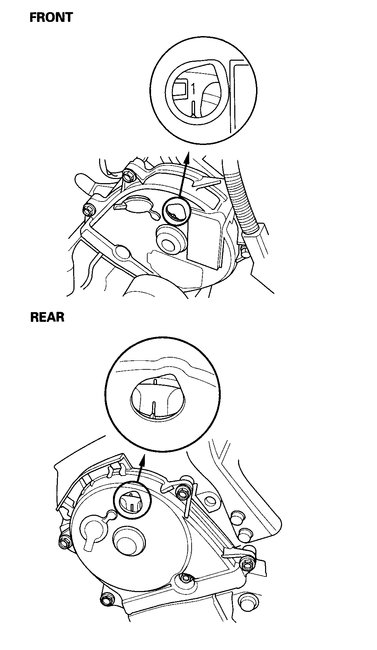
16. Check the camshaft pulley marks.
NOTE: If the marks are not aligned, rotate the crankshaft 360 degrees, and recheck the camshaft pulley mark.
- If the camshaft pulley marks are at TDC, go to step 17.
- If the camshaft pulley marks are not at TDC, remove the timing belt and repeat steps 2 through 16.
Pic 11
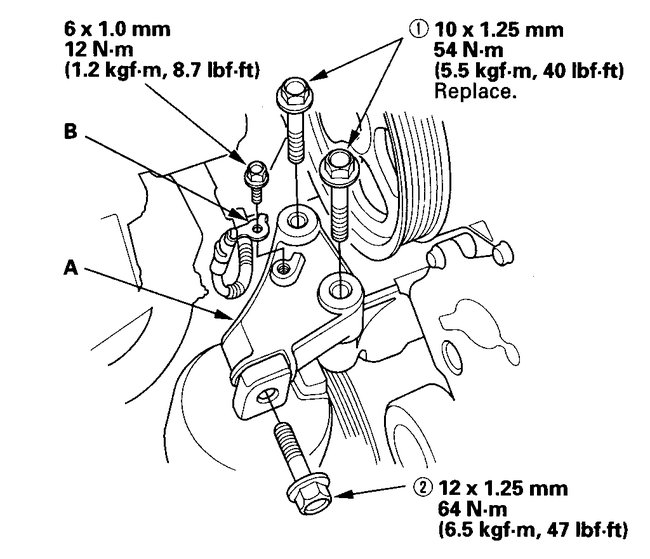
17. Install the upper half of the side engine mount bracket (A), then tighten the mounting bolts in the numbered sequence shown.
Pic 12
18. Install the ground cable (B).
19. Install the drive belt auto-tensioner.
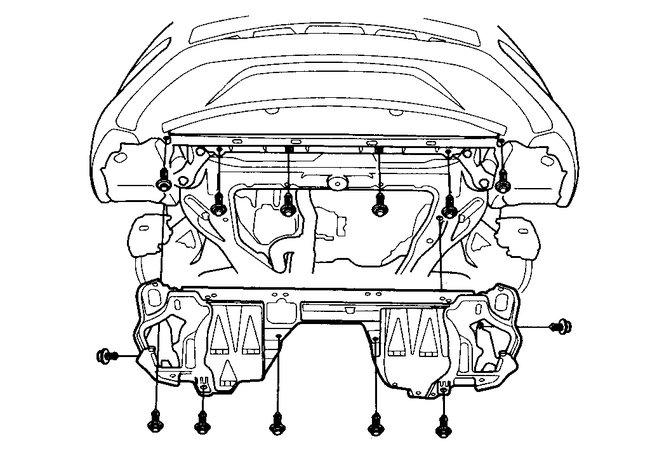
20. Install the splash shield.
Pic 13
21. Install the right front wheel.
22. Do the crankshaft position (CKP) pattern clear/CKP pattern learn procedure.
____________________________________
Let me know if this helps or if you have other questions.
Take care,
Joe
Images (Click to make bigger)
SPONSORED LINKS
Friday, September 20th, 2019 AT 9:13 PM
