HEATER CORE REPLACEMENT
NOTE: The heater core can be removed without removing the heater assembly.
1. Drain coolant at the radiator.
2. Remove evaporator (air conditioned models).
3. Remove the heater pipe cover and heater pipe clamp.
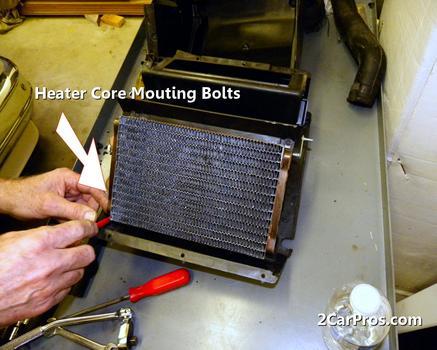
4. Remove the heater core retaining plate.
5. Pull out the cotter pin of the joint hose clamp and separate the heater pipes.
NOTE: Coolant will run out when the heater pipes are disconnected; drain it into a clean drip pan.
6. Pull out the heater core from the heater housing.
7. Install in reverse order of removal, and:
o Replace the joint hose clamps with new ones.
o Turn the cotter pin of the joint hose clamps securely to prevent coolant leakage.
o Loosen the bleed bolt on the engine and refill the radiator and reservoir tank with the proper coolant mixture. Tighten the bleed bolt when the trapped air has escaped and coolant begins to flow from it.
EVAPORATOR REPLACEMENT
1. Disconnect the battery negative terminal.
2. Recover the refrigerant.
3. Disconnect the receiver line and suction hose from the evaporator.
CAUTION: Cap the open fittings immediately to keep moisture and dirt out of the system.
4. Remove the grommets.
5. Remove the glove box and its frame by removing the 5 screws and 1 bolt.
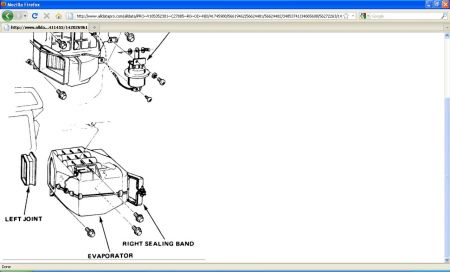
6. Loosen the right sealing band and slide it to the left.
7. Remove the screw in the outside air door diaphragm (leave the diaphragm attached to the air door arm) and the blower mount bolts, then remove the blower.
8. Remove the left sealing band and disconnect the wire.
9. Remove the three bolts and remove the evaporator.
10. Install the evaporator in the reverse order of removal.
o If a new evaporator, add 30 cc of refrigerant oil to it before charging.
o Remember to install the left sealing band and tighten the right band securely to prevent air leaking past the joint.
o Apply sealant to the inside and outside mating surfaces of the receiver line and suction hose grommets.
o Charge the system.
o Test performance.
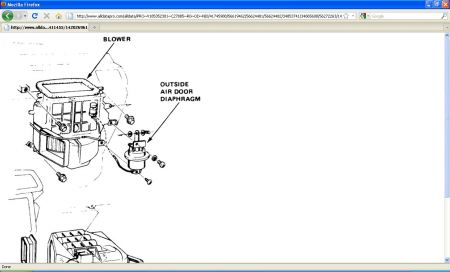
That's what i have.
Saturday, October 10th, 2020 AT 9:56 AM
(Merged)


