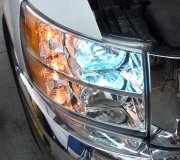
Hello,
It sounds like the BCM has gone out but to be sure lets check the fuses that run the system, #16, 17, 39, 23 and 24. Here is a guide to help us get started and the wiring diagrams for you to see how the headlight system works and the fuse location and BCM location below.
If the BCM is bad it will need to be programmed in which will run about $130.00.
https://www.2carpros.com/articles/how-to-check-a-car-fuse
Removal
NOTICE: Electronic modules are sensitive to static electrical charges. If exposed to these charges, damage may result.
NOTE: Prior to the replacement of the Body Control Module (BCM) , it is necessary to upload the module configuration information to the appropriate scan tool. This information must be downloaded into the new BCM (Body Control Module) after installation. In the event that As-Built data entry is required (BCM (Body Control Module) will not communicate), all Integrated Keyhead Transmitters (IKTs) devices must be programmed. A minimum of 2 devices are necessary to complete the configuration and turn off the flashing interior lights.
1. NOTE: This step is necessary only if the BCM (Body Control Module) is being replaced.
NOTE: If installing a new BCM (Body Control Module) , all vehicle keys are erased during the parameter reset procedure. Verify at least 2 of the vehicle keys are available prior to carrying out this procedure.
Upload the module configuration information from the BCM (Body Control Module) .
2. Remove the passenger cowl side trim panel.
3. NOTE: The upper 12A581 harness BCM (Body Control Module) (B+) connector may be more easily removed after the BCM (Body Control Module) brackets and bolts are removed and the BCM (Body Control Module) can be positioned lower and away from the body in order for the connector release tangs to be accessed and pressed.
Disconnect the 7 BCM (Body Control Module) electrical connectors.
4. Remove the in-line connector wiring harness push pins (2) from the BCM (Body Control Module) .
5. Remove the 2 bolts and the BCM (Body Control Module) .
6. Remove the BCM (Body Control Module) front bracket and the 2 BCM (Body Control Module) brackets from the BCM (Body Control Module) .
Installation
1. Install the 2 bolts and the BCM (Body Control Module) .
- Tighten to 2 Nm (18 lb-in).
2. Install the in-line connector wiring harness push-pins (2) on the BCM (Body Control Module) .
3. Connect the 7 BCM (Body Control Module) electrical connectors.
4. NOTE: If the BCM (Body Control Module) was not replaced, this is the last step that is necessary.
Install the passenger cowl side trim panel.
5. NOTE: Once the BCM (Body Control Module) Programmable Module Installation (PMI) is complete, follow the scan tool's on-screen instructions for performing the Configured Engine Immobilizer (CEI) Lock Configuration.
Download the BCM (Body Control Module) configuration information from the scan tool.
6. NOTE: If a new BCM (Body Control Module) is installed, the BCM (Body Control Module) and the PCM require a parameter reset to allow the BCM (Body Control Module) and the PCM to recognize each other.
NOTE: If equipped, the vehicle's IKTs (Integrated Keyhead Transmitters) must be programmed to the new BCM (Body Control Module) .
If installing a new BCM (Body Control Module) , carry out the parameter reset and key programming procedure. For additional information, refer to Antitheft and Alarm Systems.
7. Carry out the BCM (Body Control Module) on-demand self-test to confirm all DTCs have been cleared.
Check out the diagrams (below). Please let us know what you find. We are interested to see what it is.
Images (Click to make bigger)
Monday, March 11th, 2019 AT 10:40 AM


