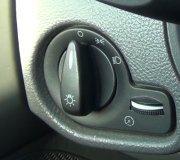
There are two versions of this circuit, and neither shows a ground wire for the head light switch. There is not anything in the switch that needs to be grounded for it to work. What is more likely, if there actually was a wire plugged into that terminal, is it is for some other circuit. If the switch is bolted to a metal part of the dash, that ground terminal is there to provide a convenient place to run that ground wire. The wire could be the ground wire for a light above the switch, or for something else in that area. If that is the case, it is the wire that needs to be grounded, not the terminal on the switch. The easiest may be to extend the wire, then bolt it to a metal part of the dash or firewall.
The extra two terminals appear to be for the dash light rheostat. It looks like they are for a different version, possibly for a vehicle that uses the newer "pulse-width-dimming" circuit. By making the new switch compatible with either system, they only have to manufacture and stock one part number to cover a lot more applications. You just use the part that is appropriate for your vehicle.
You have a more pressing concern with this repair. That is the terminal in the connector. Most commonly this problem is caused by the high current flowing through the switch, and the arcing between the contacts when the switch is turned off. That arcing causes the contacts to develop a little resistance. That resistance causes heat to build up, and that heat causes more resistance to form. It is a vicious circle once it starts, and that heat migrates out to the two terminals in the connector. You have a situation with a head light switch because it has a built-in thermal circuit breaker. The heat will stop transferring at that circuit breaker and won't make it all the way to that terminal, (that is terminal "B1"). Double check B1, but it should be okay. If this was a heater fan switch or an ignition switch, you would have found two blackened terminals.
You are going to have this same problem very shortly unless you also replace the blackened terminal in the connector. The easiest way to do that is to cut away the melted part of the body, plug the connector in that way, then plug in the replacement terminal individually. You are going to find that wire is hardened for about the first four inches, from being hot. Cut that four inch away because solder won't adhere to it. Splice in a new four inch section of the same diameter, solder it, and seal it with heat-shrink tubing. Never use electrical tape in a car because it will unravel into a gooey mess on a hot day.
Crimp on a universal crimp-type terminal to the wire, and solder it for a solid connection. Squeeze the terminal a little to insure it makes a solid electrical connection. Plug that in through the hole you made when you cut the melted part of the connector body away.
Heat build-up in the contacts is the most common cause of this problem, but that resistance and the resulting heat build-up can occur between two mating terminals in the connector too. Once the heat build-up starts, it causes resistance to increase, which creates more heat, and more resistance, until the terminals overheat and become blackened. If you just replace the switch, the head lights will usually work for a little while, but the problem will occur again if that terminal is not replaced.
Sunday, October 29th, 2017 AT 2:39 PM


