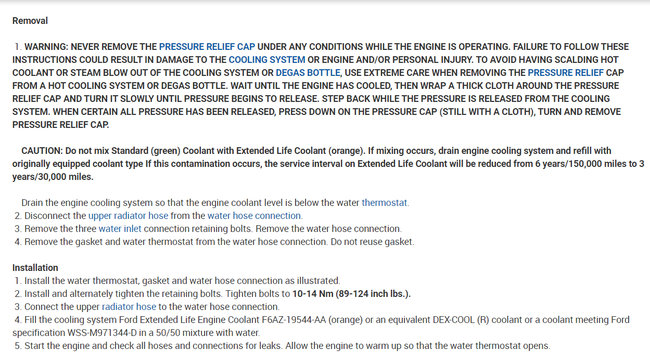
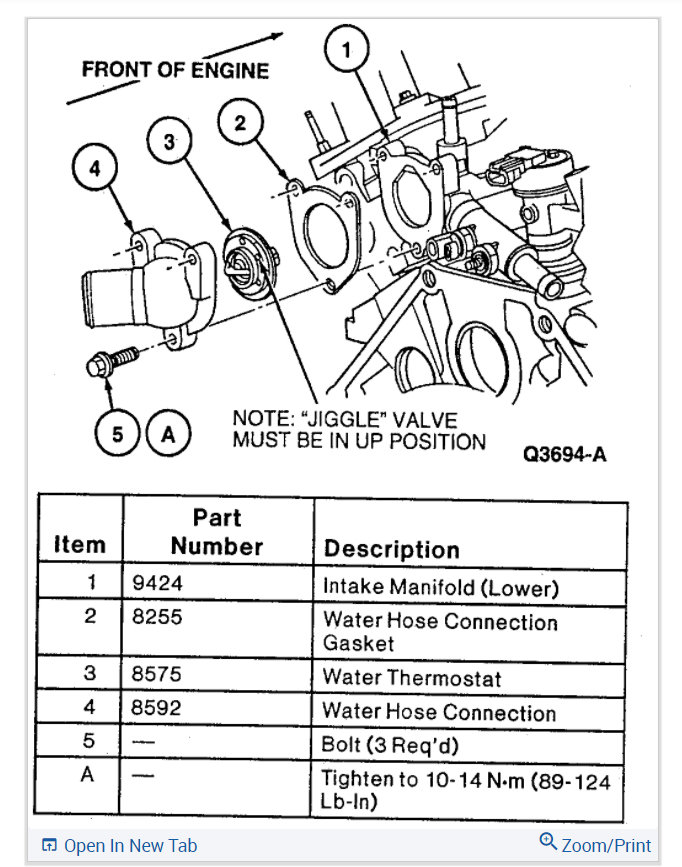
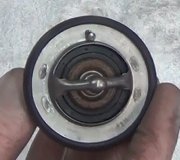
THERMOSTAT Removal 1. Drain the engine cooling system so that the engine coolant level is below the water thermostat. 2. Raise and support vehicle on hoist. See JACKING & HOISTING . 3. Disconnect the lower radiator hose from the water inlet connection. See Fig. 9. 4. Remove the two water inlet connection retaining bolts. Remove the water inlet connection. 5. Remove the "O" ring seal and water thermostat from the water thermostat housing. Inspect "O" ring for damage and replace if necessary. 6. If required, remove water thermostat housing retaining bolts, water thermostat housing and "O" ring from lower radiator hose tube. Inspect "O" ring for damage and replace if necessary. Installation 1. Install the water thermostat, "O" ring, water thermostat housing (if removed) as shown. 2. Install and alternately tighten the retaining bolts. Tighten bolts to specification. See TORQUE SPECIFICATIONS. 3. Connect the lower radiator hose to the water inlet connection. 4. Lower vehicle. 5. Fill the cooling system using Premium Engine Coolant (green in color), E2FZ-19549-AA or equivalent meeting Ford specification in a 50/50 mixture. Bleed system See BLEEDING . 6. Start the engine and check all hoses and connections for leaks. Allow the engine to warm up so that the water thermostat opens. 7. Stop the engine. Top off degas bottle as required to maintain minimum cold fill level. Fig. 9: Locating Water Thermostat Courtesy of FORD MOTOR CO. WARNING: NEVER REMOVE THE PRESSURE RELIEF CAP UNDER ANY CONDITIONS WHILE THE ENGINE IS OPERATING. FAILURE TO FOLLOW THESE INSTRUCTIONS COULD RESULT IN DAMAGE TO THE COOLING SYSTEM OR ENGINE AND/OR PERSONAL INJURY. TO AVOID HAVING SCALDING HOT COOLANT OR STEAM BLOW OUT OF THE COOLING SYSTEM OR DEGAS BOTTLE, USE EXTREME CARE WHEN REMOVING THE PRESSURE RELIEF CAP FROM A HOT COOLING SYSTEM OR DEGAS BOTTLE. WAIT UNTIL THE ENGINE HAS COOLED, THEN WRAP A THICK CLOTH AROUND THE PRESSURE RELIEF CAP AND TURN IT SLOWLY UNTIL PRESSURE BEGINS TO RELEASE. STEP BACK WHILE THE PRESSURE IS RELEASED FROM THE COOLING SYSTEM. WHEN CERTAIN ALL PRESSURE HAS BEEN RELEASED, PRESS DOWN ON THE PRESSURE CAP (STILL WITH A CLOTH), TURN AND REMOVE PRESSURE RELIEF CAP.
6/11/2009
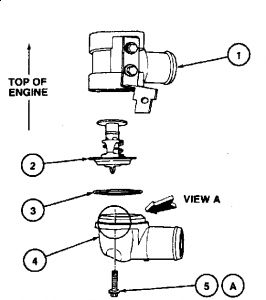
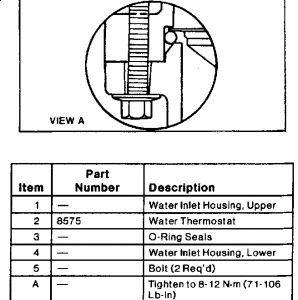
Yours is found by following the LOWER hose. on 3.0 2V VIN U or 2
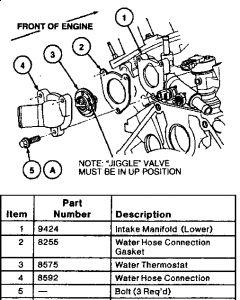
Upper hose on 3.0 4V VIN S
And lower on the SHO VIN N
THERMOSTAT Removal 1. Drain the engine cooling system so that the engine coolant level is below the water thermostat. 2. Remove battery. Remove power distribution box. Remove battery tray. 3. Disconnect upper radiator hose and position out of the way. 4. Disconnect the lower radiator hose from the water inlet connection. See Fig. 2 . 5. Remove the two retaining bolts. Remove the water inlet connection. 6. Remove the "O" ring seal and water thermostat from the water pump . Inspect "O" ring for damage and replace if necessary. Installation 1. Install the water thermostat, "O" rings and water inlet connection. See Fig. 2 . 2. Install and alternately tighten the retaining bolts. Tighten bolts to specification. See TORQUE SPECIFICATIONS . 3. Connect the lower radiator hose to the water inlet connection. 4. Install upper radiator hose. Position spring clamp securely. 5. Install battery tray. Install power distribution box. Install battery. 6. Fill the cooling system using Premium Engine Coolant (green in color), E2FZ-19549-AA or equivalent meeting Ford specification in a 50/50 mixture. Bleed system. See BLEEDING . 7. Start the engine and check all hoses and connections for leaks. Allow the engine to warm up so that the water thermostat opens. Fig. 2: Locating Water Thermostat Courtesy of FORD MOTOR CO. WARNING: NEVER REMOVE THE PRESSURE RELIEF CAP UNDER ANY CONDITIONS WHILE THE ENGINE IS OPERATING. FAILURE TO FOLLOW THESE INSTRUCTIONS COULD RESULT IN DAMAGE TO THE COOLING SYSTEM OR ENGINE AND/OR PERSONAL INJURY. TO AVOID HAVING SCALDING HOT COOLANT OR STEAM BLOW OUT OF THE COOLING SYSTEM OR DEGAS BOTTLE, USE EXTREME CARE WHEN REMOVING THE PRESSURE RELIEF CAP FROM A HOT COOLING SYSTEM OR DEGAS BOTTLE. WAIT UNTIL THE ENGINE HAS COOLED, THEN WRAP A THICK CLOTH AROUND THE PRESSURE RELIEF CAP AND TURN IT SLOWLY UNTIL PRESSURE BEGINS TO RELEASE. STEP BACK WHILE THE PRESSURE IS RELEASED FROM THE COOLING SYSTEM. WHEN CERTAIN ALL PRESSURE HAS BEEN RELEASED, PRESS DOWN ON THE PRESSURE CAP (STILL WITH A CLOTH), TURN AND REMOVE PRESSURE RELIEF CAP.

Wednesday, October 21st, 2020 AT 10:06 AM
(Merged)
