I'm overlooking something about bleeding the brakes because it shouldn't be that hard. The bends in the line are not that critical. I've used coat hangers before to get the shape right, but the manufacturer goes through all that trouble to make it look pretty and so it won't interfere with any moving parts. As long as it gets the fluid from here to there, what it looks like isn't important. Make sure there are no long stretches where it isn't anchored because vibration will cause the metal to "work harden" which makes it brittle, and likely to crack. Also be sure it doesn't rub against the shock absorber and isn't real close to hot exhaust parts.
Shock absorbers aren't a big deal. They're more for comfort than handling unless they get real bad and let a tire bounce going down the highway.
There are two or three different switches that will turn on the red brake warning light. One is the parking brake. A trick that can give a clue is to turn on the ignition switch, leave the engine off, then watch the light VERY closely while you slowly push the parking brake pedal. If you see a very tiny increase in brightness, the parking brake is not the reason the light is on. There is always a little resistance in the wires going to each switch. That resistance reduces current flow in the circuit which includes the light bulb. When you turn on a second switch, (the parking brake pedal), there is a second circuit for current to flow so there's less resistance and more current flows. Think of a fire hose connected to a fire hydrant. Current flow, (water), is limited by the size of the hose. Now you come along and connect a garden hose to the same hydrant. Current flow goes up just a little.
If you don't see any change in brightness, try pulling the pedal up by hand. If the light goes out, the cable needs to be adjusted tighter to pull the pedal back further, or one or both rear cables are sticking. Look up at the top of the parking brake pedal assembly for the switch. It is just a copper-colored piece of metal shaped like the letter "J". The lower curved part is hit by the toothed gear and pushed to turn it off. If that part is deformed or cracked off, the remaining part of the lever will touch the ground tab and turn the light on. It's acceptable to find a used switch in the salvage yard because they rarely fail on their own. There's a small white plastic pin molded into it that sits in a locating hole in the metal bracket. One long screw holds the switch in place. When the switch is deformed or broken it is usually due to it being installed improperly or the screw wasn't tight.
Next, look at the master cylinder reservoir to see if it has a low fluid switch. There will be a two-wire connector. Unplug that connector. If the light goes out, add some clean fluid. If that doesn't help, the float may have sunk or is sticking. It has a magnet that trips the switch. It's acceptable to leave that switch disconnected but you should check the fluid level at every oil change. Most older vehicles didn't even have that switch. Be absolutely sure you don't let any trace of engine oil from your fingers, or any other petroleum product get into the brake fluid. That is real serious and expensive.
The third switch is the pressure-differential switch. It might get tripped if you pedal-bled the brakes with a helper and he pushed the pedal down too far. That switch is extremely frustrating to reset on Fords but on Chrysler products it is spring-loaded to reset when you release the brake pedal. Since it is very rare for the valve that turns on that switch to move, corrosion can build up in its bore, then it will stick once it has moved. Most of the time a good hard jab on the brake pedal will shock the valve free. If not, then you'll have to open the hydraulic system to the front brakes, then slowly press the brake pedal until the light goes off. At that point the person pressing the pedal must hold it there and holler for you to close whatever you opened. It's important to not release the pedal before you close the system so air isn't drawn in. You can open a front caliper bleeder screw but since they are often rusted tight, I prefer to crack a steel line right at the master cylinder. The pressure-differential switch is inside the combination valve which is bolted to the frame under the master cylinder. You can follow the steel lines from the master cylinder to it. There's a single wire on top in the center of the brass assembly. Unplug that wire. If the light goes out, that valve must be reset.
The yellow ABS light could be on because the truck was driven with the red light on. If it doesn't go out, first check the fuses. There are two for that computer. If the fuses are good, the system must be put in test mode to read the diagnostic fault code. I can't remember if you have to remove the glove box to locate the test wire or if it is accessible from under the dash right below the glove box. It will be a single wire in a two-wire connector taped to the outside of the rest of the harness. Use a jumper wire to ground that wire momentarily while the ignition switch is in the "run" position. The ABS light will flash from one to nine times indicating the fault code. As I recall, there is no way to get the system out of test mode except by connecting a scanner to turn it off electrically. Disconnecting the battery won't even do it so save that as a last resort. I have a couple of DRB2 scanners but there is no cable that plugs into that ABS connector so I'm overlooking something that is required to work on the system.
I've had real good luck with Carquest batteries in the past but since I've been unemployed for over two years, I have to watch my bucks very closely. I found a local battery store that always has a few "reconditioned" batteries in stock. Basically these are batteries customers returned because they didn't solve their problem. There is nothing wrong with them but they aren't new. They also buy old batteries for $4.00 each. The reconditioned ones cost $25.00. I just take in a load of old batteries each time I need a new one. I've gotten three so far including a huge deep cycle battery, all for 25 bucks each. You can also look at the local salvage yards. One yard in my city only buys insurance wrecks that are less than ten years old. They get most of the very new cars with very new batteries. They charge 20 bucks each for what is essentially an almost new battery.
Most new batteries are fine. It doesn't take much to add quality so there's no point in making a lower quality battery. I wrote a whole web page on why batteries fail. It is very common for them to fail very near the expiration date of their warranty so buying one with a better warranty will usually last longer. It's not because it was designed to fail in that amount of time. It's because it is natural in older batteries for the lead to flake off the plates. As it does, it collects and builds up in the bottom of the case. When it builds up high enough, that debris touches the plates and shorts them out. The manufacturer knows about how fast that is going to happen and they determine the warranty period accordingly. A longer warranty allows them to sell it for a higher price. The area below the plates has to be big enough to collect that flaked-off lead. The more area they devote to that, the less area there is to put the plates so the trade-off is a little less electrical storage capacity.
The pinion seal is in the front of the rear axle right behind the yoke the rear universal joint slides into. If you still plan on replacing the transfer case, the drive shaft will have to be removed. That's the time to replace the pinion seal. Be sure to have a large torque wrench on hand. The torque value for the pinion nut is very high and must be adhered to to prevent gear noise. If you only see dried residue around the front and bottom or the differential, I wouldn't worry about that seal. That residue is common and normal.
I don't think there's anything to worry about when driving due to the transfer case unless you hear some unusual noise. Rotating parts asking to be let out is never a good thing, but I don't recall ever hearing of someone having to replace one of these.
If you don't want to tackle the cv joint boot, you might consider finding a shaft from the salvage yard. I've replaced a lot of boots but never one on a Dakota. If there is just a little grease leaking out, you can drive it like that for quite a while. If the boot is torn enough to let water and dirt in, that's not good. The steel marbles and the grooves they roll in are machined to very close tolerances. Dirt will grind those polished surfaces and make the joint make crunching noises when turning and moving. The most important thing about the repair procedure is there must never be any vehicle weight on the wheel bearing assembly when the axle nut is loose or off. The bearing is held together by the cv joint and axle nut. When weight is placed on it without that nut, the bearing will instantly become noisy. It will sound like an airplane engine.
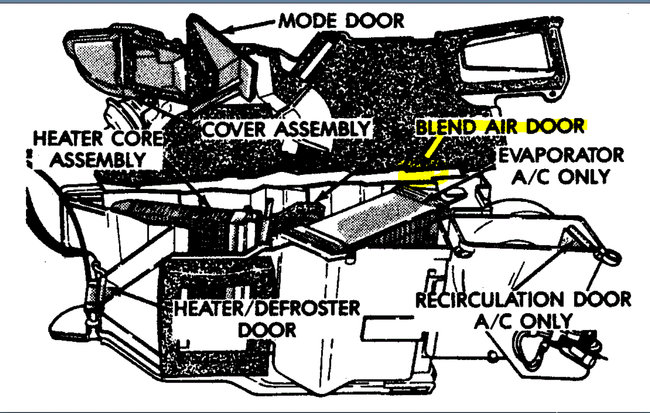
The heater blower should be accessible from the bottom right side of the heater box near the passenger door. Drop it down and you'll see the squirrel cage fan. Remove the leaves or mouse nest. If there's nothing in there, run it while it's removed. If it doesn't vibrate out of your hand but you still hear the noise, the bearings in the motor are bad and the motor must be replaced. That was extremely common on older GM cars but is very rare on Chrysler products. That happened once to an old '78 LeBaron I had. The clue it was debris is the problem was real bad one day and not there at all the day before. Bad bearings usually get slowly worse over a period of weeks. In my case there was a dead mouse going round and round like on a Tilt-O-Whirl!
The most common service for automatic transmissions is the "drain and fill". That involves dropping the pan which will make a mess. The pan is in close quarters with a cross member in the way. It has to be tipped to get it in and out. I don't remember how much fluid comes out with the pan but it will be at least four quarts. There is at least nine quarts in the whole system. This method doesn't drain the torque converter or the cooler and lines to it in the radiator. The filter is held on with three long screws. Some filters come with a new pan gasket. Some use no gasket. Gasket sealer is used instead. Chrysler has two sealers for this purpose. The black stuff stays more rubbery but it will not seal through any residue of transmission fluid or engine oil left on the mating surfaces. Those surfaces must be perfectly cleaned and dried. The gray sealer will still bond and seal through a light oil film. It gets harder and is a little harder to clean off the next time.
A transmission flush involves connecting a machine with a pump to the cooler lines. First a can of concentrated detergent is added, then the vehicle is driven for as much as a day or as little as a few miles. New fluid flushes the old fluid out. Often the pan is not removed and the filter is not replaced. Some systems simply inject nine new quarts of fluid assuming nine quarts of old fluid comes out. Some systems draw the old fluid out first into a tank where it is measured, then an identical amount of new fluid is injected. After that system is used it is important to check and correct the level because if it was low to start with, it will be low when the service is completed. Some systems run new fluid in and right back out to the waste tank to flush the system. They do a more thorough job but the cost is higher because they could use as much as 18 quarts of fluid to flush a nine quart system. These flushing systems came about because of the delicate nature of today's computer-controlled transmissions found mostly in front-wheel-drive vehicles. Many people already have an existing transmission problem and think this flushing system is the cure-all. Later, when the problem is still there or has gotten worse, they blame the mechanic and his machine. For your transmission I would recommend the drain and fill at about 36,000 mile intervals. Be sure to use the fluid that is called for. The wrong fluid typically won't cause a parts failure but it could cause a chatter or shudder for a second or two when the torque converter locks up. That is a feature that Chrysler started in the mid 1970s for better fuel mileage. It's a set of clutch plates inside the torque converter. When the engine is warmed up, in third or fourth gear, and above about 35 - 40 mph, the clutch will engage and engine speed will drop about 200 rpm. It can feel like another shift. That's when the shudder would occur. To verify that's what you're feeling, hold the gas pedal and vehicle speed steady, then lightly tap the brake pedal. The converter will unlock, then it will relock within a couple of seconds. If you feel the shudder again, it's the converter doing it. That won't hurt anything but using the correct fluid will solve it. Newer transmissions require ATF-3 but I don't think that stuff even existed yet in '93.
Caradiodoc
Tuesday, December 1st, 2020 AT 10:14 AM
(Merged)
