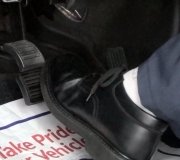
This is a very common problem due to improper bleeding procedures. Mainly, that is pushing the brake pedal to the floor while pedal-bleeding with a helper. Due to the age of the car, pedal-bleeding will have likely damaged the master cylinder. Crud and corrosion build up in the lower halves of the bores where the pistons do not normally travel. Pushing the pedal to the floor, whether pedal-bleeding or when surprised by a sudden leak, runs the lip seals over that crud and can rip them. That results in a slowly-sinking brake pedal that often does not show up for a few days. This applies to any master cylinder more than about a year old.
The other problem with pedal-bleeding only applies to GM front-wheel-drive cars. There is a valve in the master cylinder that trips when equal pressures do not build up in both halves of the hydraulic system. That occurs when there is a leak or when a bleeder screw is open. That valve blocks fluid flow to the wheel with the open bleeder screw and the one in the opposite corner. If you try to pedal-bleed the left front wheel, you will not get fluid flow to that wheel or the right rear wheel.
The only way I have found to reset that valve is to open one bleeder screw for a wheel that is not flowing any fluid, then give it short, quick burst of compressed air, then let the system gravity-bleed. The goal is just to move that valve to reset it. You do not want to blow air all the way back the master cylinder because you will just have to bleed it all out again. Also, do not be fooled by any service manual or mechanic that says this can be avoided if you bleed all four wheels in a specific sequence, usually starting with the right rear. That valve in the master cylinder will trip when there is a leak in any one of the four circuits, so it will trip if it is the line going to the right rear that does not build pressure just as easily as with any other wheel. That does not matter if it is due to a leak or because that bleeder screw is open. Logic dictates if the valve did not trip when you start with the right rear wheel, it will not trip if that circuit develops a leak either, making that valve ineffective.
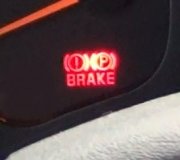
The definitive clue to this problem is the front brake pads on one side wear out and those on the other side look like brand new. Some people do not figure out there is a problem until they replace the pads two or three times. Years ago when big, heavy cars had the brake hydraulic system split between the front and rear, if one front brake was purposely disabled, applying the brakes would tear the steering wheel out of your hands. The car would be undrivable. On front-wheel-drive cars with "split-diagonal" hydraulic systems, the suspension geometry, "scrub radius" in particular, has been modified so one front working brake will make that wheel tug toward the center of the car, offsetting its brake pull. Chrysler has had that so well perfected since the 1980's that the only clue there's a brake system problem is the red warning light on the dash is on. For other manufacturers, the most you will see is a slight wiggle in the steering wheel when the brakes are applied.
I do not need to bleed at the wheels after replacing a master cylinder. That introduces a lot of air into the hydraulic system. If a caliper or wheel cylinder is replaced, that is all that needs to be bled. Some people allow the reservoir to run empty while a caliper is removed, then bleeding becomes a lot of work. To avoid that, place a stick between the brake pedal and front seat to hold the pedal down about two inches. Gravity will not be strong enough to pull brake fluid past the lip seals. My biggest bleeding jobs are after replacing a rusted steel line. Even if all four wheels need to be bled, I start with the wheel I am standing closest to, then I open all four bleeder screws. Loosen the cap on the reservoir so vacuum will not build up in it that impedes the free flow of the fluid. If fluid is not flowing from one wheel after two or three minutes, "irritate" the brake pedal by hand a little to get it started. When fluid starts dripping from one wheel, close that bleeder screw, then wait for the next one. When all four bleeders are closed, work the brake pedal a couple of times, but never push it over halfway to the floor. Open each bleeder screw once more to pop out the last few bubbles that washed into the calipers and wheel cylinders.
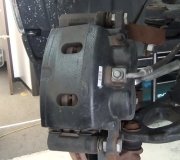
It is possible on GM front-wheel-drive cars to develop this same problem just from replacing the front brake pads. The pistons worked their way out of the calipers to self-adjust as the pads wore down. Now they have to be pushed back in to make room for the new, thicker pads. Once everything is reassembled, you need to pump the brake pedal to run the pistons back out until they are adjusted. One piston will always have a little less resistance and will move first. Once it has the pads squeezed up against the rotor, that circuit will start to build pressure each time the brake pedal is pressed. The other side will not be building pressure yet because the piston is free to move. Those unequal pressures will trip the valve in the master cylinder. To avoid this, never push any brake pedal over halfway to the floor.
Monday, January 15th, 2018 AT 1:26 PM


