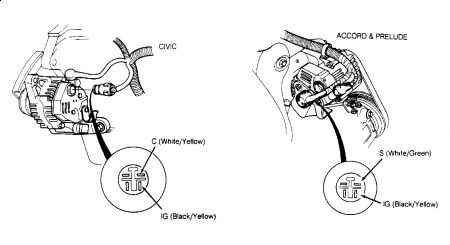
PRELIMINARY INSPECTION
Check alternator wiring harness connections and drive belt tension. Ensure battery is fully charged and connections at battery cables, alternator and main fuses are good.
Check dash fuse box fuse No. 2 (15A). Replace fuse(s) as necessary.
NOTE:If any fuse is blown, charge warning light will come on even if the charging system is working properly.
ALTERNATOR OUTPUT TEST
With engine at normal operating temperature, remove alternator harness connector.
Turn ignition switch to ON position.
Ensure battery voltage is present between Black/Yellow wire terminal of harness connector and ground. If battery voltage is present, go to step 4).
If battery voltage is not present, check dash fuse No. 2 (15A). Check for open circuit in Black/Yellow wire between dash fuse box and alternator.
Turn ignition off.
Reconnect alternator harness connector.
Connect alternator tester with integral carbon pile to apply electrical load to system. Start engine.
Ensure all accessories are off.
Operate engine at 2000 RPM and apply a load with carbon pile so voltage reading drops to no less than 12 volts. Cooling fan must not come on while testing.
Check maximum amperage and compare with appropriate alternator specification chart.
NOTE:Due to engine operation, subtract 5-10 amperes from the maximum reading.
If amperage reading is within specification, charging system is okay. If amperage is not within specification, perform full field test.
Recheck amperage. If amperage is still not within specification, replace alternator. If amperage is within specification, internal voltage regulator is defective and must be replaced.

Tuesday, August 25th, 2020 AT 12:49 PM
(Merged)


