Replace front brake pads?

Tiny
SLUMBUCKET
  • MEMBER
  • 2006 DODGE DAKOTA
  • 176,000 MILES
I've replaced hubs, brake pads, passenger front caliper, and passenger front rotor, on my 2006 Dodge Dakota Laramie V-6. I've bled the brakes several time in sequence, passenger rear, driver rear, passenger front, driver front. If I pump up the brakes, they fee spongey. If I take my foot off of the brakes for a few seconds, I have to pump them again. What am I doing wrong?
Monday, February 18th, 2013 AT 6:36 PM

21 Replies

Tiny
CARADIODOC
  • MECHANIC
  • 33,916 POSTS
At any time did you push the brake pedal all the way to the floor? Either to run the new piston out to contact the pads or while bleeding with a helper? If you did, chances are the master cylinder has been damaged. That will usually cause the red warning light to turn on. If you are able to pump the pedal up and make it high and firm, more likely the rear drum brakes are out of adjustment.
Was this
answer
helpful?
Yes
No
Monday, February 18th, 2013 AT 6:46 PM
Tiny
SLUMBUCKET
  • MEMBER
  • 3 POSTS
There is no warning light. Can you still adjust the rear brakes by driving in reverse and hitting the brakes or do you have to do it manually? I will try to bleed them again, after I adjust them. Thank you for your time!
Was this
answer
helpful?
Yes
No
Monday, February 18th, 2013 AT 7:06 PM
Tiny
CARADIODOC
  • MECHANIC
  • 33,916 POSTS
They are supposed to adjust when backing up but it is common for the star wheels to rust tight, then the lever skips over it and wears a bald spot in the teeth. It's not uncommon for the adjuster cable to break too. That misadjustment would show up gradually over time as a lower brake pedal but it will still feel firm. Pumping the pedal a few times rapidly will get a higher pedal until you release it for more than a few seconds. If your low pedal started with the recent brake service, there is either still air in the line or the master cylinder lip seals were damaged on the crud and corrosion that build up in the bottoms of the bores they ride in.

If you let the master cylinder run empty while the caliper was off there could be some air in the line to the left caliper or rear wheels. Bleeding those wheels would make the problem worse because that air could travel half way to a wheel and get stuck there. If the reservoir did not run empty, there should be no air in the lines anywhere. When the reservoir does run empty but you catch it just at the last drop, you can avoid having to bleed at the wheels and risking more problems. Fill the reservoir, then slowly push the brake pedal half way to the floor, never more than that. When you release the pedal, let it pop back quickly. Do that a few times. Any air near the master cylinder will have a chance to float back up when you push the pedal slowly, then any bubbles will wash back into the reservoir when the brake fluid comes rushing back.
Was this
answer
helpful?
Yes
No
Tuesday, February 19th, 2013 AT 1:09 AM
Tiny
SLUMBUCKET
  • MEMBER
  • 3 POSTS
Thank you!
Was this
answer
helpful?
Yes
No
Tuesday, February 19th, 2013 AT 12:10 PM
Tiny
KEVINIRE024
  • MEMBER
  • 1 POST
  • 2005 DODGE DAKOTA
  • 190,000 MILES
Ok I have old brakes can I fix it?
Was this
answer
helpful?
Yes
No
Monday, February 8th, 2021 AT 5:02 PM (Merged)
Tiny
JACOBANDNICKOLAS
  • MECHANIC
  • 109,885 POSTS
Hi,

Front brakes are not too hard to replace. First, here is a link that explains in general how it's done. You can use it as a guide:

https://www.2carpros.com/articles/how-to-replace-front-brake-pads-and-rotors-fwd

______________________________________________

2005 Dodge or Ram Truck Dakota 2WD V6-3.7L VIN K
Procedures
Vehicle Brakes and Traction Control Disc Brake System Brake Pad Service and Repair Procedures
PROCEDURES
FRONT DISC BRAKE PADS

REMOVAL

1. Raise and support vehicle.
2. Remove the wheel and tire assemblies.

pic 1

3. Compress the caliper (2).
4. Remove the caliper slide pin bolts (4).

pic 2

5. Remove the caliper (1) from the caliper adapter (2).

NOTE: Do not allow brake hose to support caliper assembly.

6. Support and hang the caliper.

pic 3

7. Remove the inboard brake pad (4) from the caliper adapter (1).
8. Remove the outboard brake pad (2) from the caliper adapter (1).

pic 4

9. Remove the anti-rattle clips (1) from the pad (2).

CLEANING
Clean the individual brake components, including the support plate and wheel cylinder exterior, with a water dampened cloth or with brake cleaner. Do not use any other cleaning agents. Remove light rust and scale from the brake shoe contact pads on the support plate with fine sandpaper.

INSTALLATION

1. Bottom pistons in caliper bore with C-clamp. Place an old brake shoe between a C-clamp and caliper piston.
2. Clean caliper mounting adapter.

pic 5

3. Install new anti-rattle clips (1) to the brake pads (2).

pic 6

4. Install inboard brake pad (4) in adapter (1).
5. Install outboard brake pad (2) in adapter (1).

pic 7

6. Install the caliper (1) over rotor, Then push the caliper onto the adapter (2).

pic 8

7. Install caliper slide pin bolts (4).
8. Install wheel and tire assemblies and lower vehicle.
9. Apply brakes several times to seat caliper pistons and brake shoes and obtain firm pedal.
10. Top off master cylinder fluid level.

_______________________________

I hope this helps. Let me know if you have other questions.

Take care and God Bless,

Joe
Was this
answer
helpful?
Yes
No
+1
Monday, February 8th, 2021 AT 5:02 PM (Merged)
Tiny
MUSTANGXXX
  • MEMBER
  • 27 POSTS
  • 2002 DODGE DAKOTA
  • 980,000 MILES
I just put new front brake pads on my 2002 dodge dakota I am somewhat used to the bleeding process but would like a proffessionals view of the best and easiest way to bleed front brakes
Was this
answer
helpful?
Yes
No
Monday, February 8th, 2021 AT 5:02 PM (Merged)
Tiny
CARADIODOC
  • MECHANIC
  • 33,916 POSTS
Did you replace the calipers? If not, you don't have to bleed the system but it's good maintenance to get the old fluid out since it will have absorbed moisture. Open the bleeder screws, crack the cap on the master cylinder to prevent a vacuum from building, and let the fluid run out. Keep the reservoir filled with clean fresh fluid. When the fluid coming out is relatively clear at one caliper, close the bleeder screw and move on to the other one.

If you did replace the calipers, did the master cylinder run empty? That makes bleeding more involved. To avoid that, place a stick between the seat and brake pedal to hold the pedal down about an inch while the hoses are disconnected. That will stop the reservoir from running empty. When you do start bleeding, you might have to irritate the brake pedal a little to get the fluid to start flowing. Close the bleeder screws when no more bubbles are coming out. Stroke the pedal a couple of times to wash any remaining air bubbles into the calipers, then crack the bleeder screws open once more for a few seconds.

Some people think you have to have a helper to push the brake pedal to pedal-bleed the system but gravity bleeding is just as effective. One thing of major importance whenever pushing the pedal is to never ever push it all the way to the floor. Crud and corrosion build up in the lower halves of the master cylinder bores where the pistons don't normally travel. Pushing the pedal all the way down runs the lip seals over that crud and can rip them. At first that will result in a slowly sinking pedal when you hold steady pressure on it. Eventually you'll have no brakes.

Also be sure to avoid getting any hint of grease or other petroleum product in the brake fluid. That is a very expensive mistake because the only proper repair is to replace every part that has rubber parts that contact the brake fluid, and to flush and dry the steel lines. Most professionals even wash their hands before working on the hydraulics to prevent getting fingerprint oil in the brake fluid.
Was this
answer
helpful?
Yes
No
+1
Monday, February 8th, 2021 AT 5:02 PM (Merged)
Tiny
MUSTANGXXX
  • MEMBER
  • 27 POSTS
  • 2002 DODGE DAKOTA
  • 980,000 MILES
I am changing front brake pads on my truck and usualy is a pretty easy job but of course this time one of the bolts that holds the caliper on the rotor. The allen head screw, is stripped how do I get it off the easiest way?
Was this
answer
helpful?
Yes
No
Monday, February 8th, 2021 AT 5:02 PM (Merged)
Tiny
ASEMASTER6371
  • MECHANIC
  • 52,797 POSTS
The easy way is with a socket.

If it is stripped, that is, spinning and not coming out, you will have to apply pressure to remove it and use an oversize bolt.

If the head is stripped, then use a pair of vise grips and replace the bolt.

Roy
Was this
answer
helpful?
Yes
No
Monday, February 8th, 2021 AT 5:02 PM (Merged)
Tiny
HDPLUS
  • MEMBER
  • 1 POST
  • 2001 DODGE DAKOTA
  • 6 CYL
  • 2WD
  • MANUAL
  • 54,000 MILES
How to change front disc brakes
Was this
answer
helpful?
Yes
No
Monday, February 8th, 2021 AT 5:02 PM (Merged)
Tiny
KHLOW2008
  • MECHANIC
  • 41,814 POSTS
DISC BRAKE SHOES
Removal
1. Clean master cylinder reservoir ad filler caps.

2. Remove reservoir filler cap and drain approximately 1/4 of fluid from reservoir. Use clean suction gun or similar device to drain fluid.

3. Raise and support vehicle.

4. Remove front wheel and tire assemblies.

5. Bottom caliper pistons in bores with large C-clamp. Position clamp frame on rear of caliper and clamp screw on outboard brake shoe.

6. With a screw driver pry up on the caliper spring and pull the spring out of the caliper holes

7. Remove caliper slide pins.

8. Remove caliper and brake shoes. See CALIPER.

9. Remove outboard brake shoe. Pry one end of shoe retainer spring away from caliper. See Fig. 25. Then tilt shoe upward and rotate it out of caliper.

10. Remove inboard shoe by tilting shoe outward until retainer spring is clear of caliper piston. See Fig. 26.

CAUTION:DO NOT allow brake hose to support caliper weight.

11. Support caliper with wire from suspension component.

Installation
1. Clean slide surfaces of adapter ledges with a wire brush. The lubricate surfaces with a thin coat of high temperature grease.

2. Install new slide pin bushings if necessary.

3. Install inboard shoe. Be sure retainer spring is firmly seated in caliper piston. See Fig. 26.

4. Insert outboard brake shoe in caliper. Insure outboard shoe retainer spring are seated in the caliper. See Fig. 25.

5. Install caliper and brake shoes over rotor and into adapter.

CAUTION: Start the slide pins by hand before tightening. DO NOT cross
thread the pins.

6. Install and tighten caliper pins.

7. Install caliper spring into one caliper hole and under the adapter. Pull down on the opposite end of the spring and hold the end under the spring. See Fig. 24. With a screwdriver, pry up on the spring to seat the spring into the other caliper hole.

8. Install wheel and tire assembly.

9. Remove support and lower vehicle.

10. Pump brake pedal to seat brake shoes.

11. Fill brake fluid reservoir.

12. Verify a firm brake pedal before moving vehicle.

CALIPER
Removal
1. Clean master reservoir and filler caps.

2. Remove reservoir filler cap. Use clean suction gun or similar device to drain approximately 1/4 of fluid from the reservoir.

3. Raise and support vehicle.

4. Remove front wheel and tire assemblies.

5. Bottom caliper pistons in bores with large C-clamp. Position clamp frame on rear of caliper and clamp screw on outboard brake shoe.

6. Disconnect brake hose at caliper. Discard hose fitting washers if worn, or damaged. See Fig. 23.

7. With a screw pry upon the caliper spring and pull the spring out of the caliper holes.

8. Remove caliper and brake shoes from caliper. See DISC BRAKE SHOES.

Installation

1. Install brake shoes in caliper. See DISC BRAKE SHOES.

2. Install caliper and shoes over rotor and into ledges in steering knuckle. Be sure ends of brake shoes are properly seated on slide surfaces of ledges.

CAUTION: Start the slide pins by hand before tightening. DO NOT cross
thread the pins.

3. Install and tighten caliper slide pins.

4. Install caliper spring into one caliper hole and under the adapter. Pull down on the opposite end of the spring. With a screwdriver pry up on the spring to seat the spring into the other caliper hole. See Fig. 24.

CAUTION:Verify brake hose is not twisted or kinked before tightening
fitting bolt.

5. Install brake hose to caliper with new seal washers and tighten fitting bolt.

6. Bleed brake system.

7. Install wheel and tire assemblies.

8. Remove supports and lower vehicle.

9. Pump brake pedal to seal brake shoes.

10. Fill brake fluid reservoir.

11. Verify firm pedal before moving vehicle.
Was this
answer
helpful?
Yes
No
Monday, February 8th, 2021 AT 5:02 PM (Merged)
Tiny
M1MHN00
  • MEMBER
  • 1 POST
  • 2001 DODGE DAKOTA
  • 4 CYL
  • 2WD
  • MANUAL
  • 122,760 MILES
I recently change the front brakes but why is it still shaking when put on brake?
Was this
answer
helpful?
Yes
No
Monday, February 8th, 2021 AT 5:02 PM (Merged)
Tiny
LEGITIMATE007
  • MECHANIC
  • 5,121 POSTS
It could be that the rotors need turning. Or that the control arm bushings are bad or ball joints are bad, it can be a lot of things, but you wont know until a trained eye has inspected it
Was this
answer
helpful?
Yes
No
Monday, February 8th, 2021 AT 5:02 PM (Merged)
Tiny
DONB31
  • MEMBER
  • 3 POSTS
  • 1998 DODGE DAKOTA
  • 6 CYL
  • 4WD
  • AUTOMATIC
  • 79,000 MILES
I have to change front brakes on this dakota. What size allen wrench do I need to take the caliper off
Was this
answer
helpful?
Yes
No
Monday, February 8th, 2021 AT 5:02 PM (Merged)
Tiny
OBXAUTOMEDIC
  • MECHANIC
  • 3,711 POSTS
Hello,

I want to say it is a 3/8's. But to make sure if you have to purchase the allen wrench just ask them to look up the caliper bolt and check it.

.
Was this
answer
helpful?
Yes
No
-1
Monday, February 8th, 2021 AT 5:02 PM (Merged)
Tiny
DONB31
  • MEMBER
  • 3 POSTS
After going to a parts store, they looked up the bolt we tried different size allens according to thier books and size of bolt it was a 7/32 but I knew that wasnt the case I said it was at least a 7mm so we took one outside and tried it on the truck. I was right it was a 7mm
Was this
answer
helpful?
Yes
No
-1
Monday, February 8th, 2021 AT 5:02 PM (Merged)
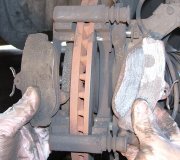
Tiny
OBXAUTOMEDIC
  • MECHANIC
  • 3,711 POSTS
Good Job.
Was this
answer
helpful?
Yes
No
Monday, February 8th, 2021 AT 5:02 PM (Merged)
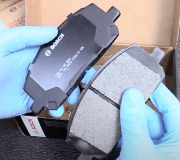
Tiny
BUTTERUP
  • MEMBER
  • 3 POSTS
  • DODGE DAKOTA
I replaced the front brake pads which were worn but not to the rivets. No brake lines were removed, fittings loosened or any other source where air could enter the system. Yet after the simple replacement, the brake pedal was very low and has not returned to a normal height. I adjusted the rear brake shoes until they drug the drums to where the rear wheels are nearly stopped yet the brake pedal is still low.
The pedal is solid not spongey.
Suggestions?
Was this
answer
helpful?
Yes
No
Monday, February 8th, 2021 AT 5:02 PM (Merged)
Tiny
JAY6647
  • MEMBER
  • 17 POSTS
There are only 2 possible reasons why you may have a low brake pedal. Air in the system or excessive travel between lining & rotor/drum. With that being said, how was the pedal prior to the pads replacement. If it was the same. Then probably you might have a leak in your hydraulic system (ie; brake lines, master cylinder, wheel cylinder, etc, etc, etc. There is also a possibility that there maybe air trapped in the ABS system. Try bleeding the system & go from there. Start with the rear wheels first then the fronts. Also, if your rotors have been resurfaced too many times, they may be too thin. If so, replace them. Visually inspect all the brake lines, master cylinder, ABS unit & importantly the wheel cylinders(inside the drum) for moisture as it may be an indication of a leak.
Hope this helps. Good luck!
Was this
answer
helpful?
Yes
No
Monday, February 8th, 2021 AT 5:02 PM (Merged)
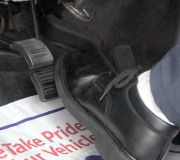
Please login or register to post a reply.

Sponsored links