
Introduction
Breaking in new brake pads and rotors, also known as bedding-in must be done correctly to get the best performance and longevity without squeaking or grumbling during their lifespan. This guide will walk you through each step of the process.
Why "Break in" Brake Pads and Rotors?
After the final machining of the manufacturing process, the brake pads and rotors surface looks flat, and it is, but if you put the parts under a microscope you will see the peaks and valleys uniformly across the mating surface due to the shape of the machine cutting tool.
When the brake are used these surfaces are forced together to stop the car, the problem is when this happens only a small part of these surfaces or contacting resulting in a diminished brake performance characteristic, sometimes it can even feel like the brake are not working at all, even though there is a firm brake pedal.
Preparation Before Bedding-In New Brakes
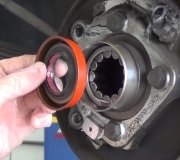
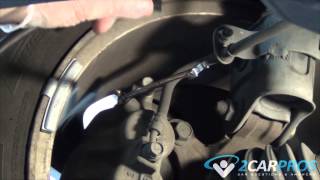
It is important that the brake job is completed correctly, brake pads and rotor are correctly installed and the brake caliper bolts tightened to the proper torque specification determined by the manufacturer.
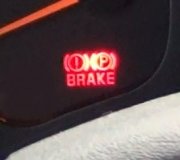
Gently push the brake pedal down (to the floor in most cases) to remove the air gap between the brake pads and rotors, repeat this process until normal brake pedal pressure has been achieved. If the brake pedal pressure is not present DO NOT DRIVE THE CAR, the brake job must be re-inspected to find problem or if a brake bleed is necessary.
After a brake service has been performed and the car is safety on level ground recheck the brake pedal operation. This should be done with the car running and in park to aid the power brake system. Perform the bedding-in procedure in a safe, controlled environment such as an empty parking lot or a quiet, low-traffic road.
Bedding-In New Brakes
Step 1: Once the you are ready to start driving the car move slowly while gently applying the brake pedal and releasing it. This will take the first layer of "peeks" off the pad and rotor surfaces while allowing the removed material to exit the area.
You must release the removed microscopic particles so they do not get imbedded back into the braking surfaces, this can cause future squeaking and uneven braking performance, (steering wheel shake).
Step 2: Gradually increase the speed of the car while making short slow downs and brake pedal releases as the peeks continue to wear flat. The more this process is done at slow speeds the better the brakes will work and improve brake life.
Step 3: Once you start to notice the brakes working better, increase the speed of the vehicle and repeat the steps of slowing and releasing to discard more of the break in material to further the mating of the pad to brake rotor union.
Step 4. Now, it is time to try a more aggressive stop, speed up to about 45 mph (70 km/h) and apply the brakes and repeat the slow down and release of the brake pedal, (do not come to a complete stop). This will heat up the brake components and prepare them for regular use.
After a few cycles it will help to create a smooth and even brake pad to rotor surface, and once the brakes have cooled they are ready for regular driving. (Note: Be careful not to brake too aggressively, this can cause the brakes to overheat resulting in uneven pad and rotor deposition.)
Conclusion
If you hear any strange noises or the pedal is soft or spongy recheck the job by re-jacking the car up and removing the wheels for inspection or re-bleeding the system. Never continue to drive a car without normal brake pedal operation.
After completing the aggressive braking applications, it's important to allow the brakes to cool down properly. Avoid aggressive braking for the first 300 to 500 miles (500 to 800 km) to allow the pads and rotors to fully mature.
Credits
This guide knowledge base was created by the 2CarPros Team, and by Ken Lavacot: Automobile repair shop owner and certified master automobile technician of over 30 years. If you have question or need help please ask one of our experts we are happy to help. Please visit our 2CarPros YouTube Channel for additional car repairs.

Article published 2024-08-22
Bleed and Flush Your Brake System Correctly