Introduction
Bleeding your automotive brake system is a crucial maintenance task that ensures your vehicle's brakes function effectively and safely. Typically a brake bleed procedure is necessary after brake components are replaced or if the system has been opened. Following this guide will show you the simple and correct way to bleed an automotive hydraulic brake system. Read completely before beginning.
Related Guides
Tools and Materials Needed
- Brake fluid (Check your vehicle’s manual for the correct type)
- Brake bleeder wrench or appropriate size wrench for bleeder valves, (10mm)
- Clear plastic or rubber tubing
- Catch bottle or container
- Jack and jack stands or a hydraulic lift
- Wheel chocks
- Safety glasses and gloves
- Clean shop towels
- Assistant (recommended for a traditional bleeding method)
Brake System Bleed
Start with the vehicle on level ground, engine off and the car lifted safely using jack stands.
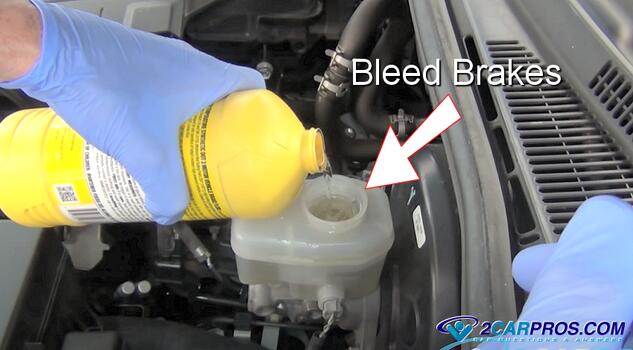
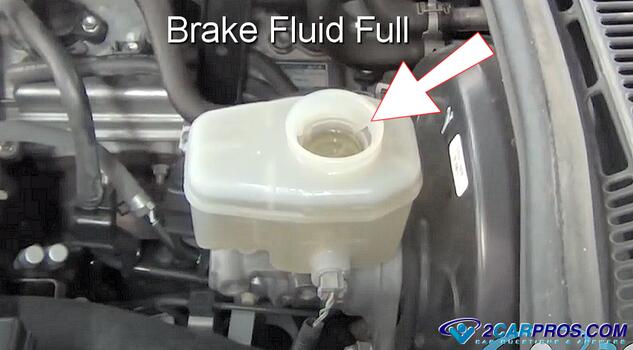
1. Fill Brake Fluid Reservoir: Make sure the brake master cylinder is filled completely with manufacturer recommended fluid, (Most brake systems use a DOT 3 or DOT 4 fluid). Before opening the master cylinder reservoir, use a shop towel to wipe it clean from dirt and debris, this will help keep the fluid free from contaminating which can cause brake component failure. (Note: void spillage, if you do accidentally spill, quickly use soap and water to wash the area clean). DO NOT allow the fluid to get low during this process.
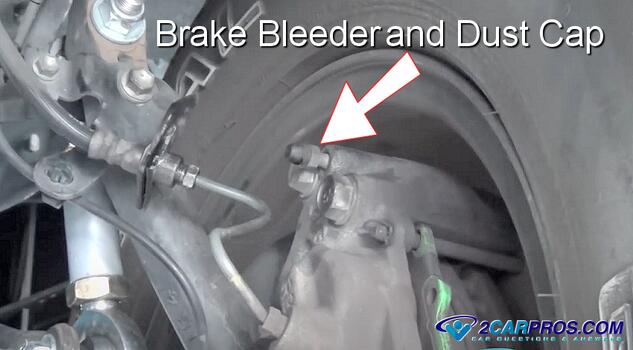
2. Brake Fluid Bleeders: Locate all four brake fluid bleeder fittings, which are near the top of each brake caliper or rear wheel cylinders and remove the dust caps, (if equipped). Here is an example of what a bleeder and cap will look like.
3. Position a Helper Inside: To bleed a brake system you will need an assistant inside the car to push the brake pedal down slowly, and then, slowly allow the brake pedal up once the bleeder is closed.
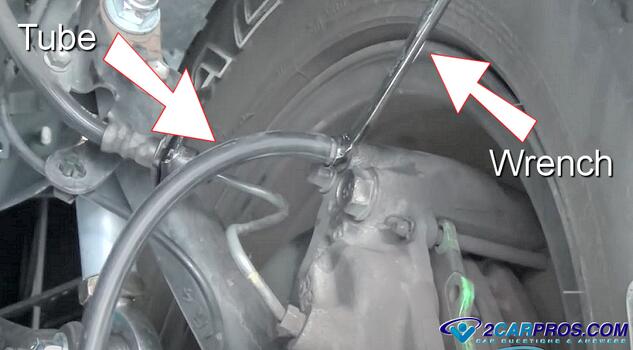
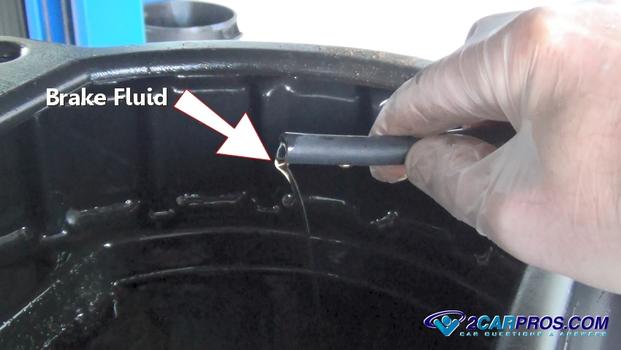
4. Crack Open Bleeders: Bleeder screws can be fairly tight, so apply WD40 or equivalent to aid in rust removal, (if needed) and use a 6 point socket (10mm) which is best to avoid stripping. Once broken loose, (not open) place a clear plastic tube or rubber hose onto the bleeder fitting and into a fluid catch basin. This hose is helpful to avoid brake fluid from getting onto the brake pads etc.
5. Start Bleeding Process: Starting one at a time, with the passenger rear, then driver rear, passenger front, and finally, the driver front, open the bleeder valve and call out to your helper to push the brake pedal slowly downward while holding even pressure, (Do not let up on the pedal). You will see fluid being forced out of the bleeder tube and into the fluid container, bubbles will stream out along with the fluid if air is present in the system.
6. Tighten Bleeder Screw: When the brake fluid flow stops, tighten the bleeder screw. Once tight, signal your helper to lift up on the brake pedal (slowly) until your foot comes off of the brake pedal pad. Repeat this process until air is no longer present in the fluid stream, this can take two or three times, complete the job by continuing onto the remaining three wheels.
7. Re-Add Brake Fluid: While bleeding the system, observe brake fluid level in the reservoir and refill as needed to keep the master cylinder full. Do not allow the master to become empty or air will be pumped back into the system. Once the job is completed refill the brake fluid to the full line of the reservoir and reinstall the lid. Use a shop towel to wipe off any spilled fluid and rinse the area with water if needed.
8. Check Brake Pedal: Once the job is completed you should have a firm brake pedal, if the brake pedal is on the floor or spongy there is air still in the system or there is a mechanical problem which needs to be inspected, (DO NOT drive the car without a firm brake pedal).
Pro Tips
- When bleeding, never "pump" the brake pedal as this will cause additional air to get into the system. (There is a very small orifice inside of the master cylinder that allows new fluid down into the master cylinder housing. If you pump the brake pedal can cause air to be drawn backwards in through the seals of the master cylinder.
- Carefully inspect all the bleeder valves and brake lines for any signs of leaks.
- Excess fluid should be hosed off with water once the job is completed
Conclusion
Start the engine and check brake pedal operation which should be firm and at the top of its travel, if not this could mean the brake shoes are out of adjustment, the master cylinder is bypassing internally or the brake system has a leak.
Watch the Video!
Please watch this video of the job being done to glean additional helpful information.
Credits
This guide knowledge base was created by the 2CarPros Team, and by Ken Lavacot: Automobile repair shop owner and certified master automobile technician of over 30 years. If you have question or need help please ask one of our experts we are happy to help. Please visit our 2CarPros YouTube Channel for additional car repairs.
