Clutch system bleeding in vehicle:
Fill the clutch master cylinder reservoir to the full line with DOT 3 Brake Fluid.
Verify that the reservoir-to-master cylinder tube routing is as shown so as not to trap air in the clutch hydraulic system. Correct the routing as necessary.
The routing for vacuum boost brakes and hydraboost brakes differ. Also, the reservoir location for 6.0L vehicles differ. Make sure the tube is routed correctly during installation.
Raise and support the vehicle.
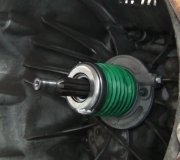
Unlock, and remove the slave cylinder from the transmission.
Compress and twist the slave cylinder to unlock it from the transmission.
Disconnect the clutch hydraulic tube from the floor pan clip.
Position the slave cylinder and the hydraulic tube so that there are no high points that could trap air in the system.
Position the slave cylinder push rod downward. Route the hydraulic tube upward as straight as possible toward the master cylinder so that the air can flow freely to the fluid reservoir.
CAUTION: Do not allow the clutch master cylinder reservoir to run dry.
Purge the air from the clutch hydraulic system.
Push the push rod slowly into the slave cylinder until it bottoms out the piston. Hold the push rod in this position for five to ten seconds to allow all trapped air to rise through the system. Very slowly, so that air is not drawn back into the slave cylinder, release the push rod (the spring in the slave cylinder will force the piston outward). Wait five to ten seconds for the air bubbles to rise. Repeat this process until all air purged from the system. Verify that the fluid in the reservoir is free of air bubbles.
Install the slave cylinder.
Compress and twist the slave cylinder to lock it onto the transmission.
Connect the clutch hydraulic tube to the floor pan clip.
Lower the vehicle.
Slowly depress and release the clutch pedal twenty to twenty five times to bleed any air still trapped in the system. Verify that the fluid in the reservoir is free of air bubbles.
Verify that the fluid level in the reservoir is correct, and install the cap
Images (Click to make bigger)
Saturday, February 12th, 2011 AT 2:26 AM


