Clutch Slave Cylinder
Removal
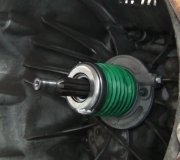
1. Raise and support the vehicle.
2. Unlock and remove the slave cylinder from the transmission.
O Compress and twist the slave cylinder to unlock it from the transmission.
3. Clean the slave cylinder and the hydraulic tube to prevent contaminants from entering the hydraulic system.
4. CAUTION: Place a suitable container under the slave cylinder.
Disconnect the slave cylinder from the hydraulic tube.
1 Using a 3/32-inch punch and a hammer, drive out the roll pin, and discard it.
2 Disconnect the slave cylinder from the hydraulic tube.
5. NOTE: Sometimes the O-ring seal will remain inside the slave cylinder.
Remove the O-ring seal from the end of the hydraulic tube, and discard it. Cap the open end of the hydraulic tube.
Installation
1. CAUTION: Hold the slave cylinder over a suitable container.
Angle the slave cylinder so that the hydraulic tube connection port is above the push rod. Fill the slave cylinder with DOT 3 brake fluid.
* Use Ford High Performance DOT 3 Motor Vehicle Brake Fluid C6AZ-19542-AB or equivalent meeting Ford specification ESA-M6C25-A.
2. Remove the cap from the opening in the hydraulic tube. Position the new O-ring seal on the end of the hydraulic tube. Coat the O-ring seal with DOT 3 Brake Fluid.
O Use Ford High Performance DOT 3 Motor Vehicle Brake Fluid C6AZ-19542-AB or equivalent meeting Ford specification ESA-M6C25-A.
3. Connect and secure the slave cylinder to the hydraulic tube.
1 Connect the hydraulic tube to the slave cylinder.
2 Install the new roll pin.
4. Bleed the clutch hydraulic system.
5. Install the slave cylinder.
O Compress and twist the slave cylinder to lock it onto the transmission.
6. Lower the vehicle.
7. Test the system for normal operation.
Wednesday, September 7th, 2011 AT 12:39 AM


