Hi,
There was a technical service bulletin years ago that indicated problems with the ignition coil breaking down. Here is what it says:
" General Motors has determined certain 1984-1985 Chevrolet Camaro and Monte Carlo models with 5.0L V8 engine and 1984-1985 Chevrolet Corvette models with 5.7L V8 engine may exhibit declining ignition voltage of the high output ignition coil.
High ignition coil temperatures combined with the stress of higher voltage may break down the epoxy coating of the high output ignition coil secondary windings. Declining ignition voltage may lead to engine misfire, hesitation, sags, or no re-start. Correction will consist of replacing the high output ignition coil and module."
I have a feeling this is the issue. If there is no spark detected, the PCM will turn off the fuel pump.
__________________________________
Here are directions for testing the coil. I believe this has an integral coil in the distributor. If I'm wrong and it is in a remote location, let me know. The attached pics correlate with the directions. The directions also include checking the pick up coil.
_________________________________
1985 Chevrolet Corvette V8-350 5.7L
Units With Integral Coil
Vehicle Powertrain Management Ignition System Distributor Testing and Inspection Component Tests and General Diagnostics Units With Integral Coil
UNITS WITH INTEGRAL COIL
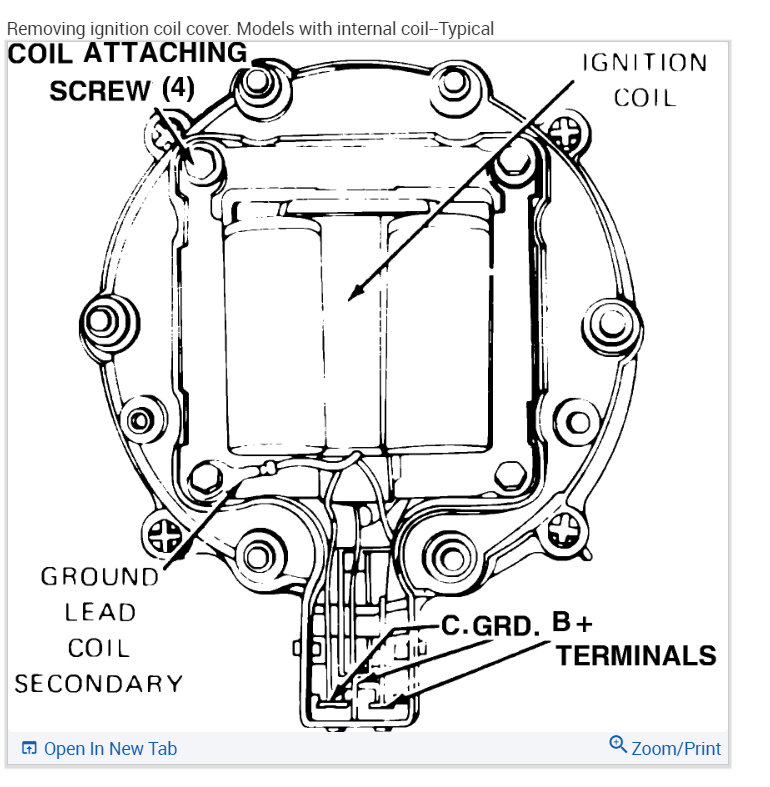
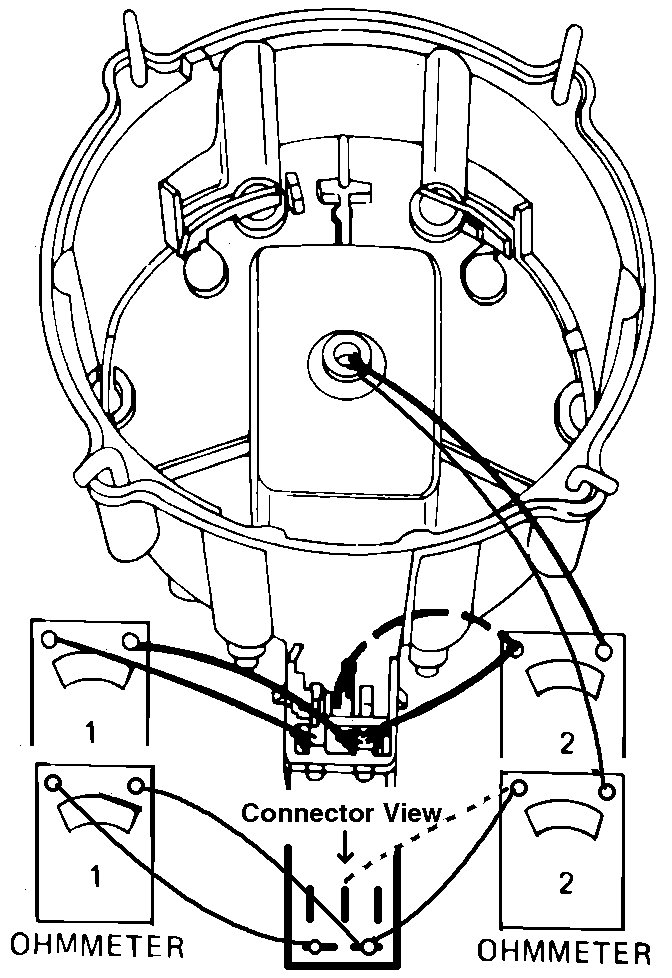
Fig. 15 Testing integral ignition coil
Pic 1
Ignition Coil Testing
1. Connect a suitable ohmmeter as shown in Fig. 1, step 1. Using the low scale, read ohmmeter. Should be near zero or zero. If not, replace coil.
2. Connect ohmmeter both ways as shown in Fig. 1, step 2. Using the high scale, read ohmmeter. If both readings are infinite, replace coil.
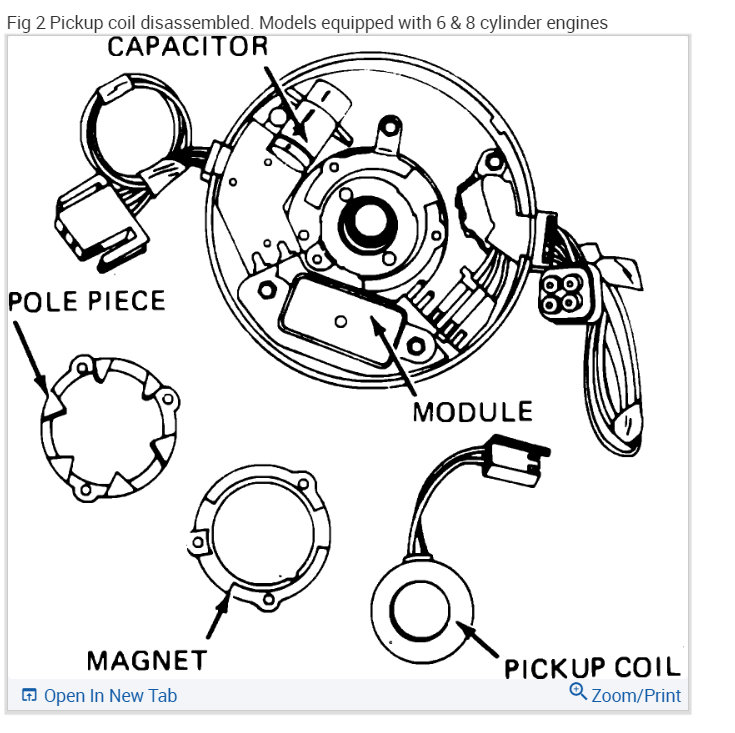
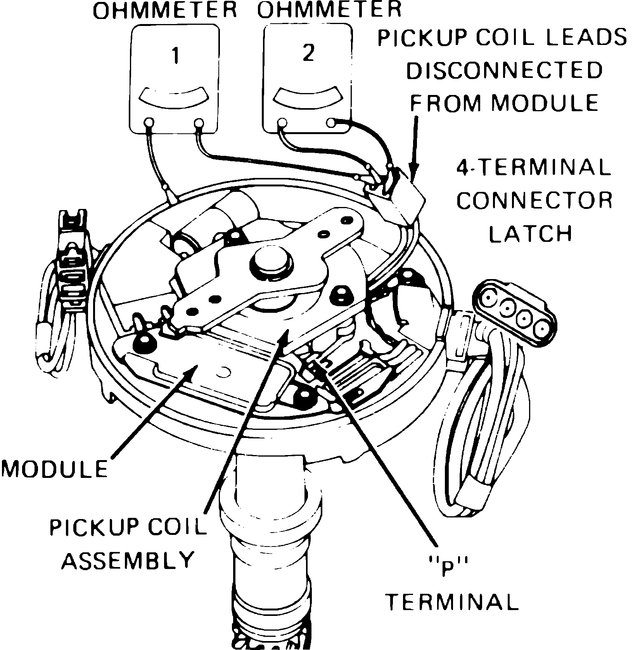
Fig. 16 Testing integral coil distributor pickup coil
Pic 2
Pickup Coil Testing
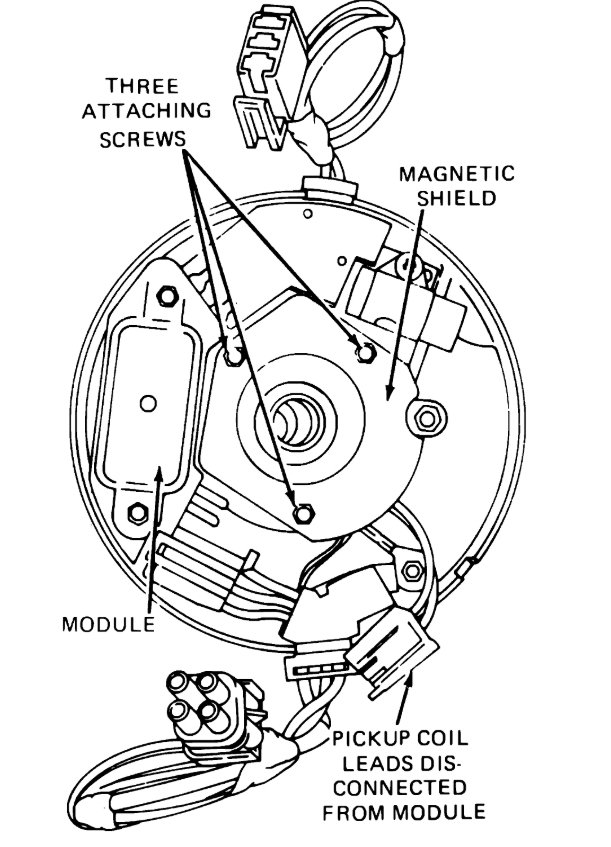
1. Remove distributor rotor, then disconnect pickup coil leads from module.
2. Connect ohmmeter as shown in Fig. 2, step 1. Connect a suitable vacuum source to vacuum advance chamber (if equipped) and note ohmmeter reading throughout entire vacuum advance range. If no vacuum advance is used, flex leads by hand to check for opens. Ohmmeter should read infinite at all times. If not, pickup coil is defective and must be replaced.
3. Connect ohmmeter as shown in Fig. 2, step 2. Repeat step 2. Ohmmeter should read one steady value between 500-1500 ohms. If not, pickup coil is defective and must be replaced.
Note: Ohmmeter may deflect if vacuum advance range causes timing core teeth to align. This is not to be considered a defect.
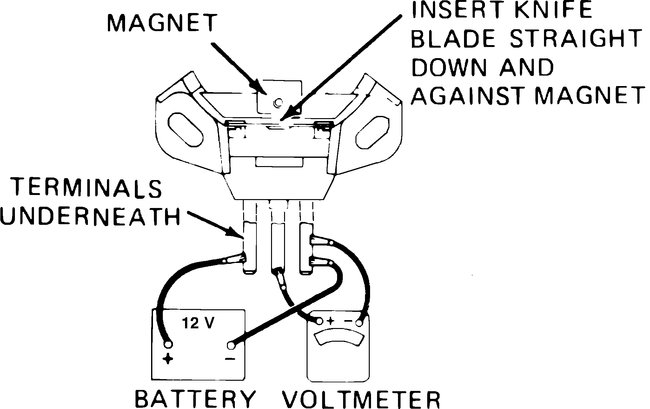
Fig. 14 Testing Hall Effect switch
Pic 3
Hall Effect Switch Testing (If Equipped)
1. Carefully noting polarity, connect battery and suitable voltmeter as shown in Fig. 3.
2. Voltmeter should read less than 0.5 volts. If not, replace Hall Effect switch.
3. Insert knife blade as shown in Fig. 3. Voltmeter should read within 0.5 volts of battery voltage. If not, replace Hall Effect switch.
________________________________
Let me know if this helps and what you find.
Take care,
Joe
Images (Click to make bigger)
Thursday, June 18th, 2020 AT 9:41 AM
(Merged)
