Introduction
An automotive transfer case is designed to distribute engine horsepower to the front and rear wheels equally by using two driveshafts and is usually bolted to the rear of the transmission. These transfer cases have a verity of styles ranging from the sophisticated which involve the electronically shifted and traction control systems to the more basic manually shifted units. Also, there might be additional controls such as front bearing hub lockouts or an additional shift actuator used on the front differential to complete the 4wd operation.
This guide will walk you through the entire process, from preparation to installation, ensuring that you complete the task with precision and safety.
Tools and Materials Needed
- Socket and ratchet set (metric and standard)
- Torque wrench
- Drain pan
- Transmission jack or floor jack
- Safety stands or vehicle lift
- New transfer case (compatible with your vehicle)
- Transfer case fluid
- Gasket or RTV silicone sealant
- Safety gloves and goggles
- Service manual (specific to your vehicle if needed)
Before You Begin
Park the vehicle on a level surface, engage the parking brake, and disconnect the negative battery cable to prevent any electrical issues, raise the vehicle safety and secure it on jack stands. Also, wear safety goggles and gloves to protect yourself from debris and fluids.
1. Drain Transfer Case: It make things easier it's best to drain the fluid from the transfer case to help minimize spillage. Position a drain pan underneath and use the appropriate socket to remove the plug. Allow all the fluid to drain completely, once drained, replace the drain plug.

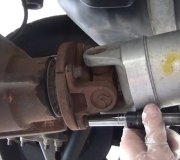
2. Remove Both Driveshafts: Before removing the driveshafts, mark the orientation of the shaft fanged onto the differential yoke, this will preserve their balance characteristics. Then remove the mounting bolts, these may have thread lock-tight on them so be ready because they are snug. A torch maybe used to help dislodge the lock-tight. Use a plastic hammer to "shock" the driveshaft flange loose.

The driveshaft can be a little awkward so be careful not to damage, drop or dent the shafts. Once removed, slide the rear shaft from the transfer case tail housing, and remove the front shaft from the vehicle.

3. Disconnect Electrical Connectors: Most transfer cases will have electrical components that will need to be disconnected, make sure they are out of the way to prevent damage during the removal, also, remove any rubber vent tubes as well. Note: Some older transfer cases will have linkage as well which needs to be disconnected.

4. Remove Transfer Case Mounting Bolts: At this point, remove all of the transfer case mounting bolts except for one, (important) preferably one that is easy to get to. This particular transfer case has a total of 6 bolts, but your application may vary.

5. Support Transfer Case: The key here is to support the the transfer case because it is heavy, use a floor jack with a helper or a transmissions jack to help shoulder the load.

6. Remove Transfer Case: Once supported, remove the last remaining mounting bolt and give the transfer case a slight wiggle to break the seal loose, and then slide the transfer case back from the transmission, (Be mindful of the transfer case weight).

7. Lower Transfer Case: While watching for any wiring, linkages or vent tubes start to lower the transfer case from the vehicle as you steady the load and keep it centered onto the support apparatus. With the old transfer case removed, inspect the mating surfaces on both the transmission and the new transfer case for debris, old gasket material, or damage.

8. Installation: Once the replacement or repaired transfer case is ready for installation just reverse these steps, be sure to replace the gasket between the transmission can transfer case. Start by cleaning the gasket surface thoroughly to ensure a good seal. Apply a thin layer of RTV silicone sealant around the mating surface. Tighten the bolts to your vehicles particular torque specifications and then refill the unit will fluid and you are all set!
Conclusion
Start the engine and test the transfer case functionality by shifting into 4WD or AWD, depending on your vehicle’s configuration. Check for any unusual noises, leaks, or error codes. If everything operates smoothly, drive the vehicle for a short test drive to ensure the repair was successful.
Watch the Video!
Please watch this video of the job being done to glean additional helpful information.
Credits
This guide knowledge base was created by the 2CarPros Team, and by Ken Lavacot: Automobile repair shop owner and certified master automobile technician of over 30 years. If you have question or need help please ask one of our experts we are happy to help. Please visit our 2CarPros YouTube Channel for additional car repairs.

Article published 2024-09-12