Some vehicles are designed with a power steering box which can leak or have internal issues which affect the steering systems operation.
What Goes Wrong?
A power steering system operates by supplying pressure to a power steering box or rack which have internal and external seals with mechanical parts that can fail over time and usage. These problems can range from fluid leaks, none or partial operation (power steering only right or left), excessive noise or slop in the main output shaft(s).
What's the Cost?
Replacing a steering box will vary per application but in general labor time at a shop should be between 3.0 and 4.5 hours. A power steering box is typically rebuilt by an outside vendor such as AC Delco or Motorcraft and can cost between $160.00 and $340.00 on Amazon or RockAuto, price denoting the quality of the parts being installed. If exact times or procedures are needed you can ask our experts to supply you with the information (free), or consult an online resource such as AllData DIY (pay) but this guide and video will be sufficient in most cases.
Let's Jump In!
To begin, wear safety eyewear and gloves, remove the negative side of the battery
to cut power to the vehicle, then
raise the vehicle using a jack
and stands, also remove
the front wheels to help gain access which will make the job easier. Remove
the pinch bolt to the input shaft of the steering box, the input shaft is connected
to the steering column and steering wheel.
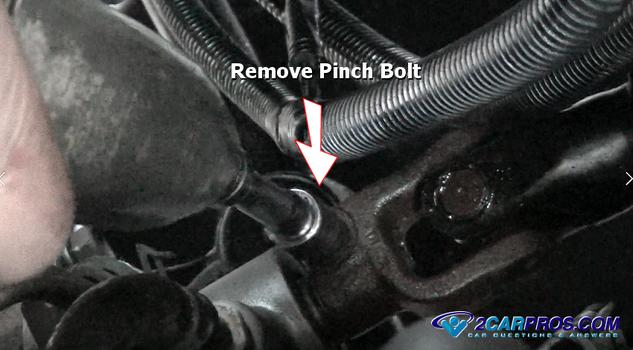
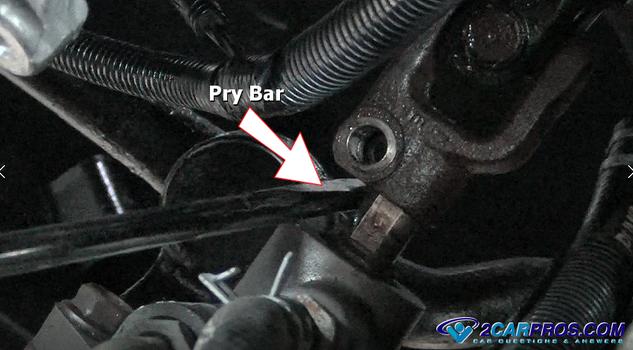
Use a pry bar to work the input coupler off of the steering box. Once the coupler
is free from the box, do not turn the input shaft from the steering column because
it can damage the spiral
or clock spring which is located inside the column near the steering wheel.
The input shaft can only go one way so there is no need to mark the orientation
of the shaft.
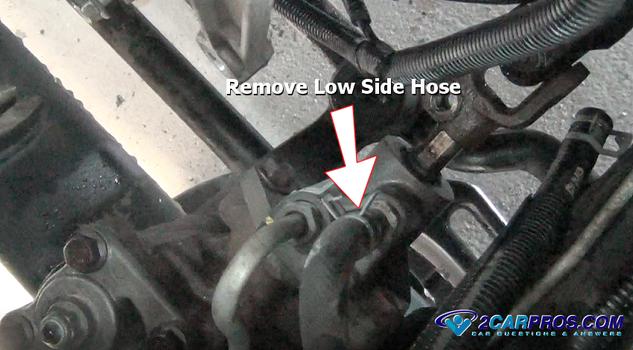
Remove the low side fluid hose using a clamp tool or pliers.
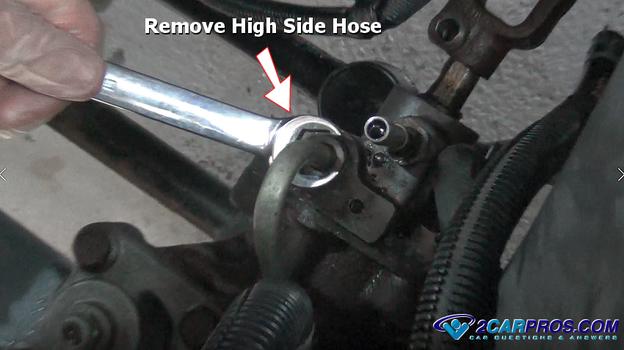
Using a line wrench remove the high side pressure hose from the steering box.
There are two ways to go when removing the pitman arm from the steering box,
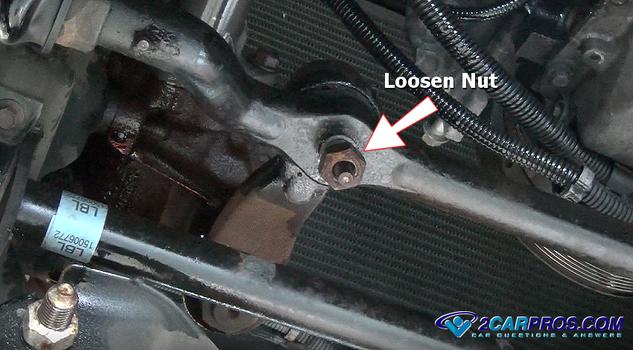
you can remove the center link bolt and
undo the taper fit, or remove
the arm from the box directly which we will show in the proceeding steps.
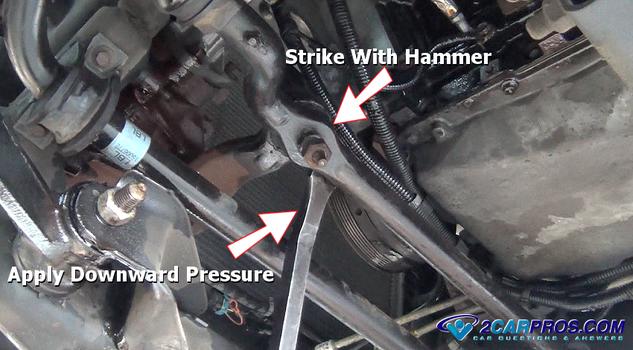
Use a pry bar to apply downward pressure to the center link while shocking the
taper fit loose by striking the center link bulkhead with a hammer.
Watch the Video!
Please watch this video of the job being done, then continue down the guide to glean additional helpful information.
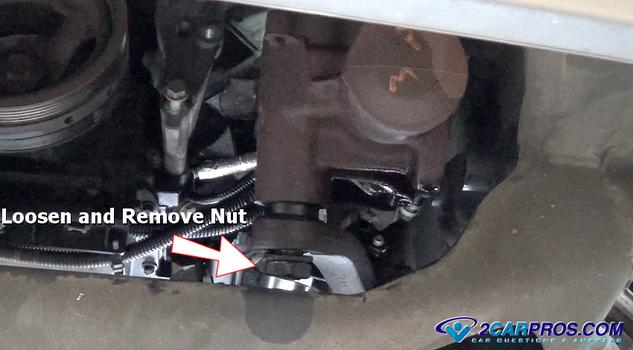
Loosen and remove the steering box main shaft nut which holds on the pitman arm.
This nut is tight so a large breaker bar or impact gun will be needed.
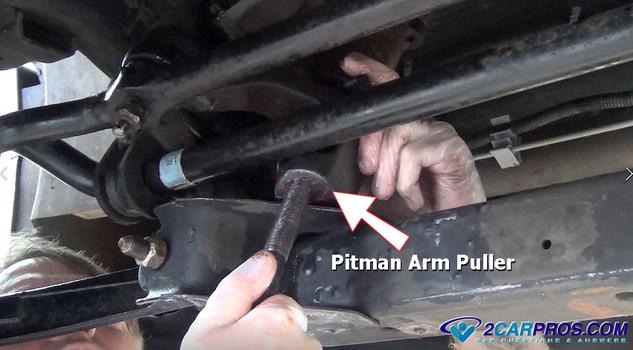
Here we have fitted the pitman arm puller onto the steering box, you may need
to loosen the steering box mounting bolts to allow clearance for the puller.
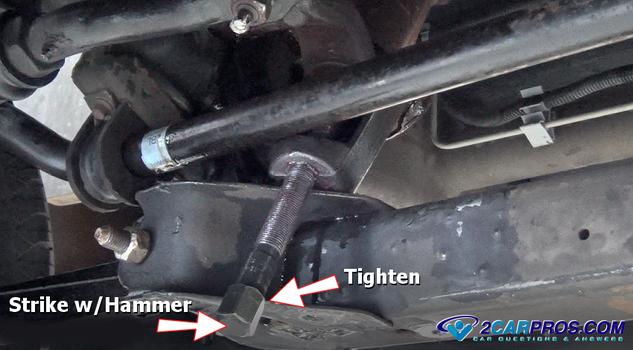
Tighten the pulley into place, strike the end of the puller screw to help shock
the taper spline loose, make sure the screw of the puller is well greased.
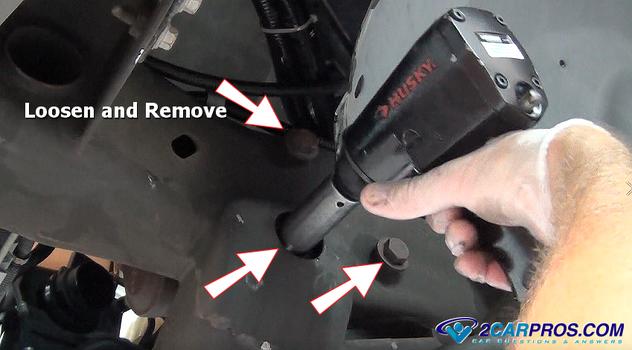
Remove the steering box mounting bolts while hanging onto the box to keep it
steady and not allowing it to fall.
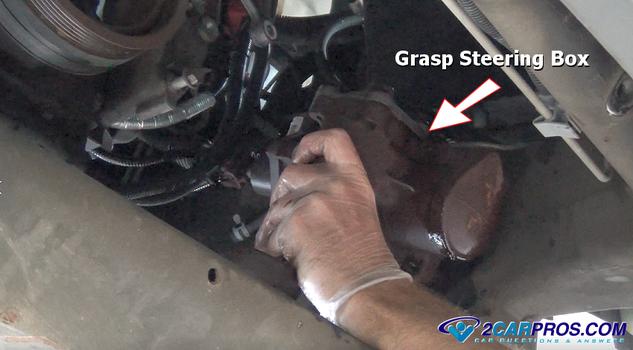
While firmly grasping the steering box carefully lower the steering box from
the vehicle, it is heavy.
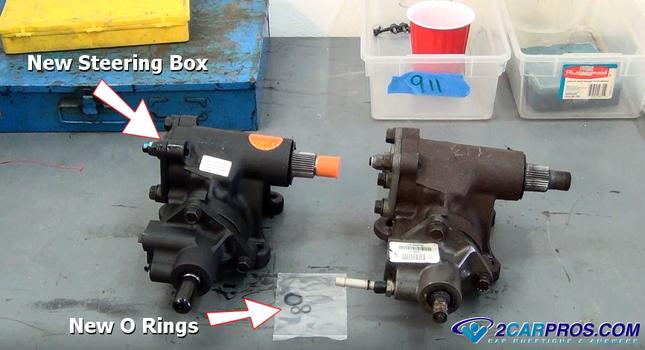
Match the old steering box to the new unit to ensure a proper installation, also
use new O ring seals to prevent leakage. Reassemble by reversing these steps while
tightening the mounting bolts and pitman arm nut to spec and refill with fluid.
If you need the correct torque specs please ask one of
our experts (free). When you first start the engine the power steering fluid
level will drop, stop the engine and refill. Restart the engine and gently move
the steering wheel back and forth to further alleviate air from the system, recheck
the fluid level in a few days.
Questions?
Our certified technicians are ready to answer steering box questions for free. We hope you saved money and learned from this guide. We are creating a full set of car repair guides. Please subscribe to our 2CarPros YouTube channel and check back often for new videos which are uploaded regularly.

