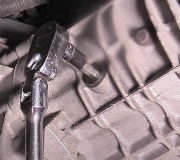
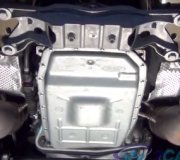
An automatic transmission or transaxle fluid dipstick handle is located toward the rear of the engine or near the transaxle. Checking and adding automatic transmissions fluid can vary depending on design and manufacturer, some newer vehicles will require a different approach. We will show you how to identify and perform each type below.
What Goes Wrong?
Often, a transmission problem can be as simple as low or dirty fluid. Checking fluid is not difficult and should be the first thing done when experiencing shifting issues, a delayed shift, or engagement issues. Allowing the transmission fluid to run low can cause a transmission to lose internal pressure which will result in the clutch packs or drum bands to slip causing the loss of clutch material. Many times this can lead to transmission failure which will warrant a transmission replacement or rebuild.
What's the Cost?
Most shops will check your transmission fluid for free or as part of an engine oil change service if you have an external dip stick model, but if your car does not have a dipstick which manufacturers started doing on some models you will be charged up to .5 hours plus fluid to do the job at a shop.
Where is It?
Automatic transmission dipstick locations will vary, if you have a rear wheel drive vehicle the dipstick should be located near the firewall behind the engine on the left side (looking straight at the engine). On front wheel drive vehicles the dipstick will be near the transaxle itself. If you cannot locate the dipstick, the vehicle will need to be lifted and supported on jack stands to access the transmission pan or case.
Lets Jump In!
Park the vehicle on a level surface and start the engine allowing it to idle.
With the parking brake applied, place the shift lever in park, some older cars will
need to be checked in neutral which it will say so on the dipstick. With your foot
on the brake pedal, move the shift lever through each gear, pausing for about three
seconds, position the shift lever back into park. Located the fluid level dipstick
which should be toward the rear of the engine, (rear wheel drive).
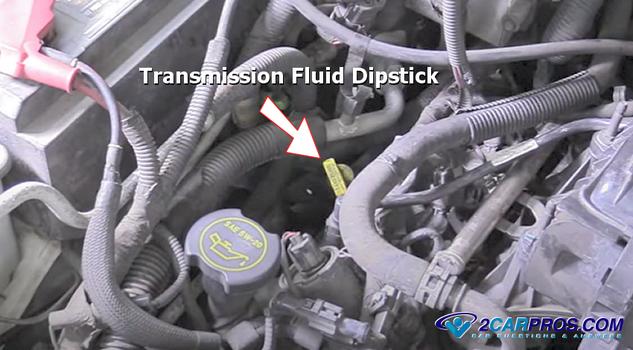 Some dipsticks will be labeled with the type of fluid used or the updated equivalent,
this one says Mercon 5 in small print.
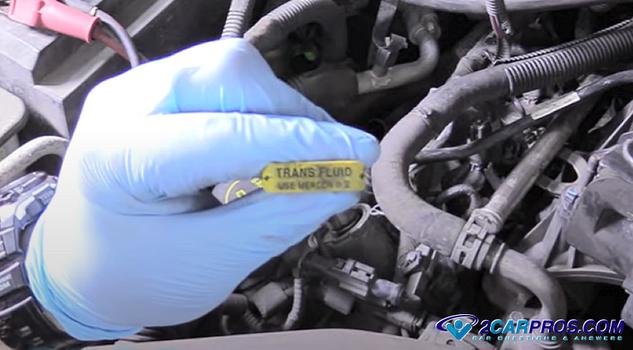
Remove the dipstick and wipe clean using a paper or shop towel, typically a dipstick
will be fairly long.
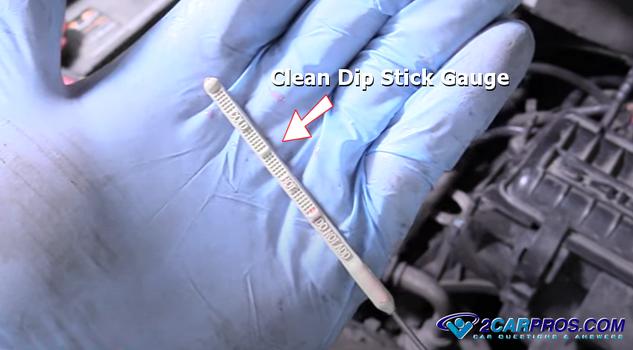
Return the dipstick so it is fully seated inside the tube, wait three seconds,
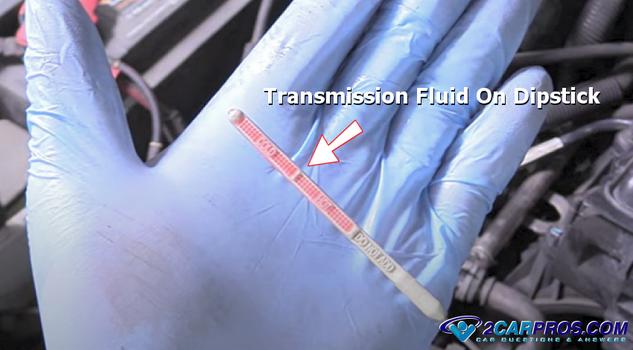
and pull it back out again. This will show the level of the fluid inside the transmission.
Check both sides of the dipstick to confirm the fluid level which must be in the
crosshatched area above the minimum level indicator. If the fluid level is in the
acceptable range, reinstall the dipstick and you are all set. If the fluid level
is low, use a long-neck funnel to add only enough fluid to bring the level into
the crosshatched area on the dipstick. Start by adding a 1/4 quart at a time, add
enough fluid to bring it up to the proper level, do not overfill.
Checking Transmission Fluid Without a Dipstick
On some newer vehicles there is not a traditional tube transmission dipstick to check the fluid level, condition or add fluid. There can be a "screw in" dipstick, a fluid level plug much like a standard transmission, or a level tube mounted in the bottom of the transmission fluid pan that is sealed with a plug. We will go over each of these types below. Follow the procedure above before checking the fluid level.
With the engine at idle, raise the vehicle on a hoist or
lift using a jack supported
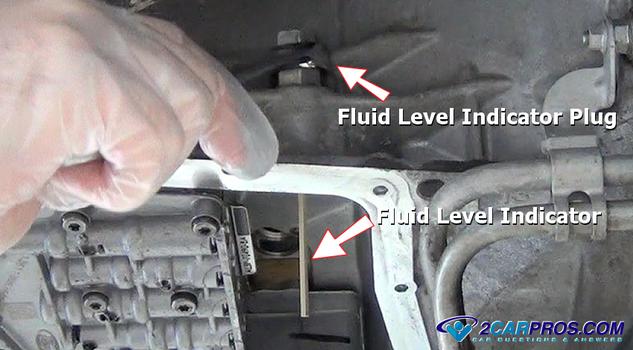
by jack stands. The vehicle must be level with transmission in park. Remove
the dipstick plug with the level indicator attached. The image below has the fluid
pan removed so you can see the level indicator. Unscrew the plug and proceed to
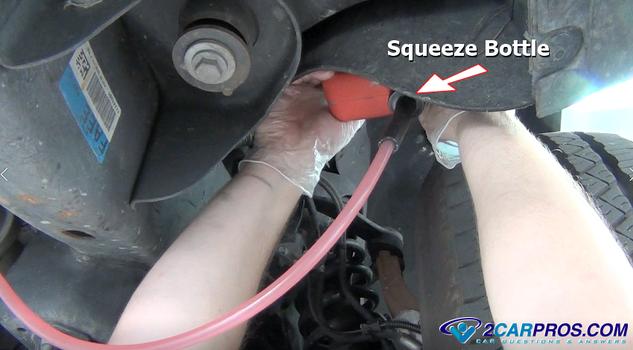
check the fluid level in a normal manner. If fluid is needed a small fluid pump
can be used which is about $10.00 (US) on Amazon.
Here you see innovation as our mechanic is using a squeeze bottle style of arrangement
with a plastic tube attached to add fluid.
Remove the fluid level gauge from the fill plug, This will be used to measure
the amount of fluid inside the transmission.

While the engine is still running insert the level gauge into the plug hole and
remove, this will show the level of the fluid.
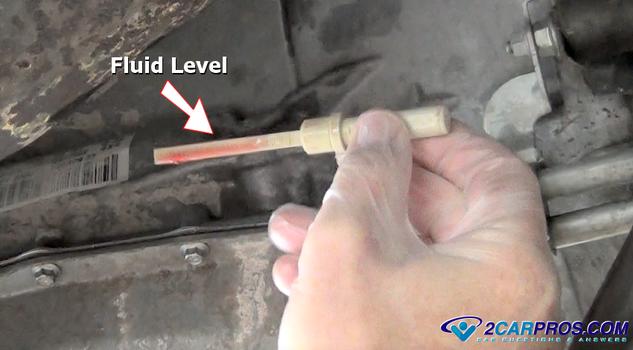
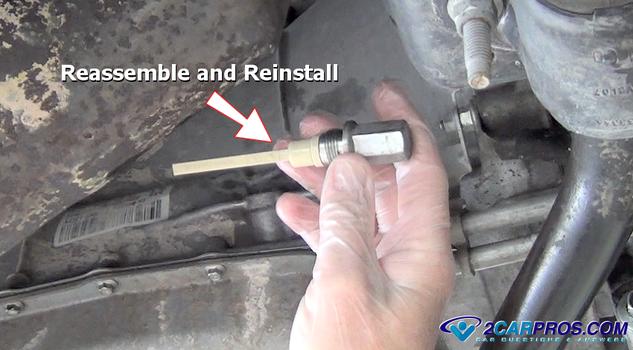
Reassemble the level gauge back into the plug and reinstall back into the transmission
case and tighten, (5 foot pounds) and you are all set.
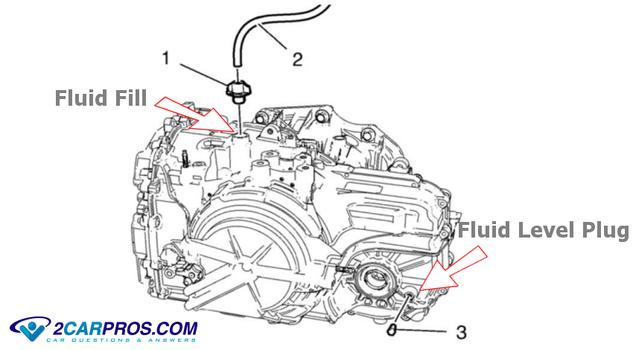
Here is an example of a side plug type which works in a similar manner. The side
plug style is filled until it runs out then reinstall the plug, much like a differential
or standard transmission fill plug, again the engine must be running. (Images courtesy
of AllData)
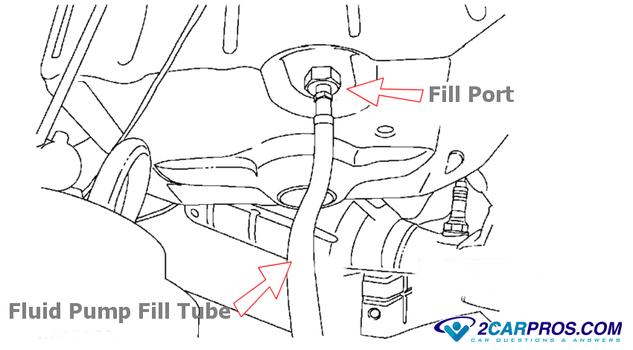
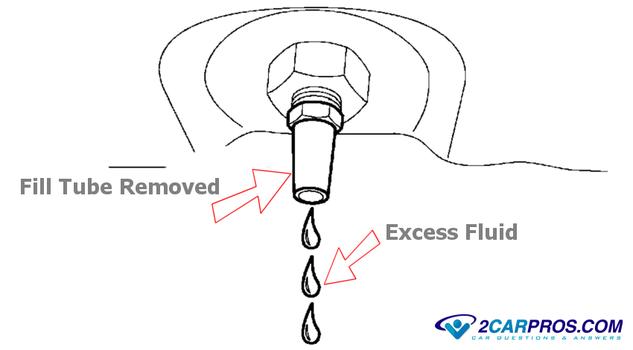
This is the drain tube type. The fill tube style acts much like the side plug
style, pump fluid in, then remove the fill tube and the excess with run out creating
the correct fluid level, (if the fluid is flowing as a steady stream, wait until
the fluid begins to drip before replacing the fill plug, if no fluid flows out,
add fluid until fluid drips out). The fluid level height is achieved by the tube
inside the transmission pan. (Images courtesy of AllData)
Transmission Fluid Color
Transmission fluid color and odor are very informative when checking the fluid level. A portion of a transmission is basically a hydraulic pump which degrades the fluid properties making it less effective. If the fluid color is dark or black and has a burnt odor the transmission should be serviced. Transmission fluid that is the color of a pink milk shake is an indication of engine coolant mixing with the fluid. This is because the transmission cooler inside the radiator has failed, when this happens the radiator needs to be replaced and the transmission fluid changed.
Watch The Video!
This video shows a transmission service and refill which will show you how to check and add fluid.
Questions?
Our certified technicians are ready to answer car repair
questions for free. We hope you saved money and learned from this guide. We
are creating a full set of car repair guides. Please subscribe
to our 2CarPros YouTube channel
and check back often for new videos which are uploaded regularly.
