Introduction
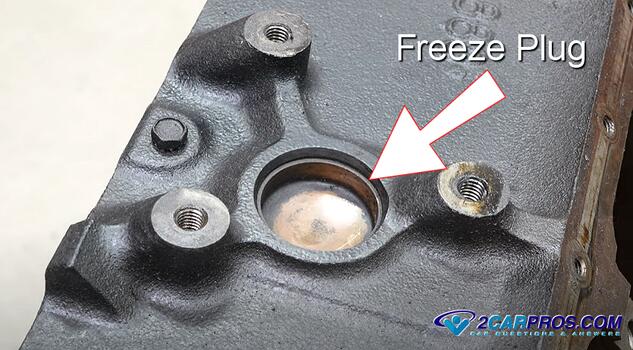
Automotive engine freeze plugs, also known as core plugs, soft plugs or expansion plugs have two purposes, first they are used to cover the holes as a result of the casting process when the engine is first manufactured, and the second and more popular reason is to act as a safety device when the car is in freezing cold weather. If the coolant inside the engine freezes it can expand while cracking the engine block, these freeze plugs are designed to "push out" affectedly giving the frozen liquid a place to go without causing damage.
Location
Cooling system freeze plugs are generally located on each side of the engine block and can be behind engine components such as transmission, motor mounts or the exhaust manifold. Smaller freeze plugs can also be located on the cylinder head in various locations. There is little information about replacing freeze plugs because each application is so different in scope and difficulty.
What Goes Wrong?
A freeze plug is part of the engine cooling system and is subject to the nature of engine coolant. If this coolant has not been flushed and filled with new coolant it can become corrosive (acidic) which eats away at the thin metal of the freeze plug causing a coolant leak.
Tools and Materials Needed
- Replacement freeze plug (correct size for your engine)
- Socket set
- Large Punch
- Hammer
- Freeze plug installation tool (or a deep socket that matches the diameter of the plug)
- Pliers
- Drain pan
- Coolant
- RTV silicone (optional for certain engines)
- Jack and jack stands (if necessary)
- Safety glasses and gloves
Freeze Plug Replacement
Replacing a freeze plug requires precision and the right tools. This guide will walk you through the process step by step, you will need to decide which method will work best for your particular situation. Park your car on level ground and raise your car safety using jack stands, drain the coolant and disconnect the battery to avoid electrical short circuits.
It's also important to wear safety glasses and gloves, as you'll be working in tight spaces and dealing with potentially sharp edges.
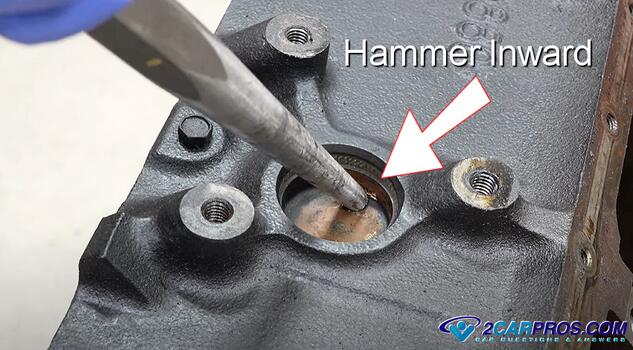
1. Push Freeze Plug Inward: Once you have disassembled and removed any obstructions that hinder the freeze plug service, use a large punch and hammer to force the freeze plug inward. Do not "score" the engine block during removal or it will cause a leak for the new soft plug.
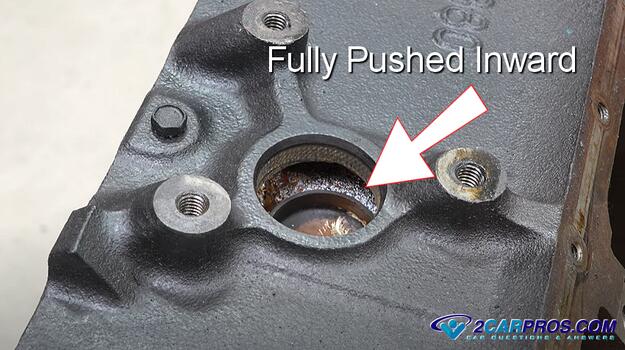
2. Fully Pushed Inward: Here is what it looks like when the freeze plug is fully pushed into the engine block. Some say you can just leave it there and install the new one, but I can tell you it can create a "hot spot" inside the engine as it impedes coolant flow.
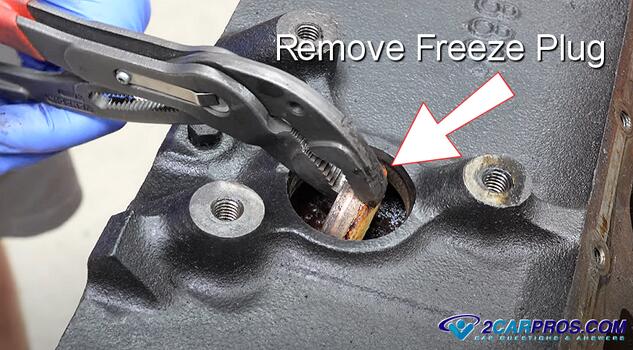
3. Remove Freeze Plug: Use a pair of channel locks to help grasp the freeze plug and pull it from the engine block, this can take some doing so hang in there.
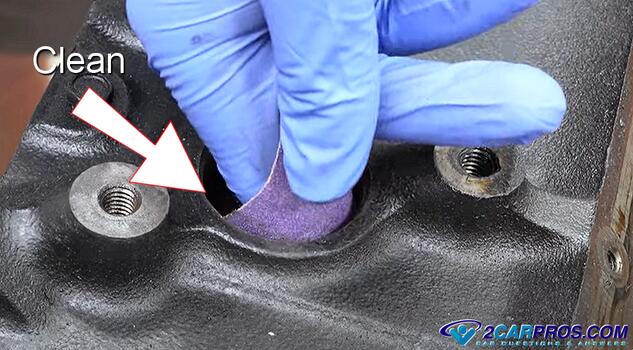
4. Clean Hole: You must clean out any rust or corrosion from the freeze plug hole to ensure a proper seal when the new freeze plug is installed. Clean the hole walls using emery cloth or sand paper until smooth.
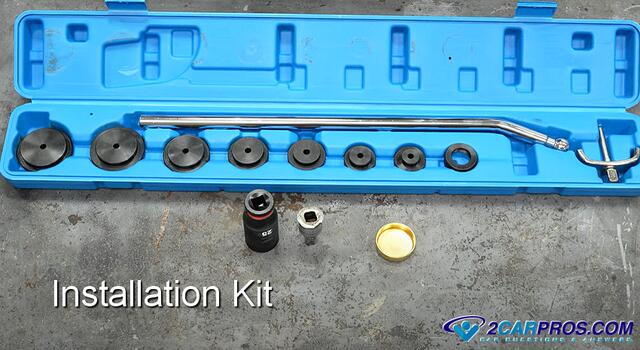
5. Freeze Plug Installation Kit: In some instances you will be able to use a socket to fit just inside the freeze plug to hammer it into place but most of the time you will need a freeze plug installation kit which enables you to install plugs into tight areas.
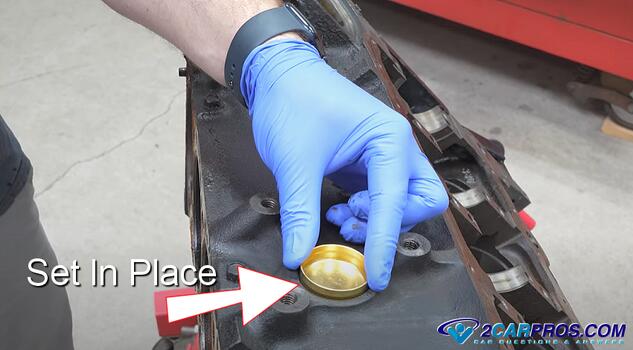
6. Set in Place: We prefer to apply a thin layer of RTV silicone to the edges of the plug for added sealing which is applied before installation. Remove the freeze plug from the freezer and push it into place, it should stay.
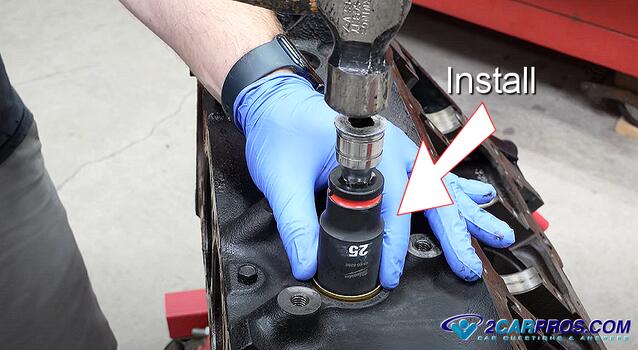
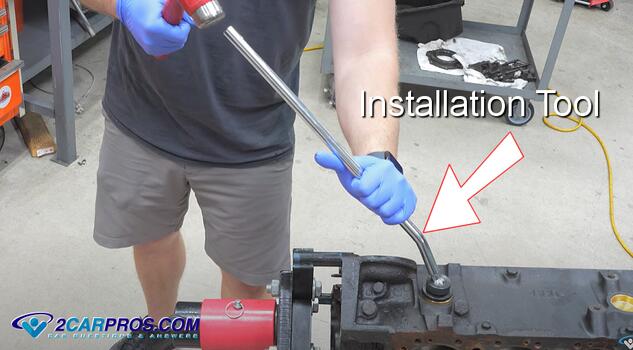
7. Install freeze Plug: You will need to assess the particular application to see if the simple hammer and deep well socket will work or if you need the added maneuverability of the installation tool. The goal is to drive the plug straight into the bore without tilting or damaging it.
8. Freeze Plug Installation Tool: Attach the proper size adapter onto the freeze plug installation tool. This can help press the plug into the bock at precarious angles which can be handy when a regular hammer and socket cannot be used.
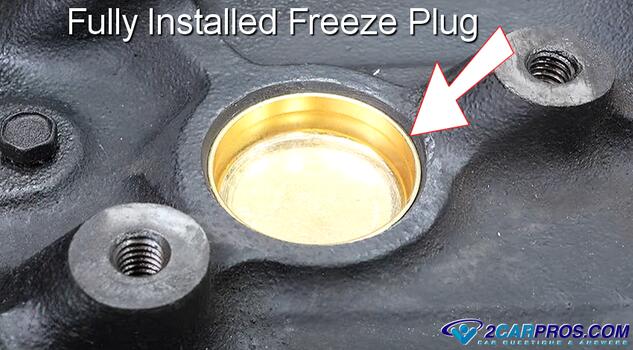
9. Fully Installed Freeze Plug: The freeze plug does not stop at a particular depth, so halt the installation once the rim of the freeze plug is at the top of the hole in the engine block. It is possible to push the new plug into the block much like the old plug.
Pro Tip
- Set the freeze plug inside the home freezer for about 15 minutes to help shrink the metal which will ease the installation.
Conclusion
Once the job is completed refill the engine with coolant, then start the engine and allow it to run for a few minutes while checking for any leaks around the new freeze plug. If there are no signs of leaks, you've successfully completed the replacement, nice work!
Watch the Video!
Please watch this video of the job being done to glean additional helpful information.
Credits
This guide knowledge base was created by the 2CarPros Team, and by Ken Lavacot: Automobile repair shop owner and certified master automobile technician of over 30 years. If you have question or need help please ask one of our experts we are happy to help. Please visit our 2CarPros YouTube Channel for additional car repairs.
