Introduction
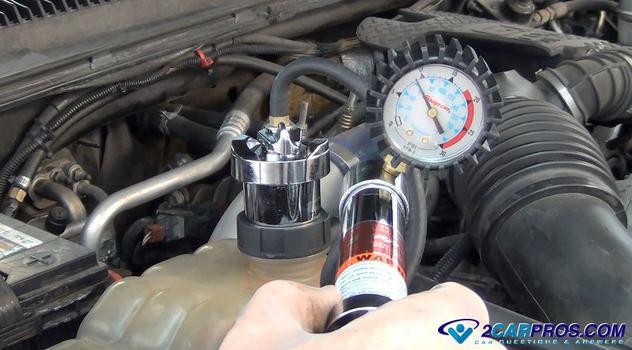
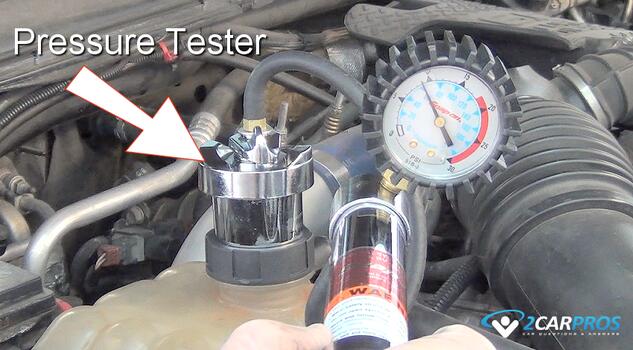
A radiator or cooling system pressure test is useful when locating a coolant leak or a blown head gasket. This tool attaches to the top or the radiator or coolant reservoir and enables air pressure to be pumped into the system including the engine block, cylinder heads, coolant hoses, heater core and radiator. This pressure test simulates the engine getting hot and expanding the coolant which, in turn, will help you find the leak.
Follow this detailed step-by-step guide to perform the test correctly.
Tools and Materials Required
- Cooling system pressure tester kit (rent it from the auto parts store)
- Coolant reservoir adapter (specific to your vehicle)
- Shop towels
- Safety goggles and gloves
- Bucket for coolant drainage (optional)
- Flashlight (to inspect for leaks)
Safety Precautions
It's best to start with the engine cold and the car parked on dry ground so you can more easily see where the leak is coming from. If the cooling system is low or empty refill it with water before the test begins. Fill the system carefully as not to spill any water so it will be easier to detect the leak. You should also where gloves and protective eyewear.
Step-by-Step Guide to Performing a Cooling System Pressure Test
1. Check the System for Pressure
Before opening the cooling system it is best to check for pressure, this can be done by simply squeezing the upper radiator hose to check for pressure in the system. Grasp the upper hose and push you thumb into the hose to check the resistance. If the system does have pressure, slowly remove the coolant reservoir or radiator cap, a small amount of coolant may come out.
2. Attach the Pressure Tester
The pressure tester will connect directly to the coolant reservoir or radiator while using an adapter which will be supplied inside the pressure tester kit. The pressure tester connector will be spring loaded so push downward before you start twisting the connector and locking it clockwise. You should feel a click as the tester secures itself.
3. Pressurize the Cooling System
Pump the pressure tester plunger rapidly to build pressure inside the system, much like you are pumping air into a tire. You will notice the needle on the pressure tester gauge starting to move upwards as it measures the pressure inside the system, common pressure ratings range from 13 to 16 psi. (Avoid pressure above 18 pounds). At this point you may see coolant leaking from the water pump, radiator or heater hose.
- This test is also good for checking a blown head gasket, once all of the spark plugs have been removed, coolant will pour from the spark plug holes indicating the failure.
- If you cannot get the system to hold pressure chances are coolant is pouring out of a leak somewhere, or the pressure tester is not attached properly, recheck the tester connection.
4. Remove the Pressure Tester
Once the test is complete slowly remove the pressure tester by twisting the connector lock counterclockwise. You will hear a pressure release signaling the tester is ready to be removed. It will be normal for coolant or water to be expelled from the connector at this time. Clean and reinsert the tester back into its case and store it in a cool dry place until you need it again.
Conclusion
Once the desired pressure is reached, monitor the gauge on the pressure tester. The pressure should remain stable for at least 10–15 minutes. A drop in pressure indicates a leak somewhere in the system. Your pressure tester should have an adapter to test the radiator cap as well which is a good idea to keep the engine from overheating.
Watch the Video!
Please watch this video of the job being done to glean additional helpful information.
Credits
This guide knowledge base was created by the 2CarPros Team, and by Ken Lavacot: Automobile repair shop owner and certified master automobile technician of over 30 years. If you have question or need help please ask one of our experts we are happy to help. Please visit our 2CarPros YouTube Channel.


