Procedure and picture
REMOVAL
Use the scan tool to reprogram the new PCM with the vehicles original identification number (VIN) and the vehicles original mileage. If this step is not done a diagnostic trouble code (DTC) may be set
The PCM engine control strategy prevents reduced idle speeds until after the engine operates for 320 km (200 miles). If the PCM is replaced after 320 km (200 miles) of usage, update the mileage and vehicle identification number (VIN) in the new PCM. Use the scan tool to change the millage and VIN in the PCM. If this step is not done a diagnostic trouble code (DTC) may be set and SKIM must be done or car will not start if it is a SKIM equipped car. If a SKIM car you must do a secret key transfer also.
To avoid possible voltage spike damage to PCM, ignition key must be off, and the negative battery cable must be disconnected before unplugging the
PCM connectors. Note radio programs.
Negative Battery Cable
imageZoom/Print
1. Disconnect the negative battery cable and isolate.
Battery Connection
imageZoom/Print
Warning: if the negative battery cable is not disconnected the possibility of damaging the power-train control module by contacting the positive battery cable at the PDC.
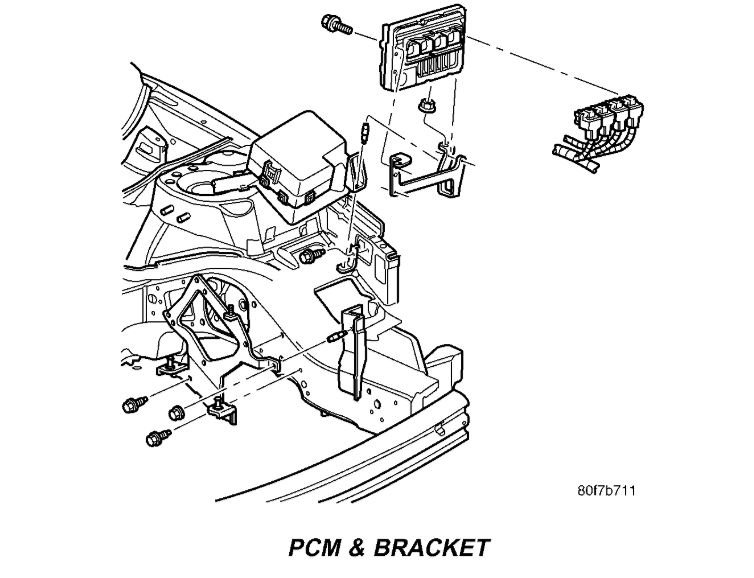
PCM & Bracket
imageZoom/Print
2. Remove the 2 nuts holding the PCM and Bracket.
3. Unlock and disconnect the electrical connectors at the PCM.
4. Remove the 3 fasteners holding the PCM to the bracket.
INSTALLATION
The PCM engine control strategy prevents reduced idle speeds until after the engine operates for 320 km (200 miles). If the PCM is replaced after 320 km (200 miles) of usage, update the mileage and vehicle identification number (VIN) in the new PCM. Use the scan tool to change the millage and VIN in the PCM. If this step is not done a diagnostic trouble code (DTC) may be set and SKIM must be done or car will not start if it is a SKIM equipped car. If a SKIM car you must do a secret key transfer also.
1. Install PCM to bracket.
2. Install PCM and bracket to vehicle and connect the electrical connectors and lock connectors.
3. Install the 2 nuts and tighten.
4. Connect negative battery cable and reprogram radio and clock.
5. Using scan tool, program mileage and vehicle identification number (VIN) into PCM.
Image (Click to make bigger)
Tuesday, July 24th, 2018 AT 8:31 AM


