Hello -
Thanks for the info.
The manual provides info for a convertible but I would think once you get it apart, you will be able to see and do the similar.
Many of these don't run on a track per say. . ...so I believe the mechanic was talking about a window regulator.
Many of the ones I have taken apart the regulator - some have a cable that begins to brake and then gets bound up in the rollers or the motor.
Some the motor has the power to lower, gravity to help but not the strength to push up.
Also, you can check Auto Zone or O'Reilly's but this may be a dealer part. I did a quick check but did not see it for the motor, regulator.
Now it did have a regulator cable and a guide, but I didn't see a motor.
So, once you get the door panel off look it all over really good and check the bottom of the door for any parts in the bottom.
If the regulator is bad, in my experience it is better to replace the motor and regulator as one part at the same time. The motor has the same time on it and will soon wear out. Some, the motor and regulator cost only a little more together. A better buy.
Once apart also unplug the motor if you don't see any regulator/cable damage. Put 12v and ground to one side of the motor then swap and see how the motor does.
Also, be very careful in there. . ...door/window parts are sharp and you can cut yourself really quick. . ..not much room to move around.
Front window regulator, removing and installing (Convertible)
Assembly overview
Fig. 453: Front Window Regulator, Assembly Overview (Convertible)
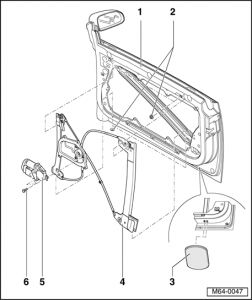
1 - Door
2 - Combination nut
"� 4x
3 - Buffer plugs
4 - Door window regulator
5 - Window regulator motor
6 - Bolt
"� 3x
Removing
o Remove subframe � � ’
o Remove door window from window regulator � � ’
Fig. 454: Front Window Regulator, Assembly Overview (Convertible)
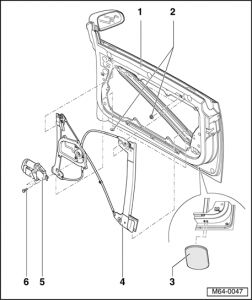
o Remove window regulator motor - 5 - from window regulator.
Fig. 455: Front Window Regulator, Assembly Overview (Convertible)
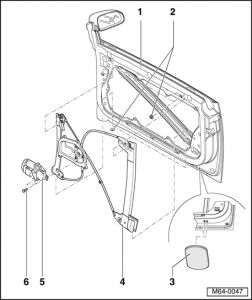
o Remove plugs - 3 -.
o Remove combination nut - 2 -.
o Unclip window recess cable.
o Move window regulator to center of door and remove.
Installing
o Installation is performed in the reverse order of removal.
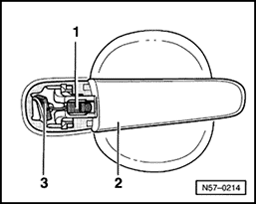
Fig. 449: Door Handle, Assembly Overview
Courtesy of VOLKSWAGEN UNITED STATES, INC.
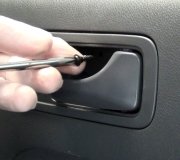
o Unclip clip - 1 - from door handle.
Monday, December 14th, 2009 AT 8:36 PM


