Installation
CAUTION :
To prevent damage, DO NOT apply more than 2205 lbs. (9807 N) of pressure to automatic adjuster rod. Do NOT press automatic tensioner rod past the top surface of the housing.
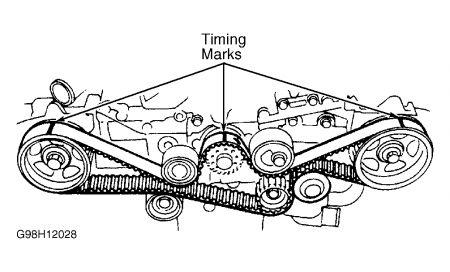
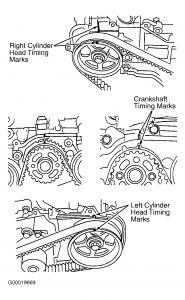
1.Ensure crankshaft and camshaft timing marks are still aligned. Place automatic adjuster in a press with rod facing up. Apply 66 lbs. (294 N) pressure to end of rod. SLOWLY compress rod (taking more than 3 minutes) into housing until rod and housing holes are aligned. Insert locking pin through holes.
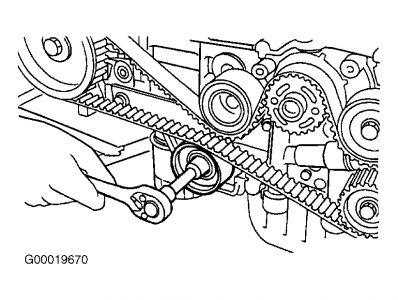
2.Install automatic tensioner on engine with locking pin in place. Install idler pulleys (if removed).
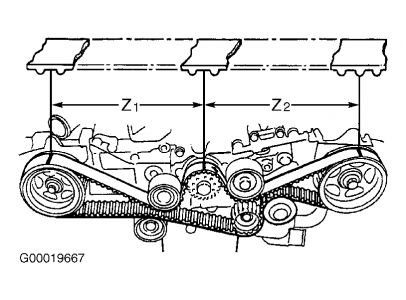
3.Ensure crankshaft and camshaft timing marks are still aligned. Install timing belt. If reusing old belt, ensure belt direction of rotation is correct and mating marks are aligned. Count number of teeth between crankshaft sprocket and camshaft sprockets so that belt will be installed in same position. For correct count of teeth. To determine distances Z-1 and Z-2,
( Z1is 44 and Z2 is 40.5 )
4.Install No. 2 idler pulley on engine. Remove automatic tensioner locking pin. On manual transmission models, install timing belt guide over crankshaft pulley. Adjust clearance between belt guide and belt to .020-.058" (.5-1.5 mm).
CAUTION : If tightening angle of crankshaft pulley bolt is less than 65 degrees, bolt is damaged. Bolt must be replaced.
5.On all models, install timing belt covers. Clean crankshaft pulley bolt and bolt hole. Install crankshaft pulley. Coat crankshaft pulley bolt threads with engine oil. Install bolt. While holding crankshaft pulley stationary, tighten bolt to specification.
6.Install accessory drive belts. Install radiator fan assembly. To complete installation, reverse removal procedures. Adjust drive belts to proper tension.


SPONSORED LINKS
Monday, October 27th, 2008 AT 8:15 PM


