Hello -
I have provided the info on the water pump for you anyway.
For removing the splash shield, just please be careful with the car on jack stands. . ..make sure it is secure before getting in there.
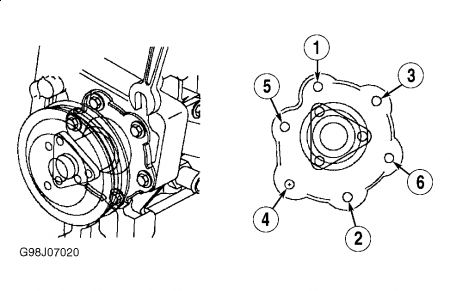
There is a bolt tightening sequence for the water pump. . ..so included that.
Also, get a piece of card board and draw out the pump with the bolts. . ..or use the new one. As you remove a bolt put it in the cardboard or new water pump in the exact spot. Many times they are different lengths and you don't want to mix them.
Make sure you put a little RTV on each one when putting together.
As for loosing coolant but no signs. . .. . .. . .mmmm, that does concern me a little. No white smoke out the tail pipe or any engine codes???
Good thinking on replacing the belt tensioner. I do this many times. . .. . ...replace parts while I am there. . .. . .. . .preventative maintenance.
You might consider replacing hoses too if they are old. . .. . ..as you pull on them etc to remove them that could be the last straw. . ...so there you are 1000 miles later replacing a hose. If I am there, the hoses get replaced since the system is drained.
Check the belt too. . .. . .. . .. . ..if it is worn. . .. . .. . .now is the time. . .. . .
Sounds like you have a good plan going.
WATER PUMP
NOTE: The A/C compressor mounting bolts can also be removed and compressor laid aside to access water pump from the top. Do not discharge A/C system.
Removal & Installation
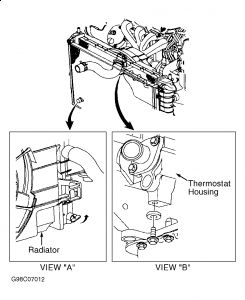
Drain coolant. See Fig. 2.

Remove accessory drive belt. Raise and support vehicle. Remove right front wheel and splash shield. Remove water pump pulley bolts. Remove water pump bolts and pump. Pulley and pump are removed as an assembly.
To install, reverse removal procedure.
Use NEW gasket.
Tighten bolts evenly in sequence to specification. See Fig. 16. See TORQUE SPECIFICATIONS.
Fig. 16: Water Pump Tightening Sequence

Monday, June 1st, 2009 AT 5:54 PM


