Hi Janet,
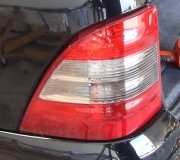
If that is the case, are you sure the left brake light isn't burned out? I ask because all three lights get power from the same point.
So, here is what I "Think" is happening. I suspect that the brake light switch is not adjusted properly and is allowing power to flow through it at all times and the left rear brake light is burned out. If you remove the switch from the pedal assembly and leave it plugged in, does the brake light go out? Power is supplied to that switch via a fuse. For any of the lights to turn on, the switch needs to complete the circuit (when pedal is pressed) allowing power to flow to the lights. Since the lights go out when the switch is disconnected, that tells me that the switch is completing the circuit and allowing that to happen. (I hope this makes sense. It's easier to show than explain). LOL
If the switch was good and working properly, when the brake is released, the circuit is then opened and power stops to the lights.
Try removing the switch so I know that it isn't touching the pedal hard enough to turn the lights on. If they don't turn on, here are the adjustment procedures for adjusting the switch. The attached pics correlate with the directions
____________________________________________
2004 Hyundai Accent L4-1.6L
Adjustments
Vehicle Brakes and Traction Control Brake Pedal Assy Adjustments
ADJUSTMENTS
PEDAL HEIGHT
1. Disconnect the brake switch connector, loosen the brake switch locknut (A), and back off the brake switch (B) until it is no longer touching the brake pedal.
Pic 1
2. Lift up the carpet. At the insulator cutout, measure the pedal height (C) from the middle of the left-side center of the pedal pad to).
Standard pedal height (with carpet removed): 157.1 (+5, 0) mm [6.19 (+0.2, 0) inch]
pic 2
3. Loosen the pushrod locknut (A), and screw the pushrod in or out with pliers until the standard pedal height from the floor is reached. After adjustment, tighten the locknut firmly. Do not adjust the pedal height with the pushrod depressed.
BRAKE SWITCH CLEARANCE
pic 3
Screw in the brake switch until its plunger is fully depressed (threaded end (A) touching the pad (B) on the pedal arm). Then back off the switch 3/4 turn to make 0.9 mm (0.04 inch) of clearance between the threaded end and pad. Tighten the locknut firmly. Connect the brake switch connector. Make sure that the brake lights go off when the pedal is released.
PEDAL FREE PLAY
pic 4
1. With the engine off, inspect the pedal free play (A) on the pedal pad (B) by pushing the pedal by hand.
Free play: 3 - 8 mm (0.11 - 0.31 inch)
2. If the pedal free play is out of specification, adjust the brake switch (C). If the pedal free play is insufficient, it may result in brake drag.
_____________________
Let me know if that helps and what you find.
Take care,
Joe
Images (Click to make bigger)
Thursday, July 16th, 2020 AT 6:11 PM


