Hi,
The first thing to try is if it will start in neutral. If it does, there is an issue with the park/neutral safety switch. Let me know.
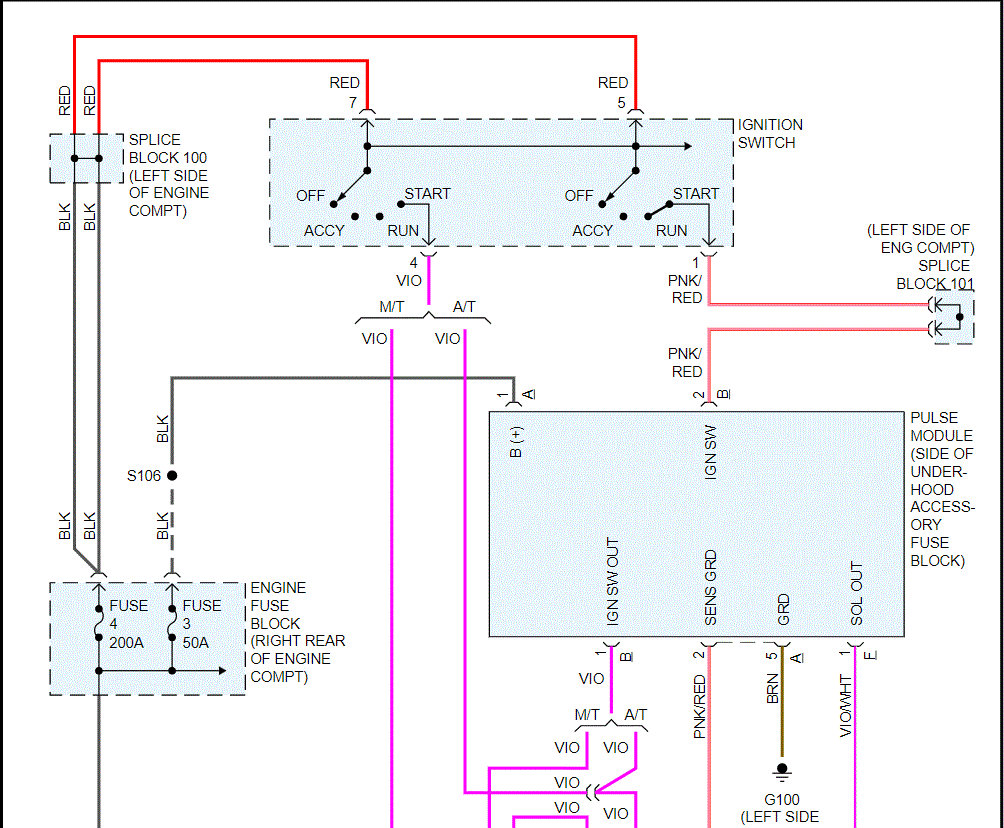
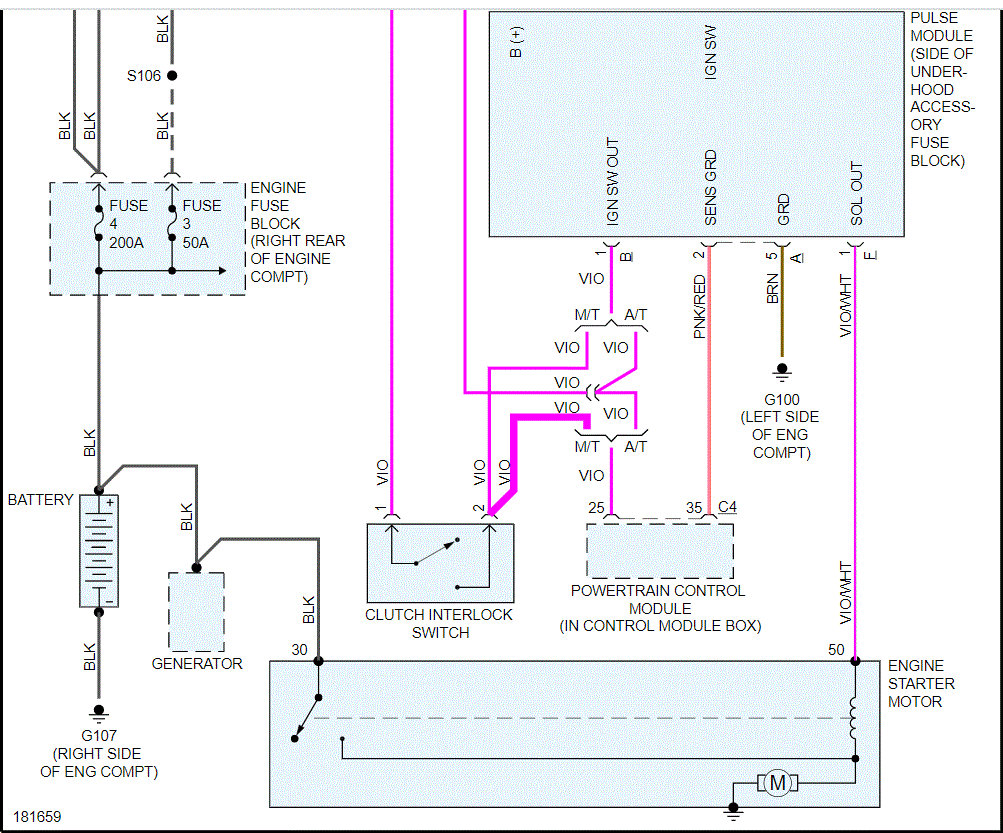
Next, I attached the entire wiring schematic of the starting system below. I had to cut the pic in half to make it readable, but I did overlap them so you can follow.
Now, on the starter, you will find a heavy gauge wire which is black. It supplies 12v at all times. Confirm that is present.
There is a smaller wire which is violet with a white tracer that provides 12v as well, but only when the key is in the start position. Have a helper turn the key to start and check for power.
Here are two links to help with testing:
https://www.2carpros.com/articles/starter-not-working-repair
https://www.2carpros.com/articles/how-to-check-wiring
If there is power to the smaller wire, replace the starter. Here is a link showing how in general to do it:
https://www.2carpros.com/articles/how-to-replace-a-starter-motor
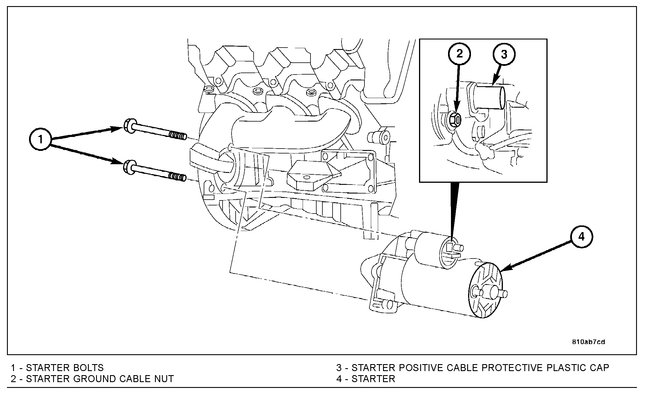
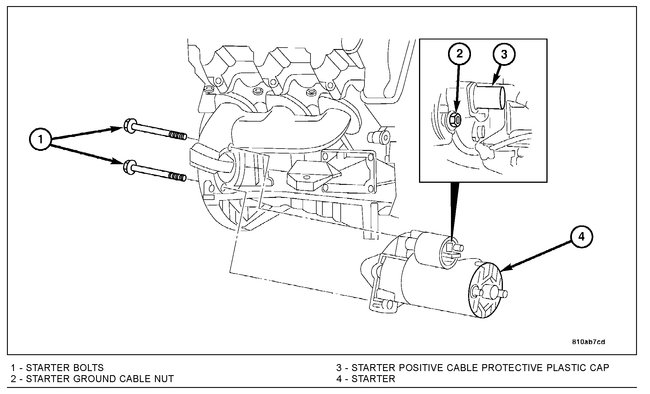
Here are directions specific to your vehicle for starter motor replacement. The remaining pics below correlate with these directions.
__________________________________________
2004 Chrysler Crossfire V6-3.2L VIN L
Procedures
Vehicle Starting and Charging Starting System Starter Motor Service and Repair Procedures
PROCEDURES
REMOVAL
pic 3
1. Disconnect the negative battery cable.
2. Raise and support the vehicle.
3. Remove the lower engine panel.
4. Disconnect the right 02 sensor electrical connector.
5. Remove the right side exhaust pipe from the exhaust manifold to the rear exhaust system.
6. Remove the starter bolts (1) and reposition the starter to access the starter electrical cables.
7. Remove the starter positive cable protective plastic cap (3).
8. Disconnect the starter cables by removing the ground cable nut (2) and the positive cable nut.
9. Remove the starter (4) from the vehicle.
INSTALLATION
pic 4
1. Install the starter (4).
2. Connect the starter cable and the ground cable with the nuts. Tighten the starter positive cable nut to 14 Nm (10 ft. lbs.). Tighten the starter ground cable nut (2) to 6 Nm (52 in. lbs.)
3. Install the starter positive cable protective plastic cap (3).
4. Install the starter bolts (1). Tighten to 42 Nm (31 ft. lbs.).
5. Install the right side exhaust pipe.
6. Connect the right side 02 sensor.
7. Install the lower engine panel.
8. Lower the vehicle.
9. Connect the negative battery cable.
_________________________
I hope this helps. Let me know what you find or if you have other questions.
Take care and God Bless,
Joe
Images (Click to make bigger)
Wednesday, March 3rd, 2021 AT 7:17 PM
