growl like noise at about 30 mph?

2001 DODGE DAKOTA
190,000 MILES • 3.9L • 6 CYL • AUTOMATIC
Avatar
FLOATR925@YAHOO.COM
  • MEMBER
  • 132 POSTS
I'm getting a growl like noise at about 30 mph an if I let up an coast I still hear it..It doesn't matter on turns.It gets louder at higher speeds .tire is off on wear but I changed the back to front an still hear it..hurl humm like sound .
New front hubs ..an many front steering things replaced including inner outer tie rods sway bush upper control arm bushings. .
I may have exhaust leak maybe ..or it's the differential..but noise isn't a pop ..at 10 mph or 15 to 20 I don't hear it ...

What should I try ..to figure it out..
Aug 29, 2025 at 11:11 AM
Advertisement
Avatar
CARADIODOC
  • CERTIFIED EXPERT
  • 34,308 POSTS
By "new hubs", are you referring to the brake rotors or the wheel bearings? A humming noise, like an airplane engine, is caused by the wheel bearings. With older pressed-in bearings, you could tell which one was noisy by the way the noise changed when turning slightly, as in when changing lanes. Your truck uses a bolt-on assembly. Those can transmit the noise, so while it might sound like the noise is coming from one side, it's actually the bearing on the other side that's noisy.

You didn't say if this a four-wheel-drive or 2wd. With 4wd models, with the truck on a hoist, I run it, in gear, then listen next to each bearing with a stethoscope. One side will be obviously louder than the other side. Another way to find this is to raise the front tires off the ground, reach over the top of a tire, then lightly wrap your fingertips around part of the coil spring. Rotate that wheel by hand. If that's the noisy bearing, you'll feel the vibration. This doesn't work when the truck has torsion bars.

If the noise is coming from a bearing that was recently replaced, the common cause of that is improper installation procedures. Specifically, there must never be any vehicle weight on the bearing unless the axle nut is fully tightened to specs with a click-type torque wrench. Some specifications are rather low, but most vehicles call for in the area of 180 foot-pounds. A lot of competent do-it-yourselfers set the tire on the ground to hold the axle from spinning so they can tighten the nut. By that time the damage has been done. A better way is to stick a screwdriver or punch through one of the cooling slots in the rotor to hold the axle while the nut is tightened.

Let me know what you find.
Aug 29, 2025 at 4:14 PM
Avatar
FLOATR925@YAHOO.COM
  • MEMBER
  • 132 POSTS
It's a 2wd ,yes front hubs had been replaced 2yrs ago .with it in air..Nothing changes as turning an as coasting at same speed a hurl noise .a while BK the diff fluid looked contaminated an I changed it....an about 6 yrs ago new rear bearings on the axle shaft an 8 yrs ago a replaced rear differential..I hope it's not a yoke issue ...

I'll check for play as u said..,an also see if diff fluid is ok ...I don't have a lift an am a bit hesitant to run it on jacks ..

One other question..if 1 rim has a bad area where the nut screws in can that factor it..I actually will put spare rim w different tire size on an try it too..

I saw that the exhaust manifold gasket had come down or off months ago too....but I thought it was a different sound if exhaust leak..what does it sound like if exhaust leak ?
WOULDNT I HAVE ISSUES AS TURNING AN NOISE CHANGE IF IT WAS MY NEWER FRONT HUBS?
Thanks
Aug 29, 2025 at 7:28 PM
Advertisement
Avatar
CARADIODOC
  • CERTIFIED EXPERT
  • 34,308 POSTS
This has to be caused by something that is rotating, so right there, that leaves out a lot of parts. The common noise from an exhaust leak up near the engine or exhaust manifold is a ticking noise loud enough to be heard from inside. That usually only occurs during acceleration. Running the engine, in gear, on a hoist, is no longer a thought because we do that to run the front wheels. Being a 2wd, you'll have to use the coil spring method I described. Also, improper installation procedures isn't the likely cause if the new bearings lasted two years.

For that bearing noise, turning slightly to identify the side that's noisy worked with the older-style pressed-in bearings found on older models from the 1980s. This was common on the Dodge Omnis and Plymouth Horizons. With that style, if you move from the right lane to the left lane, for example, some of the car's weight shifted momentarily onto the right wheel and bearing, making the whining sound louder. Turning the other way made the sound quieter, often going away completely for a few seconds. Those were easy to determine which was the noisy one, which was important because the bearing had to be destroyed to remove it.

With your bolt-on style of bearing, every professional has been fooled at least once, thinking the noisy bearing was on one side, then it turned out to be the other one that was bad. The noise transmits through the vehicle to sound like it's coming from the other side. The good news here is if you replace the wrong bearing, you can put the old one on the other side. Being a bolt-on assembly, they don't have to be destroyed to remove them.

This also doesn't have anything to do with play in the bearing. That only develops long after a noisy bearing has been ignored. I've only seen that once on a Dodge Shadow when the owner refused to believe it was bad and drove on it like that for years.

The 2wd Dakota uses front coil springs, so you can do the test I described by feeling for the vibration with your fingertips.
Aug 30, 2025 at 4:28 PM
Avatar
FLOATR925@YAHOO.COM
  • MEMBER
  • 132 POSTS
Ok so to do that test jack up both tires at same time .hold onto coil spring an turn tire ? Feeling for a strong vibration?
Aug 30, 2025 at 6:23 PM
Avatar
CARADIODOC
  • CERTIFIED EXPERT
  • 34,308 POSTS
You can do one tire at a time. The vibration is subtle and would otherwise be overlooked unless you know what you're looking for. Chances are only one is noisy, so once you feel the quiet one, the noisy one will be evident.

There's also a tool for finding the causes of noises, but even a lot of professionals have never seen or heard of it. It's called the "Chassis Ear". I found the original model on eBay a few years ago for half of what the guys with the tool trucks charge. It has six wired microphones that you clip to suspect parts. Run the wires inside to a switch box with headphones. As you drive, you switch between the microphones to find the loudest one. Or, you stop and move the microphones around as necessary. You have to be careful to route the wires so nothing will catch on them while driving. There's at least one other model that uses four wireless microphones, and I think there's a model that uses all six wireless microphones.

I used a Chassis Ear once to find a noisy bearing. The tool was a standard-issue tool from Chrysler to their dealerships. After that, for me, having a hoist, it was faster to just listen next to each one with a stethoscope. These were almost all on fwd cars so I could run the front wheels in the air.
Aug 31, 2025 at 3:58 PM
Avatar
FLOATR925@YAHOO.COM
  • MEMBER
  • 132 POSTS
The passenger side was tight an quiet left to right fine a hair o play 12 to 6 o clock but not extreme..no noticed vibration.I hear a squeeke noise as I jack up each side.
The drivers side had no play as doing either one an no vibration
noticed but a scratch like sound at each revolution ....

I don't have brake cleaner to be sure on if it's pads an rotor ..can I try soapy water ? Or carb cleaner ? On rotor to rule it out ?
I'll try to do a video
I found a new one online for 35 an got it.for that price an the issue it's not a lot to pay to narrow it down as you said..I'm just wondering which one is more likely to be the culprit.

In fact I see they are not but almost 1 year old ..

What about strut shocks in front ? A little cupping on was on old left front an right front was wearing on right side of tire before replacing all the tie rods an sway bushings an upper control arm bushings ..
Sep 1, 2025 at 9:21 AM
Avatar
CARADIODOC
  • CERTIFIED EXPERT
  • 34,308 POSTS
Forget about the struts. As I mentioned previously, this has to be caused by something that is rotating. Brake rotors don't make a humming sound. They can make a rumbling sound if they're badly rusted on the back side, but that will get much worse, or at least change when the brakes are applied.

When the tie rod ends were replaced, the truck had to be aligned. "Toe" is the last of the three main angles to be adjusted. If that is not correct, it will cause a choppy pattern to develop on both front tires. That pattern can set up a vibration or buzzing sound. That pattern could have developed before you replaced the parts. To identify that, rotate the rear tires to the front as long as those don't have any previous misalignment wear.

When it comes to washing brake parts, Brake Parts Cleaner is the only acceptable product because it evaporates quickly enough to not soak into the porous linings, yet it gives you time to scrub it around to remove foreign material. Carburetor Cleaner does the same thing but it is designed to evaporate almost immediately so it will vaporize and burn in the engine. That doesn't give you enough time to do much cleaning. Water between the linings and friction surfaces will generally evaporate before you put everything back together and drive the truck, but when you drive through deep water, it causes one type of brake fade. It's like having a lot of tiny marbles between the two surfaces. The bigger concern is soap. That is a foreign material that isn't designed to dissolve or remove grease or other petroleum products. Once the linings heat up from normal driving, contaminants will soak into them and never come out. That can result in reduced braking power, and / or, more commonly, a brake squeal. The same is true with fingerprint grease on braking surfaces. We try to handle parts only by their edges. Fingerprint grease or any other contaminants can be washed off with Brake Parts Cleaner, and it is acceptable to wash the same stuff off linings, but that has to be done before they go through a warm-up cycle. To say that a different way, any grease or contaminants you allow to get onto brake parts can be washed off with Brake Parts Cleaner while you're still assembling them. Once you drive the truck, it's too late for the pads or shoes. You can wash the rotors and drums, but the pads or shoes must be replaced. Most professionals will even not allow drums and rotors to be washed once they've been warmed up. Those are made of cast iron which is porous. When the contaminants get warm, they soak in and can't be washed out effectively.

Let me add a side note here as long as we're discussing contaminants. Be extremely careful to not ever allow the slightest hint of a petroleum product to get into the brake fluid. That includes engine oil, transmission fluid, power steering fluid, penetrating oil, or axle grease. Most brake system specialists even wash their hands before handling any parts that contact brake fluid. One drop of a petroleum product in the brake fluid can result in repairs costing more than the vehicle is worth. I can discuss that in a lot more detail, but I hope it never becomes necessary.

The vibration you're looking for in the coil springs is very subtle. We would easily overlook it or fail to notice it unless we're specifically looking for it. I normally find that on 4wd or fwd vehicles. Being a 2wd, you have a slightly different wheel bearing design that may not develop the vibration when there's no weight on it. In that case, the Chassis Ear is the best tool to find this. The only other method is parts substitution, but that's the most expensive and least effective way to diagnose a problem. It would be faster and much less expensive to have a mechanic diagnose the source of the noise.
Sep 1, 2025 at 4:07 PM
Avatar
FLOATR925@YAHOO.COM
  • MEMBER
  • 132 POSTS
Here is video
Sep 1, 2025 at 4:52 PM
Avatar
CARADIODOC
  • CERTIFIED EXPERT
  • 34,308 POSTS
Dandy videos. That is not the normal bearing vibration. From what I can tell, the place I'd start looking is on the splash shields behind the rotors. They sit pretty close to the rotor, as in less than 1/4" away, so it doesn't take much to bend one until it contacts the rotor. You can bend them away with a flat-blade screwdriver.

Less common is for part of the splash shield to rust away, then part of it rubs on the rotor. I've only seen that a few rimes, but there was always enough left to hold it in place once it was bent back into position.

The next thing to look at is the brake pads. On the outside, you can look through the wheel and see the friction surface of the rotor. Look for a rough, or ground-up section, most commonly along the outer edge first. On the inside, you might have to remove the wheel and caliper to see that. Part of the lining will be ground down to metal too on one of the pads. Worn pads get louder when you apply the brakes.

In your original post, you said this is heard above 30 mph. That is a common symptom of the noisy wheel bearing. Worn and grinding brakes are normally heard more at very low speeds
Sep 2, 2025 at 3:50 PM
Avatar
FLOATR925@YAHOO.COM
  • MEMBER
  • 132 POSTS
I pulled rotor an caliper an retested it..quieter but a tiny scratch ..as turning..I'll put tire on an try faster turn...
Sep 3, 2025 at 12:18 PM
Avatar
FLOATR925@YAHOO.COM
  • MEMBER
  • 132 POSTS
Can't really hear much when it's on .a tad ...maybe 2nd video..
Sep 3, 2025 at 12:31 PM
Avatar
CARADIODOC
  • CERTIFIED EXPERT
  • 34,308 POSTS
A little noise is normal, but you shouldn't be able to hear it inside with the windows rolled up.
Sep 3, 2025 at 5:27 PM
Avatar
FLOATR925@YAHOO.COM
  • MEMBER
  • 132 POSTS
Ok so those sounds are ok?
Can you still have a bad bearing but no sound at the hands on turn test because it has to get up to 30 mph to start humming ?
It is it tale tell if it hums at 30 that you will know on the spin test it's bad?..
Sep 3, 2025 at 9:59 PM
Avatar
CARADIODOC
  • CERTIFIED EXPERT
  • 34,308 POSTS
You've covered a lot of conflicting symptoms with many variables. At this point I would go with the Chassis Ear. Obviously you can't run 30 mph next to the truck, with a stethoscope.. If you can't find a Chassis Ear to borrow, it would be least expensive to have a specialist diagnose the noise. The best places to go for that are the tire and alignment shops.

If you're pretty sure of which side the noise is coming from, you can try switching the bearing assemblies side-to-side, then see if the noise sounds like it changed location. Leave the rotors on the same sides, but while you have them off, check the splash shields for tiny shiny spots at the bottom, indicating they were rubbing on the rotor.
Sep 4, 2025 at 4:20 PM
Avatar
FLOATR925@YAHOO.COM
  • MEMBER
  • 132 POSTS
I changed out the new hub ,even added new break pads an measured the rotors which are fine ..Sound is till there ..I'll switch the other 1 year old hub ,with front right one an see if it changes...I'll also check diff fluid

I test drive it an as I'm coasting at a regular speed..as giving light gas I hear hurl sound ,only after 30 mph .seems to be changing by the gas pedal acceleration as coasting does that incline it to be engine or differential ?....it gets higher pitched as going faster .an acceleration more.. an would shifting to neutral as driving tell me anything ?
Anything in engine to check like belt, or exhaust ? How much play in drive shaft is ok? .immediate bumb when I turn it in either direction ..I guess that's ok.

Update...changed over hub..does feel a hair tighter at 12 an 6 ..3 an 9 has always been good..gonna test run...
Sep 13, 2025 at 7:32 AM
Avatar
CARADIODOC
  • CERTIFIED EXPERT
  • 34,308 POSTS
That play you keep mentioning is not part of this. Noisy bearings can be as tight as a brand new one and still make noise.

I'm nervous about shifting to "neutral" while driving, but as far as the noise changing between acceleration and coasting, that is a real possibility because the engine and transmission will rock back and forth. If you run into a belt or pulley that rubs on something when the engine shifts, suspect a worn or collapsed engine mount. Look for signs that something has been rubbing. Sometimes you can make the noise occur by running the engine, then pushing the vehicle forward and backward while it's in "park". That will rock the engine, often enough to make the noise occur. Of course, if you have a collapsed engine mount, for example, and it's allowing a half shaft to rub on something, the vehicle will have to be moving for that to show up. This is where the Chassis Ear is priceless.

I can mention some other things I've run into years ago that might give you more ideas of where to look. One was the plastic splash shield under the pulleys on older Caravans. One got pushed up out of shape when the owner ran over some large rocks. The water pump pulley would rub on it at times. Another one, also on an older Caravan, happened when the owner ignored the rubbing / grinding noise for almost a year. Turned out to be a collapsed engine mount on the passenger side allowed the power steering pump pulley's lip to grind on the frame rail right next to the fuel line. Some engineer was thoughtful enough to place an anchor clamp for the line right in that spot, so the pulley would have to cut through that metal clip first before it hit the fuel line. That one also didn't make noise when running in the shop.

The weirdest one I ever had would never act up in the shop, and never for the first few miles on a test-drive. Once I got out in the cold winter air, after roughly five miles at highway speed, a loud very irritating whine would show up. It did not change pitch with speed, but it did go away below about ten miles per hour. Of course, by the time I got the hood open, the noise was long gone. I forget how I figured it out, but I verified it by using a piece of string to tie up the separate AC condenser cooling fan blade. Turns out the bearings in the motor were worn but the fan could freewheel when it was warm from being in the shop. Once it got cold, the air flow through it at highway speed caused it to spin and set up the vibration. The only other clue was when it was in the shop, it seemed to spin too easily by hand.

That last one, as I recall, took me a few hours to figure out. That might give you some new ideas to pursue. If none of those ideas help, seriously consider finding a Chassi Ear, especially if you may have use of it again in the future.
Sep 13, 2025 at 6:03 PM
Avatar
FLOATR925@YAHOO.COM
  • MEMBER
  • 132 POSTS
I will check the engine mounts...I do recall having to remove them when I changed the 2 piece gasket that may have been where oil leak was ..an also when I replaced oil pump...

So should I reposition them an retighten them on both sides ?
What is that new tool you connect to a app an put on engine an can hear it..is it a cordless mic?
Sep 14, 2025 at 9:15 AM
Avatar
CARADIODOC
  • CERTIFIED EXPERT
  • 34,308 POSTS
I don't have a smart phone so I'm not familiar with the APP you mentioned. Can you use that while driving the vehicle?

Front-wheel-drive vehicles with transverse-mounted engines have the most trouble with engine mounts because they use a different design. One of them also positions the engine and transmission from side to side. On the Dakota, engine and transmission mounts can collapse too, but they cause a lot less trouble.
Sep 14, 2025 at 5:52 PM
Avatar
FLOATR925@YAHOO.COM
  • MEMBER
  • 132 POSTS
What type tests can I do on differential ,I have a feeling it's that..the pinion an bearing..

I can pull the cover an look at it too..
Sep 15, 2025 at 6:30 AM
Avatar
CARADIODOC
  • CERTIFIED EXPERT
  • 34,308 POSTS
Chassis Ear. That's exactly the kind of thing they're made for. If you want to do a visual test, look for oil leaking from the pinion seal. If you see that, try pushing the end of the driveshaft up and down. Sometimes a worn bearing will allow the pinion gear shaft to walk away from the rubber lip seal and let oil leak out.

You can try running the engine, in gear, with the tires off the ground, then listen next to the differential. Be careful to not let your hair get caught in the driveshaft. Some people use a long screwdriver to touch their ear on one end and the noise source on the other end.

Be aware, the most common causes of noises from a differential involve the depth of the pinion gear, and the side-to-side adjustment of the ring gear. Setting up an axle is quite tedious and time-consuming, and best left to specialists. The tooth contact pattern is checked with a special paint, then compared to drawings in the service manual. Once properly adjusted, that doesn't change on its own over time, so if you're hearing gear noise, the axle was likely worked on previously and not adjusted correctly at that time.

Wheel bearing noise on a solid axle is not common. It is too small and turns much too slowly to make enough noise to hear. Also, your previous descriptions don't match most driveline noises.

I can't stress enough that you would be done with this problem if you had a Chassis Ear. I just did a search on eBay and found super good deals on a bunch of them. I bought mine about ten years ago for $200.00. Today, I found the same model for way less than half of that, plus a number of other models I've never seen before. One of them has a "Buy it Now" price of only $54.00 with free shipping. That's less than the cost of one wrong part.

With six channels, clip one microphone to the bump-stop bracket right above the pinion gear. That will pick up noise from anything inside the differential. Place microphones on the steel brake lines at each rear brake backing plate. Those will detect noise from the axle bearings. You can place a pair of microphones next to each front wheel bearing too, but since those wheels turn left and right, be sure to route the wires in such a way as the tires won't catch them. You can also clip them to the coil springs when you have that type of front suspension. Coils don't make noise on their own, but they can transmit it from other nearby sources.

As you switch between the microphones while driving, if one is much louder than the others, concentrate on that one's location, and move the others around to various spots in that area, then go for another test drive. In this way, you can narrow down the source.

One thing I noticed with these microphones is they tend to detect noises that are transmitted through the clamps they're mounted to. What I mean is they have to be in contact with whatever is causing the noise. If a microphone is just hanging in the air, or clipped to soft rubber or plastic parts, it will likely not pick up any sound. They are really effective at picking up sounds transmitted through metal parts.

Another source of noise that can be rather elusive is idler pulleys on the engine. They usually DO make noise while idling with the hood open, and we often identify the noisy one with that long screwdriver I mentioned, but with the Chassis Ear, it's easy to show your customer what you found. This too doesn't agree with your previous descriptions, but it's still worth mentioning.

As for removing the differential cover, the only thing you can see visually is a broken tooth on the ring gear. That is extremely rare and would create a different type of noise. Tooth noise also usually changes between accelerating and coasting. If one of the carrier bearings was bad, the ring gear could bounce up and down leading to a horrendous crunching noise.
Sep 15, 2025 at 3:40 PM
Avatar
FLOATR925@YAHOO.COM
  • MEMBER
  • 132 POSTS
Would that stethoscope tool from harbor freight work ? 8 bucks ..an I can get it today .?
I saw the other on eBay..2nd pic 35$ chassis ears w clips

Sep 16, 2025 at 8:52 PM
Avatar
CARADIODOC
  • CERTIFIED EXPERT
  • 34,308 POSTS
With stethoscopes, you're going to have to run alongside the truck. You said the noise starts at around 30 mph. I've often imagined strapping myself under a vehicle while a friend drives it, but either my butt will drag on the ground or my nose might bounce up and hit the spinning driveshaft.

The stethoscope in your first photo is what I use to listen next to front wheel bearings when a front-wheel-drive car is on the hoist. You'll think one side might be the culprit, then the noisy side will blow out your eardrums, so it will be obvious.

The Chassis Ear on the right is the model I found a few days go. It appears to use six wired microphones, like mine, but the amplifier is very different. Mine is much smaller and must be used with head phones. It looks like this one might also have a speaker in it. That would be nice. You can't beat the price. The "Buy it Now" is a quarter of what I paid for mine years ago.
Sep 17, 2025 at 4:52 PM
Avatar
FLOATR925@YAHOO.COM
  • MEMBER
  • 132 POSTS
About a year ago I looked at the fluid there an it was mixed w some water ..I'm almost sure this is what it is ..
4 years ago after a accident ,I had switched out the diff..I think water contaminated it an seals impacted ...I think I will do that again with a IDENTICLE one via switch out ...
An I can literally take it apart later an see pinion bearing an all that are likely bad .
What should I look for besides same type diffferential,test ,if LSD or not, no wiggle it ,length of drive shaft ,2wd,auto,an 98-04..an do some Durango's have the same one? If a lower miles less "truck stress" Durango is found it might be a better one than a rugged weight pulled work truck has id think..?
This is old one that got removed totally . 4 years back..an entire rear replaced w the one I'm looking at.
Thanks


I DID LOOK AT IT AN SAW A WET LOOK AT THE AREA THAT THE SHAFT CONNECTS TO DIFF..LIKELY LEAKING PINION BEARING..pics are from older one years ago
Sep 20, 2025 at 8:57 AM
Avatar
CARADIODOC
  • CERTIFIED EXPERT
  • 34,308 POSTS
The only thing you can see visually is chewed up bearing races, broken teeth, and large metal chips. If there's a speed sensor on top of the differential housing, it is not uncommon to find very fine metal particles stuck to its magnet. You won't see a noisy bearing.

As for the replacement, check with the people at any salvage yard. If you've never used a Hollander Interchange Guide, they likely have them on computer now, but they used to be really large books that listed every part on every car model, with a code number. You look that number up in the back of the book, and there it will list every car model and year that could have used that part. That will cover any physical dimensions and mounts, parking brake cables, and things like that. If you get a complete axle assembly, you also have to look at the size of the brakes. Very often there's two or more that were used. If an axle is available with different size brakes, ask if the brake assemblies can be transferred from your vehicle to the replacement axle. Often you can get an axle to work that has larger brakes, but that is a very bad idea. The front and rear brakes are carefully sized to form a balanced system. Switching to larger rear brakes will make them do too much of the stopping, leading to easy rear-wheel lockup and loss of steering control. Switching to smaller rear brakes will force the front brakes to do most of the stopping, leading to front wheel lock-up with reduced stopping power. With skidding rear tires, the back end will want to come around and pass the front end. With skidding front tires, you lose steering control. Also, if you're in a crash when the other guy ran a red light, a lawyer or insurance investigator will correctly convince a jury that you were partly at fault because you were less able to avoid the crash. Once they find a modified brake system, they'll work extra hard to pick your truck apart and find anything else they can to shift blame away from their client.

You also want to find an axle with the same gear ratio. That ensures the speedometer won't have to be reprogrammed, and you'll have the same shift characteristics you're used to. The ratio is stamped on a tag that's under one of the rear cover bolts. It's also stamped on the outer surface of the ring gear. You can find that by rotating it once the cover is removed. Trucks often had a list of options inside the glove box. I don't know if they still do that, but that is where they used to list the gear ratio.

As for mileage, solid axles have such an extremely low failure rate that it wouldn't be a concern to me. I have a friend with a body shop who specializes in rebuilding smashed one and two-year-old Ram trucks. He regularly drags two home at a time on a trailer from 800 miles away. The trucks he builds for himself typically get sold when they reach 400,000 miles. In over a dozen trucks with that mileage, the only one he ever replaced the rear axle on was one he turned into a dual rear wheel truck.

I forgot to mention earlier to keep in mind if you're trying to find a noise coming from the axle, if you're doing that with it up on jack stands, with a stethoscope, nothing is "loaded", so most noises won't be generated at that time. There's no weight on the axle bearings, and no torque on the pinion and carrier bearings. When you're driving down the road, the noise will change in intensity between accelerating and coasting. Axle bearing noise will not change.
Sep 20, 2025 at 1:08 PM
Avatar
FLOATR925@YAHOO.COM
  • MEMBER
  • 132 POSTS
The fluid was runny an milky ..A sign of ruined seals I guess?.
I try to get the exact same rear end ..I think the vin an the sticker on truck door tells me the info If I don't find exact match I look around other places .IS MINE LSD and does that factof? .Yes I see markings on the inside bearing covers near those bolts that hold a cover on each side...
Sep 20, 2025 at 4:45 PM
Avatar
CARADIODOC
  • CERTIFIED EXPERT
  • 34,308 POSTS
Water contamination is likely from driving through deep water. Water gets in through the vent on top of one of the axle tubes.

If you don't have a tag under one of the cover bolt heads, the gear ratio is stamped on the ring gear. I put a red box on your photo showing its location. Those numbers are usually very small, as in 1/4" high.
Sep 21, 2025 at 4:42 PM
Avatar
FLOATR925@YAHOO.COM
  • MEMBER
  • 132 POSTS
I got a chart with the number of bolts on cover it an mine shows to be 8.25 Chrysler .I have 10 bolts..Does all other 10 bolt pattern have a 8.25....i know there's 1 other with 12 bolt ..9.25....is that what is stamped on that pic u showed .a.8.25? If that's mine?
Sep 22, 2025 at 7:08 AM
Avatar
CARADIODOC
  • CERTIFIED EXPERT
  • 34,308 POSTS
I can't be of help there. My experience with axles was back in the 1970s with cars I was racing. At that time, Chrysler had five axles. The 7 1/4" was tiny and only used in the Darts and Demons. I had a '72 Dart that developed gear noise. I replaced it with an 8 3/4". and went from a 2.72 ratio to a more common 3.23. Engine speed was a little higher, but fuel mileage on the highway stayed the same because there was less load on the engine. Made for blazing acceleration on the race track. These were 318 c.i. cars. Your 3.9L is a 318 c.i. with two cylinders lopped off, so the 7 1/4" axle will work fine.

The 8 1/4" axle was the second smallest I never paid attention to the number of bolts in the cover, but that can be a means of identifying which one you have.

The 8 3/4" was the only axle of the five that you dropped the drive shaft, pulled the axle shafts, then the differential dropped out the front and you could work on it on the work bench. No rear cover on that one. This was the most popular axle. I currently have four in '72 and '73 Challengers. They hold up fine to 340s.
.
The 9 1/4" was next, commonly used on police cars. I had one of those on a '77 Monaco 440 c.i police car. They used them too on the Little Red Express trucks.

There's a lot of variables there you don't have to worry about unless you have some donor vehicles in the back woods. If you get an axle from a salvage yard, they will know very quickly what you have and what they have to replace it. If you want to switch to a larger axle, you need to consider the dimensions of the attaching points, spring mounts, brake size, pinion gear depth, and parking brake cables. If there was an optional axle used in your vehicle, and you find one in a salvage yard, it should drop right in, but remember the drive shaft length. If the pinion gear is longer, you'll need a shorter drive shaft. If the axle comes from a four-wheel-drive, the donor's driveshaft will be a lot shorter. Also look up the part numbers for the universal joints. If they are the same for your truck and the donor truck, the yoke will be the same and you can reuse your u-joint / drive shaft.

In the swap from my 7 1/4" to the 8 3/4", the donor axle was also from a Dart, so everything matched. The brake backing plate design was different, but the brake lines, parking brake cables, rear brake flex hose, and leaf spring mounts were all exactly the same. No modifications needed. The brake drum diameter, which was critical, was also the same size, even though the shoes were different.
Sep 22, 2025 at 7:01 PM
Avatar
FLOATR925@YAHOO.COM
  • MEMBER
  • 132 POSTS
Are these numbers on cap an written. says 3723574WN56 right cap an 3723574WN57 left cap,a important match ? I saw D56-ZOOM IN.. On that big gear wheel written by a marker .
Everything is taken apart to remove it except brake lines( loosened but tight) I will look for the IDENTICLE .I'll have to pull the other one at junkyard.
I'll post what may match.
Sep 23, 2025 at 2:15 PM
Avatar
CARADIODOC
  • CERTIFIED EXPERT
  • 34,308 POSTS
My suspicion is the numbers on the left photo are internal part numbers used by the axle manufacturer and have no relevance to this story. On the right photo, numbers are commonly painted on during assembly to denote shim or spacer thickness, gear backlash in thousandths of an inch, tooth clearance, and things like that.
Sep 23, 2025 at 4:51 PM
Avatar
FLOATR925@YAHOO.COM
  • MEMBER
  • 132 POSTS
I found this one .does vin # an door sticker tell much ? it had same number of bolts on diff cover ..
2nd pic is my door sticker..but I'll look at glove box sticker..
Why does mine say 15 inch when I got 16 inch rims?

Gear ratio found on it?


Update I looked up junkyard one ..I used a decoder an it says wheels 16x8..no idea why it says 15. on door.

Decoder says on junkyard one
Brakes 9x2.5 ..axel 8.25 corporate AXEL RATIO 3.55

On mine .- ( I'll double check vin by glovebox)
Looked up an found this ..
Same thing

Axel ratio 3.55
Rear Axel corporation 8.25
Brakes 9x2.5
Wheels 16x8


Sep 27, 2025 at 11:21 AM
Avatar
CARADIODOC
  • CERTIFIED EXPERT
  • 34,308 POSTS
The people at the dealer's parts department are the best at decoding the door stickers.

You're over-thinking this if all you want to do is get a different axle assembly. Tell the people at any salvage yard what you want, and they'll know which relevant questions to ask of you. Mainly that is going to be gear ratio.

As for tire sizes, almost all vehicles are available when new with optional sizes right from the factory. In the case of '88 Grand Caravans, for example, 99 percent of them listed 14" on the door stickers, but about 10 percent actually came with 15" wheels which included larger brakes. I have one of those as did one of my high school teachers. My doctor also had an '88, but with the 14" wheels. I have an '89 too that lists 14" wheels, and that's what's on it. Since most that came with 15" wheels still listed 14" on the sticker, I have to guess they ran out of the correct stickers, or they only printed them for the standard tire size. On your truck, the dealer can tell you if they came with optional 16" wheels. If not, then yours were installed by a previous owner.

On a related note, there is some confusion when it comes to tire pressures. Use the numbers on the door sticker as a guide, but that's only a starting point. Ford got into a huge legal nightmare a few years ago by recommending pressure that were too low on their Explorers, leading to a lot of blowouts. The numbers on the sticker are selected for a compromise between tire life and comfort. Where the problem comes in is they have no way of knowing what you're going to buy for replacement tires. In the case of Chrysler's cars in the 1990s, the first thing I did during an alignment was to set the tire pressures. I never looked at the door stickers. Instead, I went by the tiny numbers molded into the sidewall of the tires. Some tire brands specified 35 psi. I set those tires to 35 psi. Other tires specified a maximum of 44 psi. I set those to 40 psi. In both cases, the cars handled well and I never had a complaint of ride quality.

Where the confusion comes in is if the car came with 44 psi tires and they printed 40 psi on the stickers, they would have a serious liability issue if you purchased 35 psi tires later. Now, if you go by the sticker, your new tires would be 5 psi over-inflated. Besides accelerated wear in the center of the tread, the sidewalls would be less tolerant of an impact. The pressures listed on the stickers have to take into account any brand and model of tire you could purchase later.

Those pressures are also selected based on the weight of the vehicle they will be holding up. Switching a tire from one car model to another often requires a change in tire pressures, especially when putting them on a heavier car. Tires will get warm when driving, and that makes their pressures go up. The maximum pressures listed on the sidewall are for "cold" tires. "Cold" does not mean winter. It means when the car has not been driven for many hours. If you check those pressures right after driving a considerable distance, they can be expected to be a little high. That's okay. I had to take that into consideration during alignments and oil changes. If the car was dropped off yesterday, I set the tires to 35 or 40 psi. If the customer just showed up a few minutes ago, I set the tires a couple of pounds higher.
Sep 27, 2025 at 12:12 PM
Avatar
FLOATR925@YAHOO.COM
  • MEMBER
  • 132 POSTS
Ok so that one will work I guess..that 15 isn't a factor ...That decoder site had EVERYTHING!
....
I will try to look at milage an wiggle test other one
Sep 27, 2025 at 12:19 PM
Avatar
FLOATR925@YAHOO.COM
  • MEMBER
  • 132 POSTS
Got it pulled an home..gonna drain it an look at it closer.
What all should I check an change out ..outer axel bearings,etc?.
Will I have to set preload an backlash or is it ok since it's not been disassembled?
Here's the paper on it .3.55
Oct 1, 2025 at 4:39 PM
Avatar
CARADIODOC
  • CERTIFIED EXPERT
  • 34,308 POSTS
I wouldn't disassemble anything. It was working in the donor truck, so it should be fine now. If it turns out to have a problem, they may not allow you to return or exchange it if you even had the cover off.

Axle bearings and seals cause such little trouble, you're more likely to cause a new problem by replacing unneeded parts. Just pop the assembly in and buzz off into the sunset.

If you don't know what the gear ratio is on the old axle, be careful on the first test-drive because the speedometer might be off. On older models from the 1980s on back, there was a gear on the end of the speedometer cable where it went into the transmission. That gear had its number of teeth molded onto it. You selected the gear by the number of teeth and / or by its color to match the axle gear ratio and tire size to the speedometer.

On newer models starting for sure by 1989, and on some a little later, when you alter tire size or axle ratio, you have to use a scanner to program the "pinion factor" into the Transmission Computer. It takes a lot longer to describe how to do it than it actually takes to do it. Your truck, being a 2001 model, most likely uses programming to adjust the speedometer, but it's in a year range where my memory is a little fuzzy. Look on the rear, driver's side of the transmission housing, near the tail shaft or extension housing to see if there's a speedometer cable attached there. If you don't see that, you'll need a scanner or a mechanic with one to change the speedometer. Under "Transmission Computer", select "Special functions" from the drop-down menu, then select "Set pinion factor", or something similar to that. That will give you two selections. The first is "Select tire size". Click on your size from the rather long list. Next, click on "Select axle ratio". That will usually list over a dozen ratios even though only one or two might have been available from the manufacturer when the truck was built. That list includes anything you could do for modifications with aftermarket parts.

When you're done, pace the truck with another vehicle and compare speedometer readings to be sure yours is right. I like to do this myself with my own scanners because there have been a couple of times when the actual tire size wasn't on the list, and I had to select something I thought was close. If the speedometer reading was off, I had to start over by selecting a different tire size, then going on another test-drive. You don't want to be bothering a mechanic over and over again with that as it can become too time-consuming. There will always be a tire size on the list that will give you a correct speedometer, even when that size isn't what's on your truck.

Of course, if your old axle is also a 3.55, no adjustment is necessary.

If you want to change the gear lube, balance the housing on a five-gallon pail with the differential inside the pail. Remove the rubber fill plug if you have one on the cover, then rotate the assembly so that hole is down. The lube will drain out into the pail. Rotate it back, then this is a good time to refill it, but don't put too much in for now. Leave it low, put the rubber cap back in, then install the assembly. After you're done, the truck must be sitting level on the tires, to check the fluid level. Pull the plug again, then poke your pinky finger into the hole to see if you reach fluid. Add more gear lube until the level is within a half inch from the bottom of the hole. If the fluid level is too high, it will run down the axle tubes and overload the axle seals. Fluid can seep out even though there's nothing wrong with those seals. That over-filled gear lube will eventually drip onto the brake drums and mix with brake dust. That will make those shoes grab much too hard, leading to easy rear-wheel lock-up and tire skidding long before you've reached much stopping power with the front brakes.

Once gear lube, or any other petroleum contaminant on brake friction surfaces goes through a normal heating cycle, that lube soaks into the porous linings and the porous cast iron brake drums, and will never come out. The only fix for that is to replace all the parts at the same time. Easier to just not over-fill the differential.

Some older axles don't have that rubber plug on the rear cover. Instead, look for a metal plug on the driver's side, right above the webbing. A few require a 3/4" open-end wrench, but by far, most of them need a 3/8" square drive to remove them. In a pinch, you can pound in a 3/8" ratchet extension to do the job, but the much better choice is to use a standard 3/8" square drive tool. They are available in a whole set of standard sizes and are made just for this purpose. The difference is there's no retaining ball that holds sockets on. When you use a regular ratchet extension, that retaining ball often gets deformed or full of impacted rust / dirt.

You won't be able to pour the old lube out that side hole. For this style, you will have to remove the rear cover. I would wait with that until you're sure this axle doesn't have a problem requiring you to return it.
Oct 1, 2025 at 8:06 PM
Avatar
FLOATR925@YAHOO.COM
  • MEMBER
  • 132 POSTS
Ok great,I won't fool with that.


.I will pull the cover an let it drain an look at the bottom to see an remove any metal shavings an clean out the gunk ..an be sure the air tube is clear .
I do have the ELM32 tool to check speed on phone app ..does that link up to speedometer or to ecm,an is it accurate? I have 265 70 16 on rear..
If my old one is the same as this one on ratio an size I'd think speed would be same ,it looked like spare tire was 16..

Is either of these limited slip an does that factor anything?
An what weight on gear oil.an is synthetic best?
Oct 2, 2025 at 7:16 AM
Avatar
CARADIODOC
  • CERTIFIED EXPERT
  • 34,308 POSTS
I've never used a phone for this. When you connect a scanner or code reader to the data port under the steering column, it just becomes one more computer on the data buss. They all share data back and forth. You have to select the computer you want to display data for. As for reading road speed, that will be an item on the list of data for the Transmission Computer, Anti-Lock Brake Computer, Air Bag Computer, Body Computer, and probably a few others that need to know road speed. All of the computers have access to that data, but it may not show up on each one's list of data if it isn't something they need to know.

As for the pinion factor, that is set and memorized in the Transmission Computer, so you need a scanner capable of accessing that computer. Most simple code readers can only access Engine Computers. A few of the better ones can access Transmission and ABS Computers, but they also have to be "bi-directional", meaning besides displaying data, they must be able to talk back to allow you to make changes to settings.

The chart below shows the information for gear lube. If you have a locking differential, you should add a bottle of additive, (friction modifier). The dealer's parts department has that in small bottles. It contains "whale oil". It's purpose is to prevent chattering of the clutch plates when turning sharply at low speeds.
Oct 2, 2025 at 8:46 AM
Avatar
CARADIODOC
  • CERTIFIED EXPERT
  • 34,308 POSTS
Here's the mechanical specs for the 8 1/4" rear axle. That's the most common one. As you can see, there's three gear ratios listed. If you have the less common 9 1/4" axle, I can post the specs for that one too.
Oct 2, 2025 at 8:55 AM
Avatar
FLOATR925@YAHOO.COM
  • MEMBER
  • 132 POSTS
How do u tell if it's LS limited slip ..An is synthetic best ..
I believe 10 bolt is the 8 1/4 ..by the chart ..both are 10 bolt ..
Oct 2, 2025 at 12:00 PM
Avatar
CARADIODOC
  • CERTIFIED EXPERT
  • 34,308 POSTS
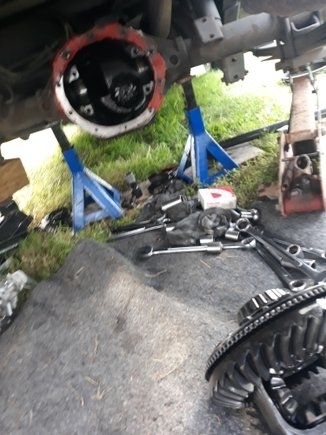
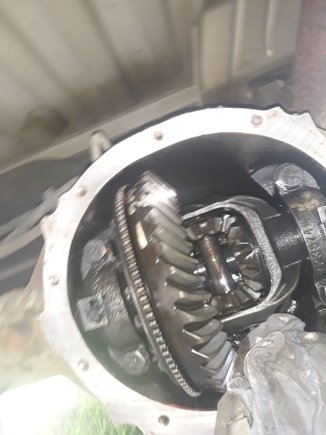
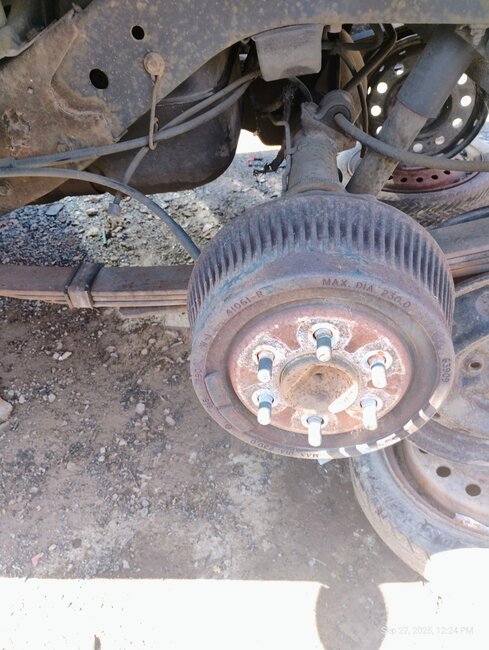
For an axle in the vehicle, fastest is to raise both rear tires off the ground and support the vehicle on jack stands. Leave the transmission in "park" so the driveshaft can't turn. Now, grab one rear tire and rotate it by hand. If you can, it is not a locking differential. When rotating one tire forward, the other one will rotate rearward, (the other way).

When you have a locking differential, both wheels will insist on rotating the same way. To rotate them together, you WILL have to take the transmission out of "park" and allow the driveshaft to rotate. When doing that, there is an over-running clutch in the transmission that you will be forcing to rotate too. Those only like to rotate one way, so don't be surprised if you can rotate the pair of wheels rather easily one way, but it takes more effort to turn them the other way. As I recall, the wheels will rotate easily in the forward direction. You would see the same thing if you were to rotate the drive shaft by hand. One way it will turn somewhat easily with just one hand. The other way, you're turning additional rotating parts in the back of the transmission, so you'll definitely need both hands and it will be noticeably harder to turn.

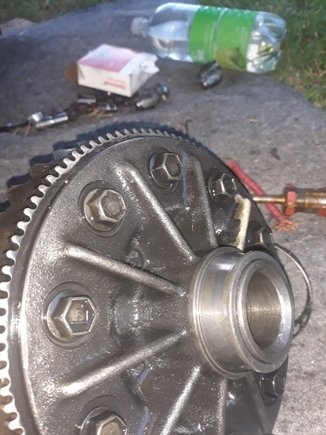
With these designs, there is a set of spring-loaded clutch plates inside the differential assembly that tries to lock the two small axle gears together. That's what makes both rear wheels rotate under power when either one of the tires slips on snow or mud. Think of this as a rather wimpy hand shake. It gets the job done, but the parts can slip if enough force is applied. In the case of the axle, the two wheels / axle shafts need to rotate at different speeds when you go around a corner. Slippage in the clutch plates allows that to happen, while the pressure ensures both tires get some power when one is slipping. Since there's some play in the springs, during turning, the clutch plates like to grab too aggressively until enough force builds up to tear them apart, then they rotate a little, then grab too hard again. That's what makes the assembly chatter on tight turns. The whale oil additive quiets that chattering.

Now that I've shared this wondrous information, allow me to add a few comments of value, for the benefit of others researching this topic, to ward off potential confusion. There are two other locking differential designs that do basically the same thing, but without those clutch packs. One was an old design we called the "Detroit locker", and I'm pretty sure was only used by GM in the 1970s. That one acted exactly like a standard, or common "open" axle; "open" simply meaning non-locking. Once one spinning wheel was rotating a certain amount faster than the other one, centrifugal force would throw out a weighted lever that activated a mechanical catch that suddenly locked both axles together. That was a result strictly of the difference in rotational speed of the two wheels. I don't know what it took to make it unlock, but it had to do that, otherwise any car, including race cars, are very miserable to drive on dry pavement with the two sides locked together.

Regardless of how or when the unit unlocked, there was also a second weighted lever, also run by centrifugal force, that forced the assembly to unlock at and above 35 mph. At that speed you don't need a locking axle, and to be locked solid like this one did makes for a somewhat dangerous, or unpredictable vehicle to drive at higher speeds. So, this design only kicked in when needed, with no drag at other times, and it never interfered with stability or handling at highway speed.

I know even less about this second design, other than what I've learned from other mechanics. This is a differential used on Dodge trucks that has what looks like an engine oil pump between the ends of the two axle shafts. One shaft holds the body of the pump. The other axle shaft drives the pump's rotor. During normal operation, both parts rotate at the same speed, so no pumping action takes place. It's when there's a significant difference in speed due to one wheel spinning, that the assembly pumps gear lube under pressure. That oil puts pressure on a set of clutch plates that tries to lock the two axle shafts together. It takes a little time for that pressurized fluid to bleed off. The slipping should be done by that time, then the assembly unlocks to improve fuel mileage. I think that design showed up around 2005, give or take a couple of years.

Locking differentials are going by the wayside now. Just about every car and truck model today is available with optional anti-lock brakes, which are an add-on system to the standard brake system. When you have anti-lock brakes, you next have the option to add traction control, and if you have that, you have another option to add stability control. Each new advancement requires the vehicle to have the previous option first. They can't be a stand-alone option. The more advanced 4-wheel anti-lock brake systems control a skidding tire by reducing brake fluid pressure to that one brake, but then it reapplies that fluid pressure once the wheel gets back up to speed and the skidding stops. That, "block, bleed, reapply" sequence can occur up to 30 times per second, but 15 is more common. (That's the buzzing you hear, and feel in the brake pedal, during a skid). Since the ABS system can reapply braking power to any one wheel, the add-on traction control system can do the same thing. Rather than relying on a mechanical locking differential, traction control lightly applies the brake to the spinning wheel, causing the tire with more traction to get more power. My 2014 Ram has traction control, and it's very effective. The first car I drove with it was the first Intrepids at the dealership I worked at, and it too was a lot of fun. Tried, but couldn't get it stuck in snow, going uphill.

By the way, to the best of my knowledge, only one truck, an International from the 1960s, was ever available with a locking front axle. That was back in the days when few people were driving 65 mph. If you can find anything with a locking front axle today, I'm pretty sure it is designed for use on dirt where the tires are free to slip. Driving on pavement with a locking front axle would be extremely miserable and tiring.

There's nothing to gain by going to a synthetic gear lube. Any product specified for this purpose will have the necessary additives, except for the friction modifier. Add that only when necessary. The gear lube will get hot during long highway runs. That causes it to thin, and it gets much stiffer in cold weather. One of the selling points of synthetic oils is they're less susceptible to changes in viscosity with changes in temperature, but if there was a real benefit in those products, the manufacturer would have used them on the assembly line, and they would specify that in the specifications. Standard gear lube meets all the requirements for the bearings to get lubricated, the rubber seals to stay pliable, and it stands up to the pressure between the gear teeth. There's also the consideration that the whole idea of a ring and pinion gear set is the gear teeth are sliding across each other. The gear lube has to stick a film of oil that doesn't squish out, to prevent early tooth wear. The synthetic oils will do the same things, but there's usually different additives in them. To be safe, I would only use synthetic if the entire axle has been drained of the old oil first. Don't use synthetic to top off an axle already filled with petroleum-based gear lube. One product might have a detergent, (more so in engine oil), that attacks the seal conditioner in a different product, for example. Mixing some products can destroy the qualities of both of them. A perfect example is mixing GM's Dex-Cool antifreeze with anything else. It turns it into "Dex-Mud" that can clog radiators and heater cores.

I hope I've covered everything. Let me know if I missed anything.
Oct 2, 2025 at 9:27 PM