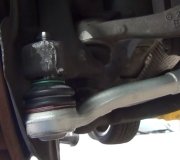
You're in for a lot of heartache, but this can be done by a competent do-it-yourselfer. First, GM doesn't provide for replacing the inner tie rod end. They think you won't mind replacing the entire rack and pinion assembly. The good news is the aftermarket industry stepped up and makes the parts available. The new part should come with a sheet of instructions including the torque specs.
Let me start with what GM does provide for replacing the accordion boot. Read through those first 6 images first, then I'll try to make this easier for you.
Unless there's something I'm not aware of, you don't have to lower the cross member. If you do, be sure to start with the steering wheel straight and centered, then lock it there with a rubber strap so it can't rotate. The rack also must be centered when you reinstall the steering shaft coupler. If the steering wheel gets out of sync even one revolution, the clock spring will be damaged. That's a wound-up ribbon cable in a plastic housing under the steering wheel. Its travel is limited to just slightly more than the steering system can turn, lock to lock. If it's not centered, one way it will wind up too tight and tear off. The other way it will unwind too far, fold over on itself, then eventually crack. The first one happens the instant you turn fully that way. The second failure takes days or weeks to show up. The clue will be the Air Bag warning light turns on and the steering wheel controls will stop working.
Once you have the boot removed, GM's favorite inner design has two flats on the back side of the joint. That's the two red arrows I added in the seventh image. You'll need a special tie rod end socket to get that off. It's shown in the eighth image. Instead of buying it, any auto parts store that borrows tools will have it. You slip the correct size crow's foot wrench over the two flats, slide the tube over the two tabs on the wrench, and rotate a ring to lock them together. Pull out gently to keep the wrench engaged to the flats, and turn it with a 1/2" ratchet. Pay attention to the amount of force needed. That will give you an idea of how tight to make the new one.
If you are lucky enough to have a hoist and you do resort to lowering the engine cradle, there's an important step to be aware of. That is to mark the location of the four or six mounting bolts so the cradle can be reinstalled in exactly the same position. If it's off-center by less than 1/4", the car will be just about undriveable. Shifting the cradle to one side moves the lower control arms and lower ball joints with it. That tilts the wheels on top. That's the "camber" adjustments that are the first part of the alignment. Camber can be adjusted to get both wheels standing up again, but it leaves an underlying secondary angle called steering axis inclination, (SAI), unequal on both sides. The last drawing is a Notes Page I handed out in class that describes SAI.
Being a secondary angle, it does get measured automatically by the alignment computer, but we rarely look at it unless we're inspecting for crash damage repair. You'll need to mention the service you performed, then there's a better chance SAI will get looked at. If it's off, it's a simple matter of loosening the bolts and sliding the cradle with a big pry bar until SAI is equal. Chrysler uses a similar design, but they use special bolts that force the cross member to go back to the proper position, so that isn't an issue.
Here's a trick you might also find useful. The assumptions are there are no other loose or worn steering or suspension parts, and right now when you drive on a straight road, the steering wheel is perfectly straight. If either of those are not true, this trick has no value. Start with a straight steering wheel, do the tie rod service, then go out and drive the car. If the steering wheel is still straight, you have the tie rod ends adjusted very close to correct. If you got them off by a turn or two, that wheel will be steering to one side. You have to counteract that by turning the steering wheel the other way to make the car go straight. Another way to look at it is if the steering wheel is turned to the left now, the car is supposed to be going to the left. You need to go back to the tie rod ends, loosen the jam nut, then rotate the inner tie rod to shorten or lengthen it to turn that wheel that way. When you get close, the steering wheel will come back to centered. That will get you close enough to drive to the alignment shop.
It's okay to put a little grease on the threads that screw together, but don't use any penetrating oil. It's not a lubricant, and it will open the way for moisture to follow it in. That will make them rust together so tightly, you'll need a torch to free them up at the next alignment. Also, do not drive even a short distance with the jam nut loose. The hammering action will tear up the threads and can lead to separation of the linkage. That requires replacing both the inner and outer tie rod ends. Hand tight is sufficient. The alignment specialist will set them to the proper tightness.
Let me know how this goes.
Friday, August 18th, 2023 AT 10:21 PM


