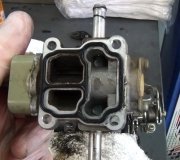
I looked through the pics you attached. Was the engine warm when you did the test? I noted the engine at 208°F and the air intake at 55°F. Just curious. As far as the egr leaking, based on fuel trims, I would say the problem isn't a vacuum leak. However, here are the directions for testing the EGR system. The attached pics correlate with the directions.
_________________________________________
1999 Toyota Camry CE Sedan L4-2164cc 2.2L DOHC (5S-FE) MFI
Component Tests and General Diagnostics
Vehicle Powertrain Management Emission Control Systems Exhaust Gas Recirculation EGR Valve Testing and Inspection Component Tests and General Diagnostics
COMPONENT TESTS AND GENERAL DIAGNOSTICS
1. INSPECT EGR SYSTEM
pic 1
a. Inspect and clean the filter in the EGR vacuum modulator.
1. Remove the cap and filter.
2. Check the filter for contamination or damage.
3. Using compressed air, clean the filter.
4. Reinstall the filter and cap.
HINT: Install the filter with the coarser surface facing the atmospheric side (outward).
Pic 2
b. Using a 3-way connector, connect a vacuum gauge to the hose between the EGR valve and VSV.
C. Inspect seating of the EGR valve.
Start the engine and check that the engine starts and runs at idle.
Pic 3
d. Using SST, connect terminals TE1 and E1 of the DLC1.
SST 09843-18020
e. Inspect the VSV operation with the cold engine.
1. The engine coolant temperature should be below 55° C (131° F).
2. Check that the vacuum gauge indicates zero at 2,500 rpm.
Pic 4
f. Inspect the operation of the VSV and EGR vacuum modulator with the hot engine.
1. Warm up the engine to above 60° C (140° F).
2. Check that the vacuum gauge indicates low vacuum at 2,500 rpm.
3. Disconnect the vacuum hose port R of the EGR vacuum modulator and connect port R directly to the intake manifold with another hose.
4. Check that the vacuum gauge indicates high vacuum at 2,500 rpm.
HINT: As a large amount of exhaust gas enters, the engine will misfire slightly.
G. Remove the vacuum gauge, and reconnect the vacuum hoses to the proper locations.
Pic 5
h. Inspect the EGR valve.
1. Apply vacuum directly to the EGR valve with the engine idling.
2. Check that the engine runs rough or dies.
3. Reconnect the vacuum hoses to the proper locations.
HINT: As exhaust gas is increasingly recirculated, the engine will start to misfire.
I. Remove the SST from the DLC1.
SST 09843-18020
2. INSPECT EGR VACUUM MODULATOR
pic 6
a. Disconnect the vacuum hoses from ports P, Q and R of the EGR vacuum modulator.
B. Block ports P and R with your finger.
C. Blow air into port Q, and check that the air passes through to the air filter side freely.
Pic 7
d. Start the engine, and maintain speed at 2,500 rpm.
E. Repeat the above test. Check that there is a strong resistance to air flow.
F. Reconnect the vacuum hoses to the proper locations.
Pic 8
3. INSPECT EGR VALVE
a. Remove the EGR valve.
1. Disconnect the 2 vacuum hoses from the EGR valve.
2. Remove the 2 bolts 2 nuts, EGR valve and 2 gaskets.
B. Check the EGR valve for sticking and heavy carbon deposits.
If a problem is found, replace the valve.
C. Reinstall the EGR valve.
1. Temporarily 2 new gasket and the EGR valve with the 2 nuts and 2 bolts.
2. Tighten the nuts.
Torque: 13.3 N.M (136 kgf. Cm, 10 ft. Lbf)
3. Tighten the bolts.
Torque: 10 N.M (102 kgf. Cm, 7 ft. Lbf)
4. Connect the 2 vacuum hoses to the EGR valve.
4. INSPECT VSV FOR EGR
__________________________________________________
Let me know if this helps.
Joe
Images (Click to make bigger)
Friday, January 3rd, 2020 AT 10:52 PM


